- Joined
- Nov 16, 2012
- Messages
- 5,596
Here are two height gauges and a little explanation of each -to the best of my current understanding.
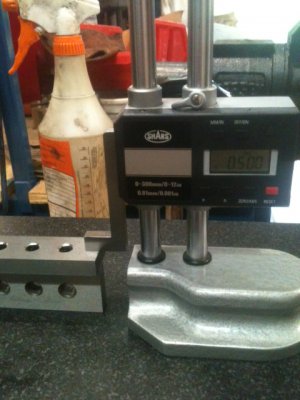
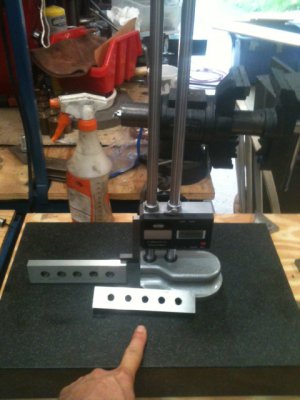
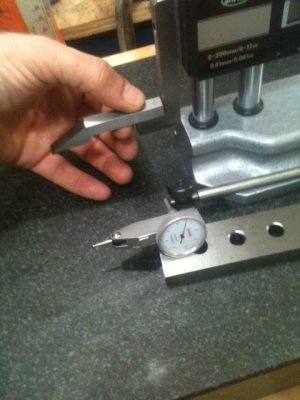
The first and most simple is dual column electronic height gauge which is as easy to use as a digital caliper. In the example, I'll measure the width of the machinist block which I'm pointing to. This is a simple example and I'm not using a stylus. The anvil of the gauge is placed directly on another machinist block and the electronic unit is zeroed. This is just establishing a zero reference point.

Next, the other block is placed on the reference block and with a crank on the back of the unit (which you can't see in the picture), the anvil is lowered into contact then, a measurement is taken. Simple as that... It's reading 0.500".

This was a very simple case and most often a stylus is used. They can take any shape or be home made and they're clamped to the anvil. I could very well attach a TDI to the anvil and that way, I could see exactly when contact is being made when the TDI starts to show a reading. I purchased this unit used at less than half the new cost but, it did not come with any anvil clamps -not a hard problem to overcome. A simple unit like this will cover all my basic needs.

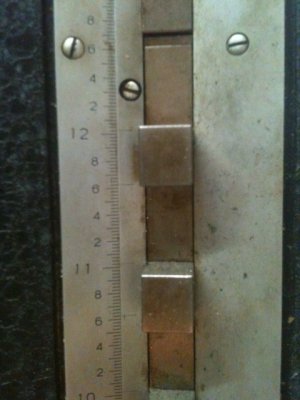
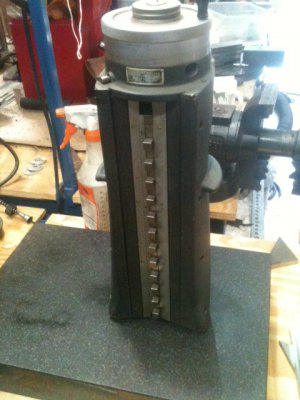
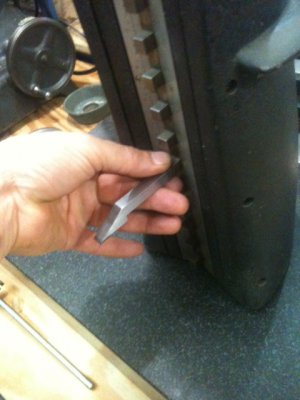
Although I don't have an immediate need for such precision, I saw this Mitutoyo Height Master gauge and at $200 decided that good deals like this don't come often. This unit has a little dust and light film of grime but appears to be in perfect condition otherwise. I will need to check it with reference blocks but, the PO said it was dead on. These units are very precise -and very heavy to the tune of 50-60lbs. They work on a very similar principal as the other unit but, it does not have an electronic means of zeroing. Also, it has a total travel of one inch but, there are 12 anvils so, the stylus would be placed on the nearest anvil as needed.

Each inch on the face scale is subdivided in 0.1" increments and there are three marks (0.025") subdividing each tenth of an inch.

Once again, different stylus types could be attached to the anvils.

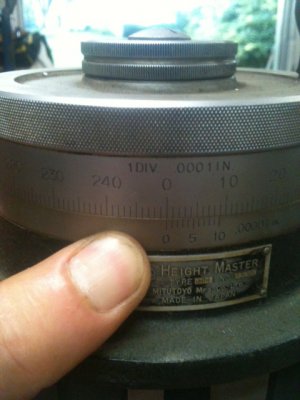
Readings are taken by first zeroing the stylus on some reference point which is done by turning the top (knurled rings) until the reference is touched. Next, the bottom ring (by my thumb) is rotated to the zero mark on the top ring. Note: There are two knurled knobs which are connected and fixed and spin with the top ring. The two knurls are just for convenience and there's also a little crank lever but it got cropped out of the picture.
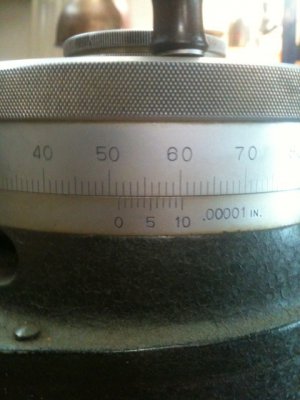
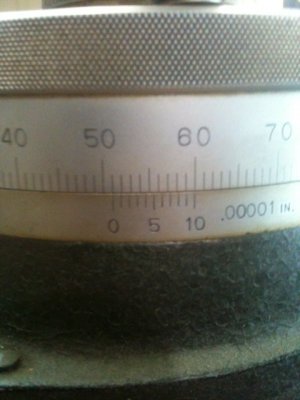
Next, the part would be positioned and the stylus touched off on the part by turning the top ring until contact is made. The top ring is numbered 0 thru 250 and each line represents 0.0001" (ten-thousandth inch) thus, one complete revolution is 0.025" -which is the amount corresponding to the fine lines on the face scale. On the bottom ring, note the numbers and lines with 0, 5 and 10. Those are hundred-thousandths (0.00001") and just like a micrometer which reads ten-thousandths, you line-up those marks in the event that the 0 on the top ring does not line-up exactly with the 0 on the bottom ring and it gives hundred-thousandths.

So there you have it... Two types of height gauges...
Ray


The first and most simple is dual column electronic height gauge which is as easy to use as a digital caliper. In the example, I'll measure the width of the machinist block which I'm pointing to. This is a simple example and I'm not using a stylus. The anvil of the gauge is placed directly on another machinist block and the electronic unit is zeroed. This is just establishing a zero reference point.

Next, the other block is placed on the reference block and with a crank on the back of the unit (which you can't see in the picture), the anvil is lowered into contact then, a measurement is taken. Simple as that... It's reading 0.500".

This was a very simple case and most often a stylus is used. They can take any shape or be home made and they're clamped to the anvil. I could very well attach a TDI to the anvil and that way, I could see exactly when contact is being made when the TDI starts to show a reading. I purchased this unit used at less than half the new cost but, it did not come with any anvil clamps -not a hard problem to overcome. A simple unit like this will cover all my basic needs.

Although I don't have an immediate need for such precision, I saw this Mitutoyo Height Master gauge and at $200 decided that good deals like this don't come often. This unit has a little dust and light film of grime but appears to be in perfect condition otherwise. I will need to check it with reference blocks but, the PO said it was dead on. These units are very precise -and very heavy to the tune of 50-60lbs. They work on a very similar principal as the other unit but, it does not have an electronic means of zeroing. Also, it has a total travel of one inch but, there are 12 anvils so, the stylus would be placed on the nearest anvil as needed.

Each inch on the face scale is subdivided in 0.1" increments and there are three marks (0.025") subdividing each tenth of an inch.

Once again, different stylus types could be attached to the anvils.

Readings are taken by first zeroing the stylus on some reference point which is done by turning the top (knurled rings) until the reference is touched. Next, the bottom ring (by my thumb) is rotated to the zero mark on the top ring. Note: There are two knurled knobs which are connected and fixed and spin with the top ring. The two knurls are just for convenience and there's also a little crank lever but it got cropped out of the picture.
Next, the part would be positioned and the stylus touched off on the part by turning the top ring until contact is made. The top ring is numbered 0 thru 250 and each line represents 0.0001" (ten-thousandth inch) thus, one complete revolution is 0.025" -which is the amount corresponding to the fine lines on the face scale. On the bottom ring, note the numbers and lines with 0, 5 and 10. Those are hundred-thousandths (0.00001") and just like a micrometer which reads ten-thousandths, you line-up those marks in the event that the 0 on the top ring does not line-up exactly with the 0 on the bottom ring and it gives hundred-thousandths.

So there you have it... Two types of height gauges...
Ray
