Help with Clausing Lathe

Methias

Registered
Registered
Joined
Sep 19, 2018
Messages
4
Hi,

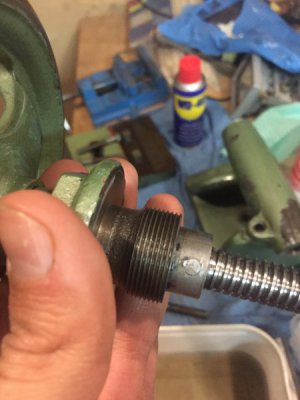
I recently acquired an old 100 Mk2 Clausing Lathe (At least thats what I can make out from looking at the Lathes.co.uk site). I am giving it a good clean and re-paint since its caked in grime and the pain is chipping and whomever repainted it before in its life decided it was a good idea to paint over some of the oiling points. I started with removing the tailstock, and I've got it all apart with the exception of the back wheel. The nut unscrews from the tailstock itself and the back wheel seems to be attached to a shaft that runs all the way through and is eventually the leadscrew which moves the tailstock spindle in & out. However I am stuck there as there seems to be a ring with a pin through it (looking at a slightly different manual of a later lathe version, the mk3a I believe since I cannot find anything on the mk2 version, and clausing themselves are not answering me (I need to email, living on the other side of the world means phoning them is pretty much impossible due to timezones). They call this pin a groove pin on the documents. Can I just knock this pin out? It seems pretty tight, I don't want to go mess up something by being too forceful.
IMG_8766.JPG
 
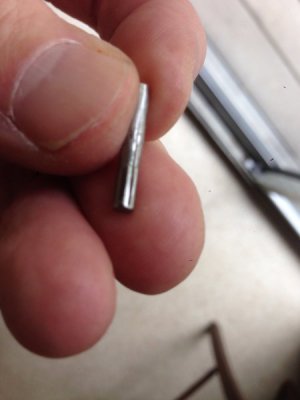
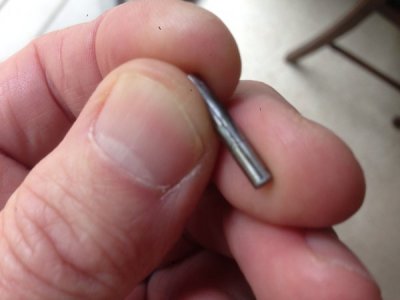
I'm not familiar with the Clausing per se, but I have run into the groove pins on various Atlas machines. Yes you can drive them out. They are a solid pin that gets about three or four grooves pressed into one end so it makes that one end of the pin slightly larger diameter as well as giving it a bit of tooth. Almost like if you took a pin and made grooves into it using a sharp chisel, that's what they look like. To remove them, look for the end that appears slightly larger diameter or where you can see the very slight "V" impressions on the edge. That will be the large end, so drive it out using a punch from the other end. Once they're tapped out a little they loosen up pretty fast, not like a roll pin or spring pin that keeps tension all the way.

Here's a kind of blurry pic of one removed to help you visualize.

-frank
image.jpegimage.jpeg
 
Cool Thanks. Will go have a look tomorrow (Its getting late now) and try get it out. Hopefully it comes out easily and then I can continue my teardown and repair of the machine.
 
Be sure to support the part with wood blocks to prevent damage when you go a tapping
m
 
I cannot think of any reason why you would want to remove that groove pin. And several why you would not! If you have the handwheel removed from the screw, remove the Woodruff key from the back end and the screw and thrust collar should easily slide out of what they call the Button (the threaded piece that your left hand is holding in the photo).

The earliest Clausing 100 Series manual that we have a copy of is the 100-3, followed by 100-3a, followed by 4800. But the parts shown in your photo appear to be the same.

And FWIW, 99% of all lathes and machinists will call the long internally threaded part that the feed screw extends out of the front of the tailstock the "ram", not the "spindle".
 
Also, if anyone should ever turn up a manual for the 100 or 100 MK2, please contact me.
 
I cannot think of any reason why you would want to remove that groove pin. And several why you would not! If you have the handwheel removed from the screw, remove the Woodruff key from the back end and the screw and thrust collar should easily slide out of what they call the Button (the threaded piece that your left hand is holding in the photo).

The earliest Clausing 100 Series manual that we have a copy of is the 100-3, followed by 100-3a, followed by 4800. But the parts shown in your photo appear to be the same.

And FWIW, 99% of all lathes and machinists will call the long internally threaded part that the feed screw extends out of the front of the tailstock the "ram", not the "spindle".

Apologies for the wrong term, I am an utter newbie on these things, thanks for the info on what it is called, I will eventually learn.

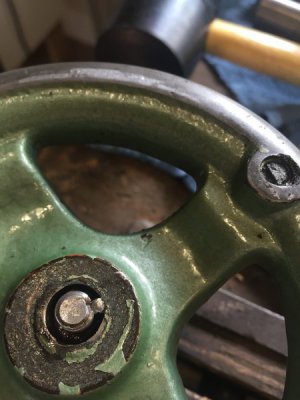
As for removing the pin I thought I might be able to get the wheel off. Clearly thats not how it works :(. I took it off and ye it hasn't helped me much. I can't seem to get it apart. I've attached a pic of the front of the wheel. I can see a pin of some sort there which might be holding things together, I'm not sure. I also want to take out the broken hand wheel bit so I can make up and fit a new on, any pointers as to how this could be removed?

As to the lathe manual I did eventually manage to find an instructions and parts list for the range of model 100's which covers my mk2. This helped me figure out the gearbox and why it wasn't working. It seems I have a missing gear (the 16 tooth clutch gear) and one of the gears has a partially bent tooth which is causing the gearbox to bind. Still trying to get it all apart slowly.

I am stuck on the cross slide assembly. The compound slide part (is this the right name?), that very top piece which swivels then goes in and out I can't seem to get apart, the nut which the leadscrew goes into seems to be trapped. It was secured by a bolt underneath but removing that bolt listens the nut but i can't free it so the parts are trapped (I want to check the ribs and clean out the very very gunned up grease and grime on the slides.

IMG_8780.JPG
 
Interesting, if I'm not mistaken I believe I can see the slight "V" indentations around the edge of that pin that's been driven in. That is NOT proper use of a groove pin, so I'm thinking a previous owner has done a monkey repair on it. Anything goes now on how it looks inside.

-frank
 
Methias,

The Woodruff key keeps the screw from rotating in the hand wheel, but the only thing holding the hand wheel onto the screw should be the nut, unless a PO drilled it and installed a pin. If you can't find any sign of a pin being installed, cut a hole through something like a piece of 1/2" x 6" steel flat bar (hole diameter to be a slip fit over the male threads on the "button") and try pressing the pin part-way out with an arbor or hydraulic press. Don't forget to stop pushing before the key hits the button. Then complete the job with a three-jaw puller if you have to.
 
Back
Top