Hendey Refurbish #3

Or scribe the radius, and take a flap disc to it. Crude, but effective. Nice work on the part. Mike

But... I don't have any way to lift the RT... it's about 200 lbs and I'm not interested in screwing my back up... I'll have to mount an anchor in the ceiling to hang a chain hoist from.
 
How in the world have you refurbished all this old iron without an engine hoist or a portable gantry?

I have both a gantry and an engine hoist... but I can't get either one to the mill. The gantry is 10 feet tall, my basement shop has an 8 foot ceiling. The legs on the engine hoist is too wide to go between my South Bend lathe and my workbench to get to the mill.

If I had a folding engine hoist where the legs would fold up, I could get that in there, but mine doesn't.

It's not a big issue... I just bolt a chain to the overhead floor joists and hang a chain hoist. It's a 10 minute job... I had a chain over the mill table a couple of years ago, but then I moved the mill to it's current home and never moved the chain.

-Bear
 
This morning, I set the bar up on my RT and machined the radius on the pivot end...

20220329_093254.jpg

20220329_100513.jpg

20220329_100528.jpg

I'm finished with it for now... later on, I plan to install a bronze sleeve in the 1/2" hole to prevent steel-to-steel contact between the lead screw and the bar.

After I get the sleeve installed, I'll drill and tap two holes through the top, to provide access for oiling the lead screw.

-Bear
 
This afternoon, I moved the lathe bed outside and set it on sawhorses and degreased and pressure washed it...

20220411_153825.jpg

20220411_153809.jpg

It looks rough... but at least it's not covered in oil/grease/gunk. The ways have a little wear, nothing serious, and there is a good bit of surface rust on the ways. I'll have to see how well I can clean it up.

There is some fairly deep rust pitting, but it is on the flat area between the two rear v-ways, so it won't affect the function, it will likely just look rough. I could see how much of the pitting I can smooth out, since it is a non-critical area, but I'll make a decision on that later.

An interesting observation: Hendey project #1 has a 6 foot bed and was made in 1920... Hendey #2 has an 8 foot bed and made in 1921. #3 is a 6 foot bed, made in 1918, but the bed is MUCH heavier than #1... maybe heavier than the 8 foot bed on #2. I discovered this when I attempted to 'roll' the bed on the sawhorses. When I was cleaning and painting #1, I could somewhat easily roll the bed onto it's back. I could almost roll #2... this one, there is no way I can do that. The casting is a good bit thicker on #3.

-Bear
 
I've finished up with the lathe bed... cleaned, painted, installed back on the legs, and did what I could cleaning the ways up...

20220416_143250.jpg

20220416_143259.jpg

There is some pitting in the flat areas between the ways, this is the worst pitting...

20220416_143311.jpg

It extends up into the lower half of the way that the tailstock rides on... it's ugly, but I don't see it causing any problems, so I'll leave it alone for now.

I re-mounted the countershaft/ drive pulley assembly onto the bed just to support it while I disassemble it. It seems to be in very good mechanical condition, but needs a good cleaning.

20220416_151023.jpg

20220416_151035.jpg

When I get it finished, I'll have to figure out how to fabricate a motor mount system... it will mount to the back of the leg under the chip pan.

I've also been working on assembling the apron...

20220414_162810.jpg

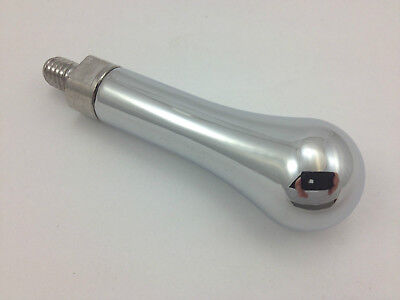
The handwheel that goes on the apron is not the original Hendey wheel... it is a cast iron 3 spoke wheel, where the original was a 4 spoke... I'll reuse the 3 spoke, it may be near impossible to find an original. I've soaked it overnight in evaporust, and the knob on it is very pitted with rust...

20220416_152426.jpg

There is not any way to polish that out and make it look decent, so I'll have to come up with another plan.

-Bear
 
Last edited:
I started taking the countershaft assembly apart... and quickly found a problem...

The motor is connected to a double flat belt pulley... one is an idler, or neutral pulley, the other is the drive pulley, which is geared to the step pulley. This allows the operator to shift the lathe into neutral and stop the spindle without turning off the motor.

The idler pulley is in good condition... along with the part of the shaft that it spins on. The drive pulley has a bronze bushing in it... the bushing is badly worn, and the area of the shaft that it rides on is very damaged, also...

20220416_161440.jpg

20220416_161426.jpg

I'll probably remove the shaft and skim it to clean up, then press the bronze bushing out of the pulley and machine a new bushing to fit the pulley and the new diameter of the shaft. I hope it is that simple to repair... we'll see...

-Bear
 
I've been working on repairing the shaft and pulley bushing... I machined about .050" off the shaft to clean it up and ordered a piece of 954 bronze tube to machine the new bushing from. The tube is 1.562 OD and 0.750 ID...

Today, I chucked up the piece of bronze to begin machining it and realized it's not straight... chucked on either end, the other end runs out about 0.060"...

The finish OD of the bushing is 1.442"... I would need to machine 0.120" minimum to clean the OD up, which would come too close to finish size for my comfort, so I decided to set it up between centers to machine the OD.

The only dead center that I have for the headstock on the South Bend is a MT2 in a MT5 adapter... which is too small to locate the 3/4 inch hole in the material... so I 'innovated' by using a MT2 live center in the adapter. Luckily, I had a lathe dog the right size, and the tail on it was long enough... barely...

20220426_152421.jpg

This gave me roughly 0.010 runout on both ends and 0.030 in the middle... it cleaned up with room to spare...

20220426_155716.jpg

I finished the OD and parted it off, then pressed it into the pulley... it was 'good-n-snug'...

I set the entire pulley up on the lathe to bore the bushing in place...

20220426_190716.jpg

The bushing is fairly thin walled... I was concerned that chucking on the OD to bore the ID would have distorted the bushing... so I decided to finish bore it after installing it.

I'll try to finish it up tomorrow...

-Bear
 
Back
Top