- Joined
- Jul 28, 2017
- Messages
- 2,368
I thought this would be a better place to show what I did rather than the Q&A section. I had posted a question there regarding the fabrication of a special (long) countersink. Based on the feedback from that thread, I went ahead and made one.
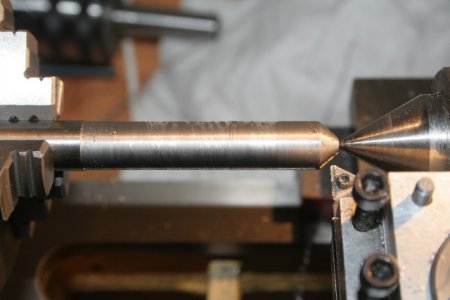
The above photo shows the lathe work to form the 82 degree profile of the countersink, and also to reduce the diameter of the shaft so it will go through a 3/8" hole. I want to countersink some holes on the inside wall of a U-shaped aluminum extrusion so a standard countersink won't work. While performing this step I saw a pretty rough surface, and the cutting action wasn't smooth. I rotated the insert to a fresh point and suddenly the finish and cutting action were much better. Examination of the bad point revealed it was chipped. The photo above was taken before I figure out what the problem was.
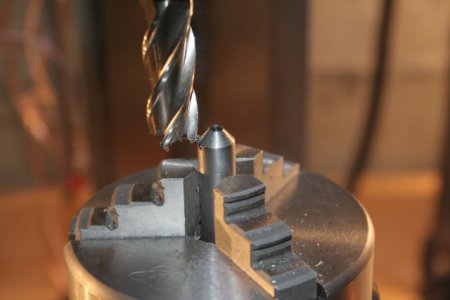
The piece is mounted on my rotary table. I'm cutting a "vee" profile, similar to what you'd do to make a D profile drill bit.
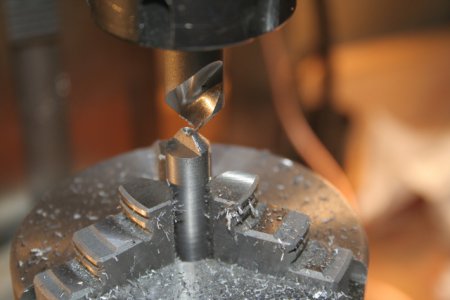
This step I'm cutting a 15 degree relief behind the cutting edge. I hit on the idea of using a spiral single-flute countersink to do this so I don't need a separate setup to orient the piece at 41 degrees (the half-angle of my 82 degree countersink).
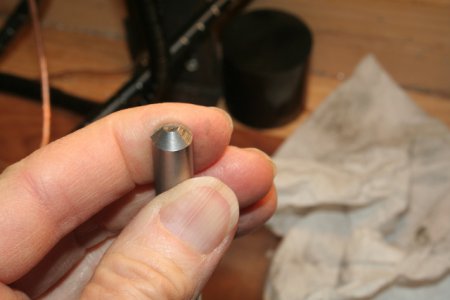
Here's a photo showing the relief on the right side of the cutter. From here, I hardened it using my little propane plumber's torch. It took awhile to get the end up to temp but it eventually got there. It's probably time to get my acetylene cylinder filled so I can more easily do this kind of stuff. After hardening, I honed the cutting edge with a 600 grit diamond file.
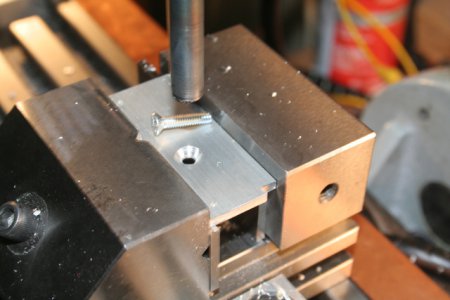
And finally here's the result -- a nice counter-sunk hole for a #8 screw. No excitement, it just worked. This was just a test piece, not the actual extrusion I'm going to use. The U piece will be attached to the left side of my (cheap) table saw to provide a more-stable guide for my cutting sled.

The above photo shows the lathe work to form the 82 degree profile of the countersink, and also to reduce the diameter of the shaft so it will go through a 3/8" hole. I want to countersink some holes on the inside wall of a U-shaped aluminum extrusion so a standard countersink won't work. While performing this step I saw a pretty rough surface, and the cutting action wasn't smooth. I rotated the insert to a fresh point and suddenly the finish and cutting action were much better. Examination of the bad point revealed it was chipped. The photo above was taken before I figure out what the problem was.

The piece is mounted on my rotary table. I'm cutting a "vee" profile, similar to what you'd do to make a D profile drill bit.

This step I'm cutting a 15 degree relief behind the cutting edge. I hit on the idea of using a spiral single-flute countersink to do this so I don't need a separate setup to orient the piece at 41 degrees (the half-angle of my 82 degree countersink).

Here's a photo showing the relief on the right side of the cutter. From here, I hardened it using my little propane plumber's torch. It took awhile to get the end up to temp but it eventually got there. It's probably time to get my acetylene cylinder filled so I can more easily do this kind of stuff. After hardening, I honed the cutting edge with a 600 grit diamond file.

And finally here's the result -- a nice counter-sunk hole for a #8 screw. No excitement, it just worked. This was just a test piece, not the actual extrusion I'm going to use. The U piece will be attached to the left side of my (cheap) table saw to provide a more-stable guide for my cutting sled.

