Homemade T-Nuts

AmericanMachinist

Registered
Registered
Joined
Mar 3, 2020
Messages
195
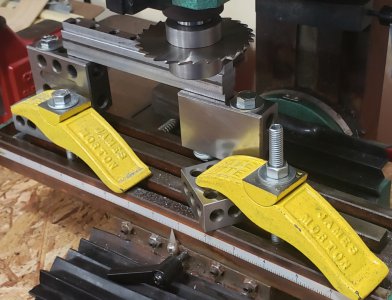
As you may notice in one of the pictures, my current hold down capabilities consist of 3/8" carriage bolts with flats filed into the flanges. :oops: I am turning this bar of "unknownium" alloy (something 1.5" x 0.75" with slight scale) into 14 T-Nuts for the mini-mill.

The mill I stumbled into because it was cheap at an auction... I'm starting to learn how to use it to it's strengths and for small, non-precision work it seems to get the job done.

Most of the metal removal here was with a 5/16" 4-Flute short Carbide End mill (HTC). At one point I tried a 3/4" HSS cutter, but need to learn more technique with it... with the 5/16" carbide tool, cuts were about 1/4" deep and 0.040" depth of cut.

The slight chamfer on the long edges is the result of slightly engaging a ball-nose endmill. I need to acquire a 45* cutter (other than a countersink which I have)

The holes are tapped 3/8-16, and are not through holes. I blind-drilled 7/16" of the part's 1/2" depth with an end mill (conveniently 5/16 tap drill size for 3/8-16 threads!). Because of the short depth only the bottoming tap really did anything, but a new USA tap cut like butter. The remaining operation is to slit the two halves of bar apart and then separate the 7 nuts per half. ...and then cold blue them.
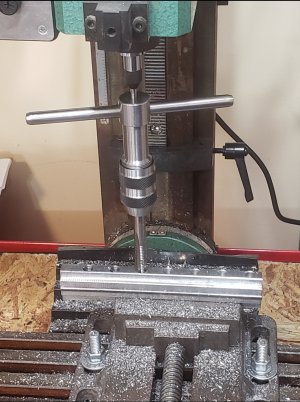
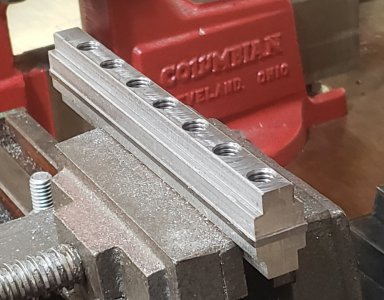
Screenshot_20200907-212228_Gallery.jpg


Screenshot_20200907-212218_Gallery.jpg
 
Last edited:
Interesting, I don’t think I’ve ever seen anyone mill them back to back like that. Cool. I think I see the impetus behind the new slitting saw arbor... :)

-frank
 
Interesting, I don’t think I’ve ever seen anyone mill them back to back like that. Cool. I think I see the impetus behind the new slitting saw arbor... :)

-frank

If i was buying material i probably wouldn't have done it this way either. I had this on hand that would work, and so here we are :)
 
Time to put the new slitting saw arbor to work! I had to get creative with the fixturing, to get set up so the arbor could clear the fixtures. Fortunately, I bought a package set of used 123 blocks, and two of them have all 3/8 through holes, so I was able to screw one set of blocks to the other (necessitated by the screws inserted vertically from below the upright 123 blocks into the bottom holes in the T-nuts...

Screenshot_20200907-234336_Gallery.jpg


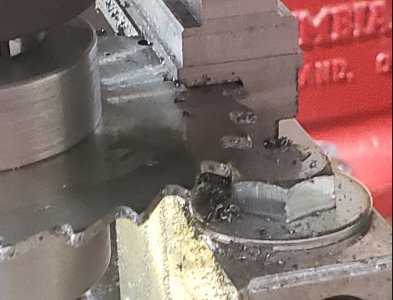
The saw is about 1/16" thick and the most I could take in a pass was about .125" deep at what I calculated to be roughly 1 IPM. Beyond that, the mill motor would stall. Oil helped an appreciable amount.

Screenshot_20200907-234347_Gallery.jpg


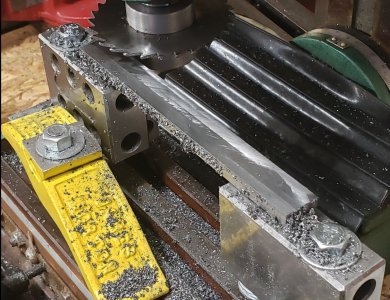
The surface finish.... The last pass I had to take from the back side, because the 123 blocks protruded just far enough that I couldn't make it all the way through from one side.

Screenshot_20200907-234413_Gallery.jpg


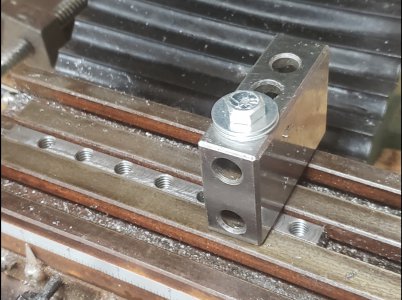
Just had to do a test-fit at this stage. :)

Screenshot_20200907-234424_Gallery.jpg
 
As you may notice in one of the pictures, my current hold down capabilities consist of 3/8" carriage bolts with flats filed into the flanges. :oops: I am turning this bar of "unknownium" alloy (something 1.5" x 0.75" with slight scale) into 14 T-Nuts for the mini-mill.

The mill I stumbled into because it was cheap at an auction... I'm starting to learn how to use it to it's strengths and for small, non-precision work it seems to get the job done.

Most of the metal removal here was with a 5/16" 4-Flute short Carbide End mill (HTC). At one point I tried a 3/4" HSS cutter, but need to learn more technique with it... with the 5/16" carbide tool, cuts were about 1/4" deep and 0.040" depth of cut.

The slight chamfer on the long edges is the result of slightly engaging a ball-nose endmill. I need to acquire a 45* cutter (other than a countersink which I have)

The holes are tapped 3/8-16, and are not through holes. I blind-drilled 7/16" of the part's 1/2" depth with an end mill (conveniently 5/16 tap drill size for 3/8-16 threads!). Because of the short depth only the bottoming tap really did anything, but a new USA tap cut like butter. The remaining operation is to slit the two halves of bar apart and then separate the 7 nuts per half. ...and then cold blue them.


View attachment 336246


View attachment 336247air valve
I made T-nuts from scrap aluminum. I have a clamping set but needed a few extra T-nuts. I milled the channels with an end mill and drilled and tapped them for 1/2-20 threads. I bored straight thru and cut 4 burrs with a cold chisel on each t-nut. I like your idea of tapping blind holes.
I use these T-nuts to hold a post that an air valve is fastened to and an indicator for the Y axis.
mike
 
Curios why you went for blind holes. I hate tapping blind holes. For a T nut it is a good place for swarf to hide.

I tapped mine thru so chips and stuff can fall thru. Then I used a plug tap and stopped tapping 1 turn before full thread so that the studs would still bottom out on the last incomplete thread.
 
I make my own t-nuts from mild steel, and make them fit the t-slots nice and snug, but easy to slide. I carefully debur and round all the edges. That is way better than the hardened ones I have bought that have sharp corners, fit poorly in my t-slots, and damage the t-slots of my machines when they are tightened down. It is really worth the effort to make them yourself...
 
Curios why you went for blind holes. I hate tapping blind holes. For a T nut it is a good place for swarf to hide.

I tapped mine thru so chips and stuff can fall thru. Then I used a plug tap and stopped tapping 1 turn before full thread so that the studs would still bottom out on the last incomplete thread.
Thanks for the insight. These are my first T nuts so i hadn't thought of swarf, but i like your idea for through holes while not quite fully threading them.

I'll see how these work and if needed perhaps drill the holes out the rest of the way.

Thanks for the comment and the good idea!
 
In retrospect i wish i had tapped a few 5/16-18 to use with 5/16 through holes on 123 blocks. I may locktite some 1/4-20 to 3/8-16 inserts in a couple.
 
Back
Top