How Do I Adjust My Centering Microscope?

cazclocker

Purveyor of cheese.
Registered
Joined
Sep 24, 2012
Messages
484
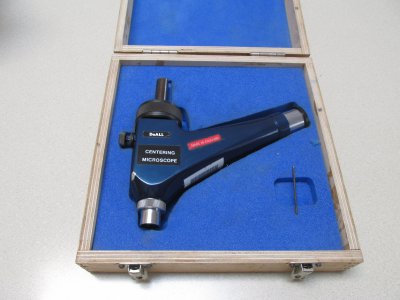
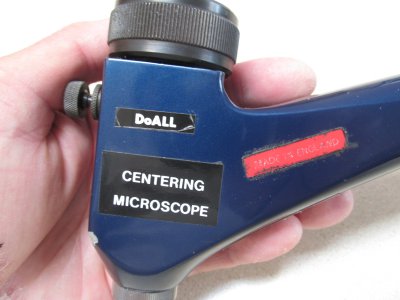
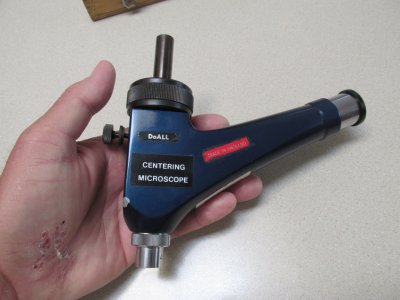
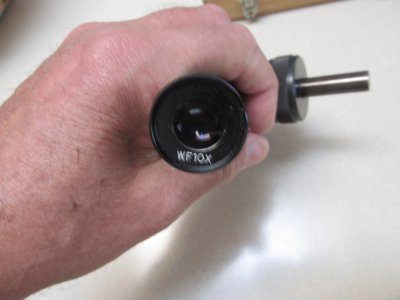
IMG_2926.JPG IMG_2927.JPG IMG_2928.JPG IMG_2929_with text.JPG IMG_2930.JPG I just bought a nifty centering microscope on evil-bay for $125.00 which I thought was a good price. I've never owned one before, or seen one in person, so using it is all new to me. But it didn't come with any kind of maintenance instructions since it was used. Does anyone here have a similar one, and can tell me how the adjustments are made?
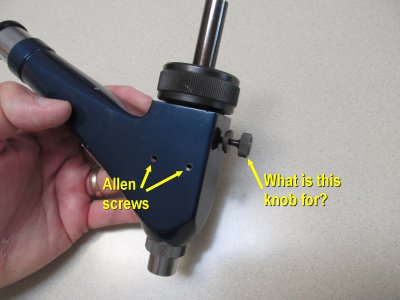
Here are some pictures. Basically what I'd like to know is what the allen-head setscrews are for, and what the knurled adjusting screw is for. Also, notice a small rectangular inset in the blue foam in the wooden case - there is an allen wrench laid across it, but what would have originally been in the inset?


Thanks in advance.
 
Last edited:
Nice scope ! If it was me, I'd be tinkering with every adjustment that's accessible on the outside to see what they do, LOL.

Once you know how to move the cross hairs, calibrating the scope is simple. Put a piece of scrap in your mill vise and locate the mill spindle over the approximate center. Carefully center drill a hole with your smallest center drill installed directly in a 1/8 R-8 collet - to minimize run-out, don't use a drill chuck.

Without touching the mill handwheels, remove the center drill and install the scope. Move the quill up/down until the drilled hole is in sharp focus. Adjust the cross hairs until they are positioned over the center of the hole. Done.
 
Last edited:
Hi Randy! Well actually I've already done all that, except I still haven't figured out what the allen screws are for, or the knurled set screw. And what might have originally come in the small rectangular hole in the blue foam?
...Doug in Arizona
 
Hi Randy! Well actually I've already done all that, except I still haven't figured out what the allen screws are for, or the knurled set screw. And what might have originally come in the small rectangular hole in the blue foam?
...Doug in Arizona

Beats me, Doug :) Maybe the hole in the foam was for an extra eyepiece - it wouldn't be uncommon for a scope to come with, for example, 2x and 5x eyepieces.

The knurled screw + locking nut suggests attaching an external component (although nothing obvious comes to mind). It greatly resembles the typical mechanism that secures a camera to a tripod ....

Have you determined that the set screws are not the means of adjusting the cross hairs ? What happens if you loosen them ?
 
The extra hole in the foam is probly for a cleaning cloth for the lenses, At least it looks the right size for something like that.
 
Does the large straight knurled at the top do anything. I have one of the scopes sold by ENCO. It has a knurled collar near the bottom the tilts the lens to align the cross hairs. The horizontal cross hair is fixed. The vertical line is moved with the collar. You pick an in-focus point or Y-axis line. You have to swing the scope 90 degrees right and left, and move the table X axis and the vertical line until the back and forth swings causes no movement of the point or line. It's a pain because there in no lock on the collar, so you have to do this every time you use it. I think that the small knurled knob with the knurled jam nut on yours is for this.

The hole in the foam could be for a target...I just made a cross hair on a small piece of aluminum for mine.

Ken
 
The reticle (crosshair) is typically adjusted with a push and release set screw affair. Two set screws on each side of an axis, so typically 4 set screws for adjustment. I would adjust the scope mounted in the spindle and sight on a target. Rotate the scope 180° and check for error/discrepancy. If you see any error, adjust half of it out. Keep rotating/adjusting scope until no error…Good Luck, Dave.
 
This scope was available in the UK, mine has PRIOR on the lens body.
The knurled screw and lock nut adjust one cross hair and the two 1/16 inch Allen bolts the other.
In the latter case, slacken one and tighten other until second crosshair is registered.
The slot in the foam is for a stepped rectangular block with an engraved line, which is used to locate a straight edge on the part.
 
The open space in the case is for a mirror iirc as used to point available light onto your workpiece center.
 
Mine has an edge finding block but perhaps a previous owner has made one that fits exactly in the foam and substituted the mirror...
 
Back
Top