How to solder to these round lugs?

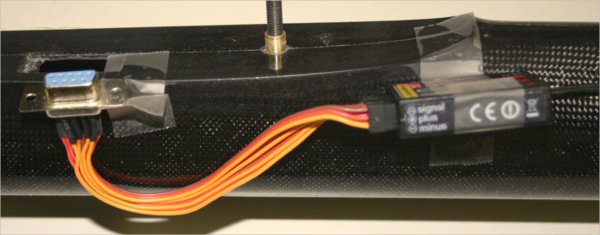
One of my other hobbies is RC airplanes. The electric models demand some fickle soldering now & again. This is an electric sailplane with a DB9 plug & wiring harness that connects the 4 wing servo leads back to the receiver in located in the fuselage. Some of the wires are doubled up on common pins which is a PITA. Soldering is the normal/preferred mode but actually when the wires are cramped & constrained, this can be a liability because now the joint is hard (= break failure point).

I bought some pure silver rings which come in all sizes and a teeny plier crimp tool. This stuff is used by the jewelry bead hobbyists & very inexpensive. It was crimped & completed before the solder iron would have been warm. Actually all RC plugs are crimped inside their male/female housing. Its a lot more common in industry than I realized. Just mentioning to keep in your bag of electrical tricks.
IMG_6151_edited-1.jpg

IMG_6155_edited-1.jpg

SNAG-1-6-2018 0000.jpg
 
Last edited:
Ex-AKG lab' and field engineer here....

The inner cores are probably "tinsel cable", coated strands of flat copper wrapped over a non-metallic strength member, after stripping it's a good idea to dip in acetone (or methylene chloride if you can get it and have good ventilation) and wipe with paper towel to remove the coating before trying to tin the ends, otherwise you can cook the insulation to the point where it starts to flow and the cores short...

Dave H. (the other one)
 
"The best advice I can offer is "make sure you put the cover on the cable first" before you do anything else. I'll bet there's quite a few reading this thinking "forgot it once and won't do it again" but won't admit it."

Yep, and it's always the fat multicore...

Dave H. (the other one)
 
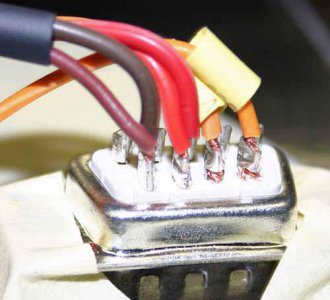
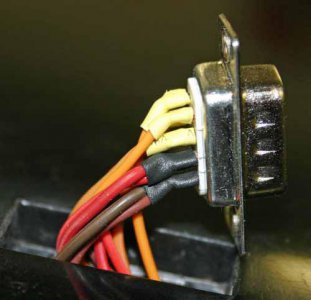
This is the beading hardware I used. Actually even for small (22-24) gauge wire splicing. The pliers have kind of a 2-step crimp, first it flattens, then on a different plier jaw position it U shapes the ring back on itself. No way that bugger is coming apart & no risk of cold or iffy solder joints. Its now my go-to method.

The DB9 plug was a bit different, they are semi open tubes (solder pots maybe they are called) so I just flat crimped the appropriate diameter silver sleeve. This was kind of a special case though where the wires coming off have to make a hard-90 right at the end of the tube because its constrained by the wing skin. The consequence of iffy connection on these plugs is rather dire -no power or signal to servo = no control = $$ model either goes bye-bye or pounds the dirt.

2018-01-06_13-30-40.jpg
 
"The best advice I can offer is "make sure you put the cover on the cable first" before you do anything else. I'll bet there's quite a few reading this thinking "forgot it once and won't do it again" but won't admit it."
Dave H. (the other one)

I'll admit that I've forgotten it more than once.
 
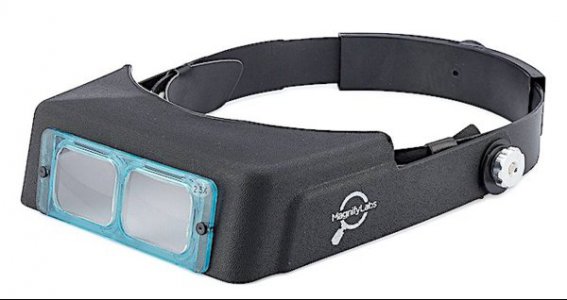
I purchased these on Amazon and am completely satisfied with them. Very sharp lenses and good construction.
I chose them because of a Wiki review of about 10 different visors. These were the #1 recommendation.
I chose not to get one with illumination because sometimes LEDs don't make an even light and highlights and shadows can obscure what you are trying to see. Anywhere I use them will be well illuminated by good broad diffuse light sources.
I like the 8" focal length because it gives decent magnification and there's room for a screw driver under them.

MagnifyLabs Headband Magnifier - (Hands Free Optical Visor / Binocular Magnifier)
- with One Optical GLASS Lens Plate (2.5x at 8" Focal Length) - $20


81Di2SVWQ0L._SL1500_.jpg

An additional lens kit is available for about $16
3.5X Magnification (10-Diopter Lens / 4" Focal Distance)
2.0X Magnification (4-Diopter Lens / 10" Focal Distance)
1.5X Magnification (2-Diopter Lens / 20" Focal Distance)
 
Last edited:
Back
Top