

- Joined
- Oct 11, 2013
- Messages
- 90
OK, Gentlemen. I've compiled a procedure of sorts, to enable you to build a similar contraption to the one mentioned earlier. The details are pretty simple and straightforward, but it took me a while to decide how to build it:The 'OP' has heard your pleas, and will respond with construction details...
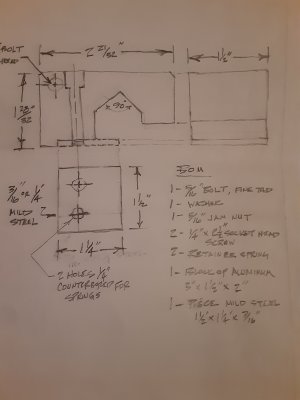
I had a few parameters to consider; size, one clamping bolt or two; accessible from the top, where to put the stop bolt, how big to make the actual clamping piece; simplicity of fabrication; and others.
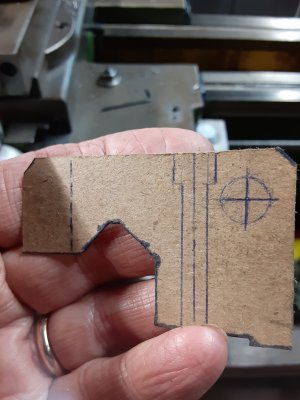
I couldn't find the preferred configuration online, so I made a cardboard cutout of the general shape, that would fit the ways on my lathe, and give me the clamping force I wanted:
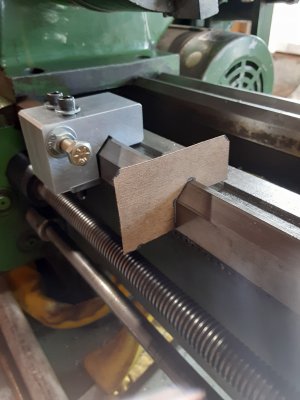
The cutout would need to fit fairly well, as indicated by the picture:
I decided to make the body from a spare block of aluminum I had...to big initially but it was pared down to the correct size after marking it out:
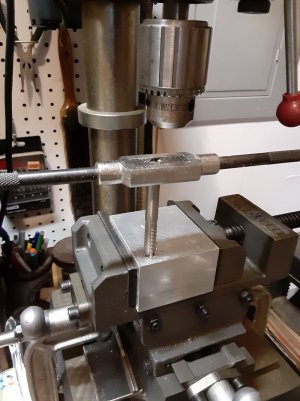
The block was then squared up to facilitate vise holding to drill the required holes:
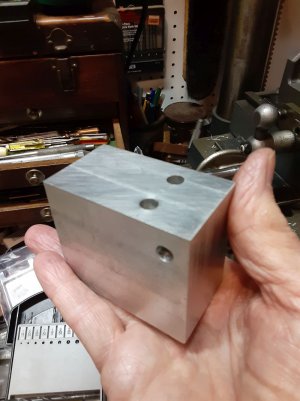
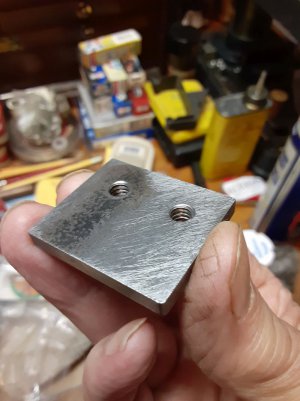
With all the holes drilled, the block is semi-finished:
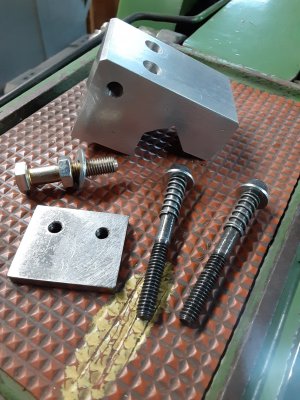
I used 1/4" x 21/2" socket-head cap screws for the clamp, and one 5/16" fine thread bolt for the stop itself. All the bolts, springs, nuts, and washers can be purchased at your friendly Ace Hardware Store. The springs are there to keep the parts together, and they disappear into the counterbore to allow the clamping bolts full travel against the block.
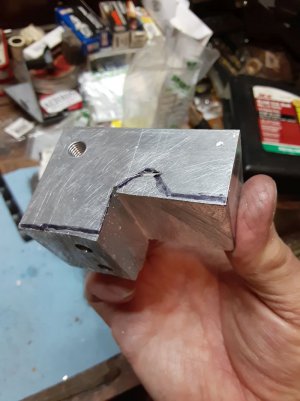
Since my block was bigger than I needed, I cut out that portion before milling operations:
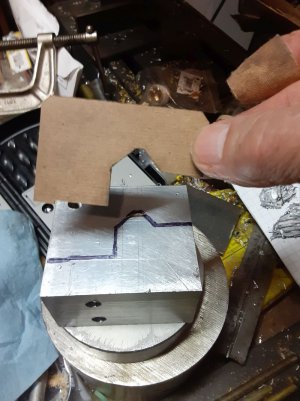
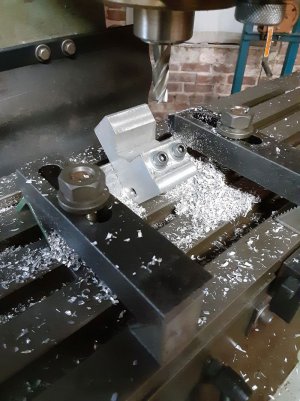
Then I proceeded to mill down to the inscribed lines as indicated from the scaled cutout:
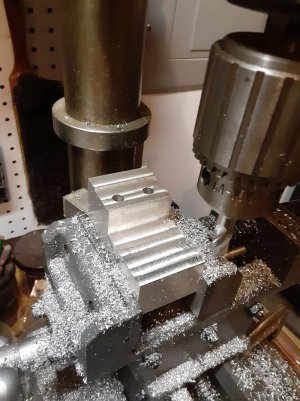
After the horizontal milling, I needed to come up with a way to mill the 90 degree way angle. I didn't have a fancy tilt angle plate, so I used an inverted angle iron with the block bolted with the clamping bolts:
After a little clean-up with a file, the majority of the work is done. You need to make the clamping plate, which I formed from a piece of 3/16" plate steel. This could be as thick as 1/4" but probably not necessary:
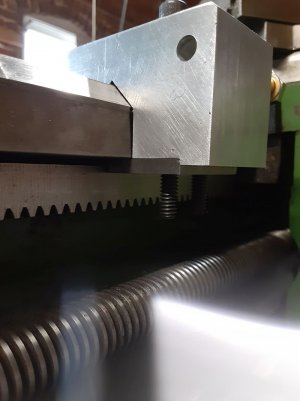
I need to mention my clamping philosophy. The contact area for the clamp, in my mind, needed to be as large as possible. When I measured the edge under the way, it was about 1/2" from the outside to the surface of the carriage rack. I wanted to get as close as possible to the rack and still have some play, so when you investigate your clearances, please check this. Also, as you draw the clamp up to touch the way, there only needs to be about 1/32" or even 1/64" of 'negative clearance' to create an awesome clamping force. By that I mean that the clamping bolts are basically putting the metal of the clamp in compression, almost a shearing action, that will guarantee holding power:
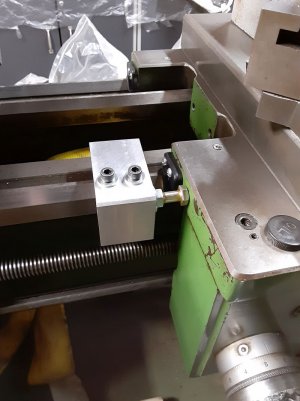
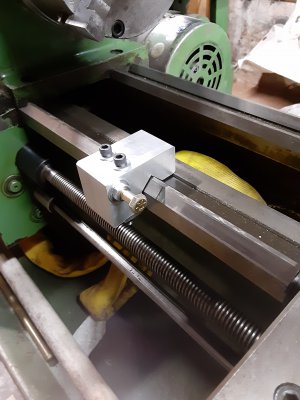
Here is the finished carriage stop against the carriage apron:
I think the final result turned out OK. I had to do some file clean-up on the way 'Vees' due to the angle iron not having been precisely aligned...but overall it behaved as intended. Like I said in the beginning of this thread, the project is sort of experimental with only the rudimentary configuration given, however it can be modified in a myriad of different ways.
I think the important takeaway is to make sure that you make some measurements on your particular machine to insure that the dimensions reported here will work...good luck!
Lou O.
Attachments
-
 20210201_143316.jpg1 MB · Views: 191
 -
 20210201_161614.jpg897.9 KB · Views: 187
 -
 20210130_133838.jpg820 KB · Views: 178
 -
 CL-20.jpg165.9 KB · Views: 178
 -
 CL-16.jpg165.7 KB · Views: 176
 -
 CL-18.jpg140.9 KB · Views: 181
 -
 CL-21.jpg142.4 KB · Views: 177
 -
 CL-22.jpg214.2 KB · Views: 178
 -
 CL-2.jpg208.9 KB · Views: 178
 -
 CL-24.jpg144.8 KB · Views: 184
 -
 CL-12.jpg112.7 KB · Views: 185
 -
 CL-3.jpg156 KB · Views: 194
 -
 20210128_180537.jpg951.2 KB · Views: 174
 -
 20210203_193615.jpg629.1 KB · Views: 212