Ok, for once i may actually be able to contribute instead of just asking questions. this could be a long one. i decided to sit down at a comfortable table and actually take a good look at this. i started with my accusize dial test indicator. .0005 at .30 range. i bought this one on amazon because i had read great reviews about how smooth the action was for the price that you pay. Wanted to check tram on my mill. i was disappointed. the bezel was stiff and jerky to move. action looked smooth so i kept it and chucked it up to a learning experience about trusting reviews on amazon. This was the unit i had tried to fix before by just deburring but had no success.
Just so you are prepared, here is what i used tool wise: Micro screwdriver set (phillips and straight), micro tweezers, Optivisor (a must if you are vision challenged), flashlight, set of small diamond sharpening sticks, rubber soldering pad with part depressions (those screws love to jump), clean rag, graphite lube (like for locks although this one is not necessary as you will see). Watch hand removal tools (these are a must, cheap to buy, buy them).
Disassembly:
Gently pry off the bezel cover. Did this with a flat blade under the bezel edge and slowly worked it off. you will end up with a bezel ring, bezel glass (plastic) and a plastic ring. dont lose this ring it sets the distance between the face and the glass bezel to give the hand room to move. (ask me how i know).
Use the watch hands to gently pry off the hand using the removal tools. be careful, it likes to jump too (just like the pesky screws).
Remove the face, nothing holds it on but the hand and the bezel ring.
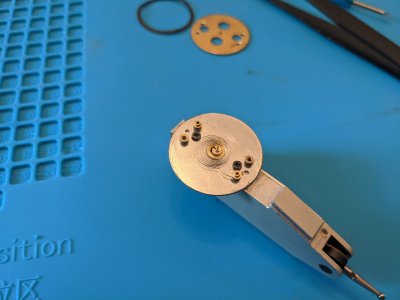
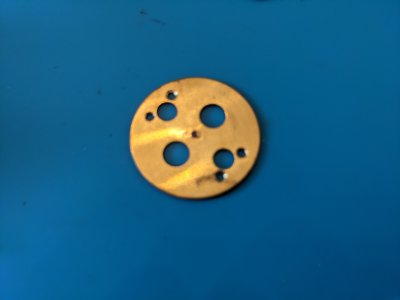
You will now be confronted with a brass or steel plate (escutcheon?) that the armature (wrong word) pokes through with anywhere from 2 to 4 screws holding it down.
Remove the screws carefully and place them in something to keep them corralled (like i said, they like to jump AND they respond to gravity better than most objects and will roll in directions you though were impossible)
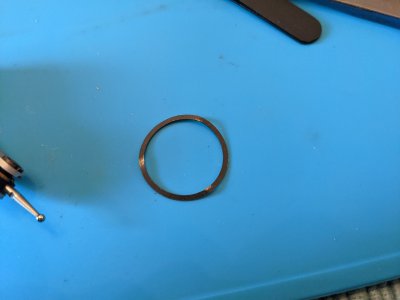
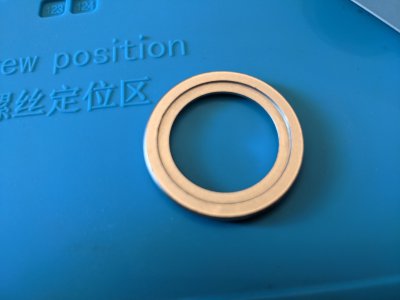
Take off the 'escutcheon plate, the ring shaped spring and the bezel back. Be VERY careful as my indicator had the face spring exposed at this point. Messing this up is a great way to ruin an indicator. You should now have 4 component parts that all are involved in this Bezel rotation smoothness problem:
Dial indicator body, note the spring.

Escutcheon plate:

Spring (the real culprit):

Bezel back plate:

The Fix:
I started by deburring every one of these pieces using a fine and superfine diamond stick. All the edges felt like they were just punched out and not cleaned at all. After i got them where i thought they should be i started putting them together again and moving the action to see how they felt. Did they still feel rough, was there any binding between the parts, etc. After a few back and forth's, i decided to put some graphite lube at the mating points (just a tiny bit applied with a toothpick brush. to make a toothpick brush you get one toothpick, and chew on one end until it resembles a brush. ;-) i then assembled the four pieces (NOTE the escutcheon has a tiny hole in the center for the armature, mine was a 'Ruby Jewel' you MUST get this lined up or BAD THINGS HAPPEN), put the screws back in, and then tested the action. DARN, still hard to move. Hmmm, what next. I took it apart again, then left the spring off and put it together. Hmmmm, definitely needs the spring, too floppy otherwise. Is the spring too thick? how the heck do i measure that? i dont have the right tools for that. Wait a minute? that spring looks like a sine wave when you look at it from the side (couldnt get a good pic, sorry). Wonder if i could just unbend those bends a bit and see if that helps.
Well i did so, and reassembled the four parts, and wouldnt you know it, that fixed the problem almost totally. i was so happy i did NOT take it apart again to adjust the spring. It could use some fine tuning on the bends but i was too happy to care.
So I put the whole thing back together(this is where i discovered the importance of the plastic ring between the face and the bezel glass). NOTE: putting the hand back on is an exercise in patience and a steady hand. neither of which i have in abundance. Tweezers and optivisor DEFINATELY came in handy here. Also, a watch press would be handy. using needle nose to squeeze the bezel back on is sooo hammer and chisel mechanic (thank you MrPete).
i was so impressed that it worked so easily that i decided to try it on my ultra cheapo chineseum dial test indicator (7 jewels ya know, somebody should tell the repeatability about that). Guess what? Same problem, same solution.
Then i decided to try it on my Horror Freight Dial Indicator that i have had for 10+ years. Hmmm, built a little differently, instead of a spring, the escutcheon holds the clock works and has a slit in each side that is bent down to work as a spring. a little unbend and whalla (sp?) much smoother action.
So i have concluded that these things use a punched spring that is not calibrated. just punched out and formed in the same operation, and the poor chinese assembler who is paid by the piece doesnt have time to tweak it to work. My guess is this is why Mitutoyo, Interapid, and high end Starretts cost what they do. the springs are probably calibrated and adjusted at assembly. OH, and the fit and finish too.
I am sure the deburring helped quite a bit. in fact it could use more of that. but the graphite was probably totally unnecessary. You could definitely spend alot of time adjusting the spring for just the right feel. and i may go back and do that. But i spent about an hour on the first one with all the troubleshooting. The second one took me 15 minutes, with some deburring. The last one was 10 with NO deburring.
YMMV, but this is definitely worth some time if you have these type indicators and would like to actually use them.
I would love to hear if this works for anyone else


