

- Joined
- Jan 25, 2021
- Messages
- 50
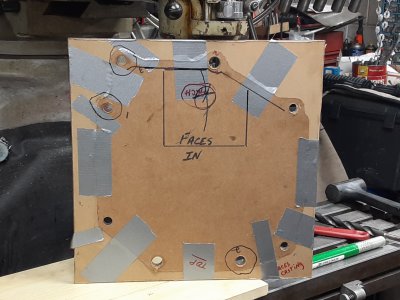
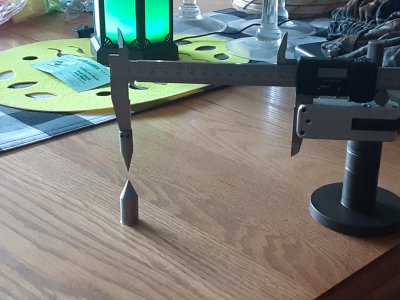
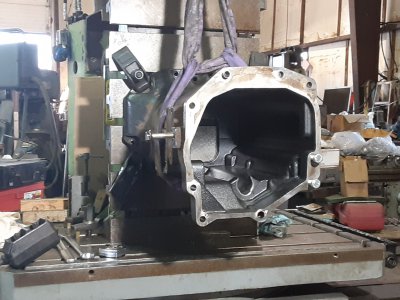
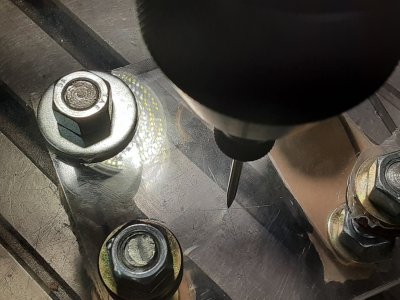
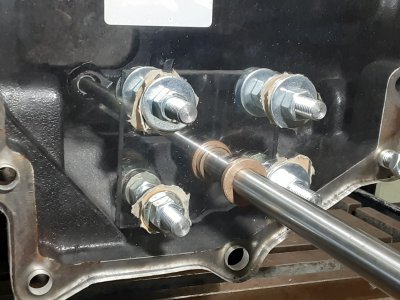
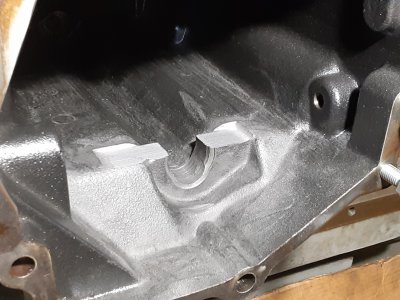
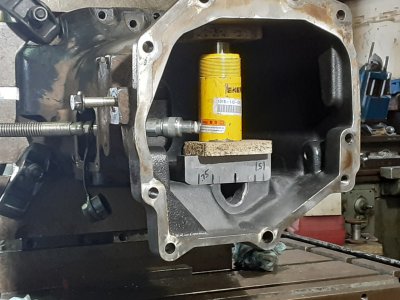
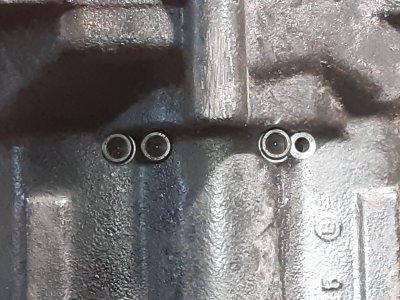
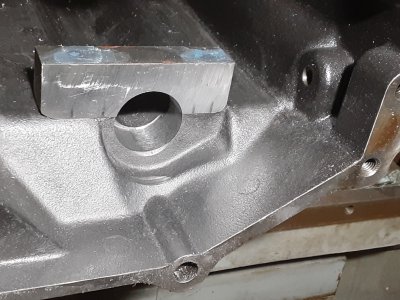
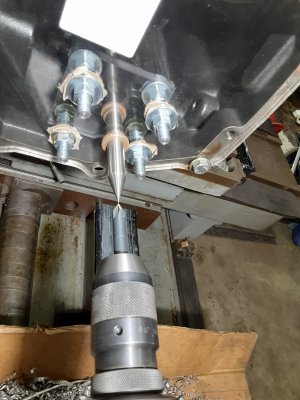
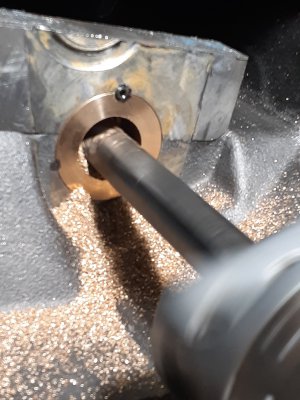
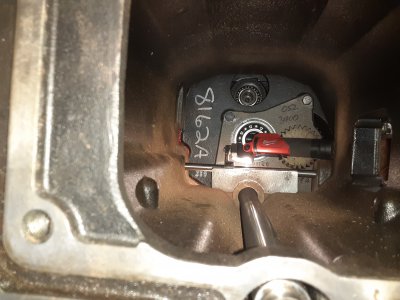
JD.4400 intermediate case that couples the bell housing and the Rear end is in my shop and the Rear end is tilting back on the drawbar 30 miles away...the bearing on the rear end that holds the shaft for the front wheel drive failed....in the intermediate case the shaft is held inside of a cast iron bridge which houses a needle bearing...this bridge is now egg shaped and 4 times bigger due to the rear bearing going bad....the rear bearing sits on a perch that sits about 2 inches farther out than the casting...problem is how do you transfer the center of that bearing to the intermediate housing 30 miles away to do the repair??....I will try to explain as best as I can...I first took a stiff wrapping paper and taped it to the mating side that couples to the rear end.....here is where you have to work like a heart surgeon.....with a small ball pein hammer tap all around the casting....there were extensions that stuck out that acted like dowel pins and measured .625...make these cut outside very accurately with an exacto knife as your accuracy will depend on it!! Theres one at the 1 o clock position and another at the 6 o clock position I believe....once you have the template cut out transfer it to a 1/4 sheet of polycarbonate stock....locate and drill all the holes after cutting the sheet to size on a jig saw or thin bladed band saw...pick up the centers of the dowel cutouts using a wiggler and center drill, then drill in steps to just under .625 then Ream these 2 holes to size.....now how do you duplicate the bearing standoff and transfer the center of the bearing on the rear end to the intermediate casting 30 miles away?? I marked the approximate location and went slightly larger....then made stand offs using 1/2 all thread rods with washers and nuts in 4 corners to hold another polycarbonate plate to the distance the perch on the rear end was approx. 2 inches....now how do you transfer the center of the bearing to the polycarbonate plate?? I made 2 plugs to tightly fit the .625 dowel holes to fit an attachment I made to hold my 24 inch digital caliper. Made a tight fitting center to fit the bearing on the rear end....put my caliper with the plug at the 1 o'clock position and adjusted the caliper by eye looking at different positions then lock the beam using the thumb screw.....carefully withdraw the plug from the casting and insert it into the 1 o'clock hole on your polycarbonate reamed hole, carefully swipe an arc onto the poly. Perch with the centering point....do the same procedure at the 6 o'clock dowel location this will give you the center as X Mark's the spot!! Now take the polycarbonate plate to the Bridgeport, locate center with wiggler pointed tip, center drill, drill to just under 1 inch and ream both holes to 1 inch...install 1 inch to 3/4 inch flanged bushings to hold a 3/4 drill rod pointed at one end...I had to slip the non pointed end thru the flanged bushings first and put a wrap of electrical tape on that end as the far end of the intermediate case has a slightly larger metric bearing the drill rod had to fit into......slide your polycarbonate plate over the dowel pins put a couple of bolts in to hold it to the housing....slide your drill rod into the bearing against the angle plate and pick up center with a co-axial indicator...points in the pics are for show....LOL.....I machined off the cast iron bridge inside the casting to make a flat perch to hold a 4140 bar stock...used a porta power cylinder piece of pine to hold temporary bridge in place so casting could be stood up and drilled and tapped to hold the new bridge....had to use an endmill to make flat bottomed pockets on the outside of the casting for the socket headed cap screws to seat up on and center drill for tapping.....picked up center and bored the new bridge to accept an oillite bronze bushing instead of the original Wimpy Needle bearing....this bushing has more contact area than the needle bearing....we had to slightly flap wheel the bushing to get everything slid together....owner is one Happy camper....one word of advice....I picked up the new bearing that holds the front drive shaft at the rear and the owner said that's new right out of the box..I spun it on my finger and it was rough feeling like it had sand in it....asked him if he wanted to do this all over again in a year or so....he said Hell no!!! Told him to take that RUSSIAN bearing back and go to motion industries aka. Wisconsin bearing and buy a timkin...no kidding take the Russian bearing spin it on your index finger in the bore and maybe 8 to ten seconds of rotation....timkin 25 to 30 seconds...no Comparison!!!!
Attachments
-
 20200328_193735.jpg1.2 MB · Views: 16
 -
 20200401_160758.jpg1.2 MB · Views: 15
 -
 20200402_143005.jpg1.2 MB · Views: 12
 -
 20200401_084630.jpg1.4 MB · Views: 11
 -
 20200402_173337.jpg1.2 MB · Views: 9
 -
 20200402_163132.jpg1.3 MB · Views: 11
 -
 20200403_163032.jpg1.1 MB · Views: 11
 -
 20200405_190558.jpg1 MB · Views: 11
 -
 20200406_192037.jpg1.3 MB · Views: 11
 -
 20200406_160604.jpg917.5 KB · Views: 11
 -
 20200407_171205.jpg739.2 KB · Views: 12
 -
 20200410_144947.jpg2 MB · Views: 16