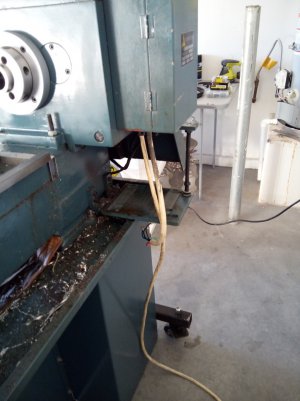
Just bought an old 1994 -12 X 36 Enco Lathe 110-2075

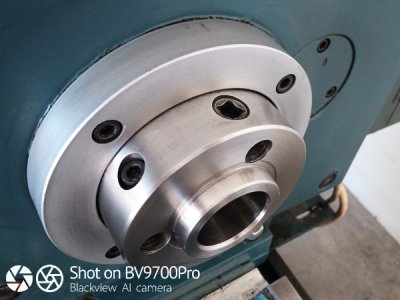
I looked at the manual and it calls out a D1-4 spindle so I must be wrong but I don't see any camlock cams on the rim of the chuck in the picture shown so how is the chuck being held onto the spindle?

Lets see a picture of the spindle with the chuck removed. The Frankenchuck photo is a little confusing.

John

I will post some clear photos of the spindle and chuck today when I get off work. The Cam locks are integrated into the spindle. and the chuck back plate is a conversion plate I think I read on bisons website.

My last working lathe was a 9X20 CM, so for me the size of this lathe is a bit intimidating and much bigger than the projects I have in store for it.
 
Last edited:
Hello Nogoingback..

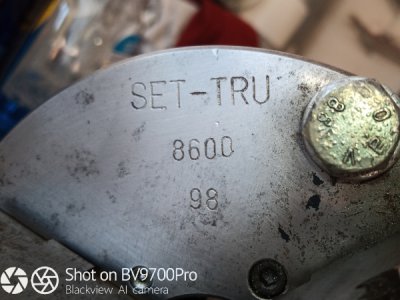
The Spindle looks to be a D1-4 and you have a good eye, the 3 jaw chuck is a Bison Set Tru 6 1/4" , the rest are not. and oddly there are 3 bolts holding that chuck to its back plate I think. I named it the frankenChuck because of that.

There is a bunch of tooling that came with the lathe, and several QCTP holders with bits installed... I have no idea whats worth keeping and whats not... some of it doesn't seem like its lathe tooling, or even go with a lathe. unfortunately there are no collets or collet closer

It will be interesting to see what you have there once the chuck is removed. I'm curious about the use of hex bolts
rather than cap screws (normal for Bison) to hold the chuck on. As for the other stuff, I agree with mathewsx,
just hang onto it for a while and sort it out later. If you don't know what some of it is just post some pics and
you get lots of opinions... :)

As for being intimidated by a larger lathe, remember that the basics are all the same: if you were comfortable with the previous lathe you'll be fine with this one. You have things to learn about the new machine, but that's the fun part.
 
Lets see a picture of the spindle with the chuck removed. The Frankenchuck photo is a little confusing.

John

It will be interesting to see what you have there once the chuck is removed. I'm curious about the use of hex bolts
rather than cap screws (normal for Bison) to hold the chuck on. As for the other stuff, I agree with mathewsx,
just hang onto it for a while and sort it out later. If you don't know what some of it is just post some pics and
you get lots of opinions... :)

As for being intimidated by a larger lathe, remember that the basics are all the same: if you were comfortable with the previous lathe you'll be fine with this one. You have things to learn about the new machine, but that's the fun part.

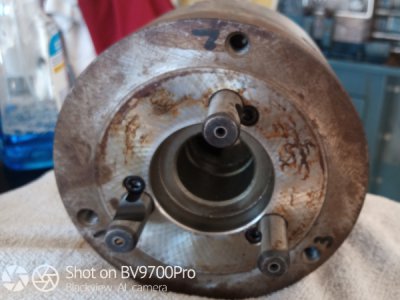
Here are three closeup photos.. 1- The Spindle, 2- Bison Chuck Front Model, 3- Bison Chuck Rear View.

I'm sure ill get reprimanded but I had to clean the Spindle with WD40 and an Ultra fine 3M pad... The Spindle was as bad if not worse than the back of the chuck, it took about 10 minutes of scrubbing to get the old oil off it.. There are no discolored grey shadows in the steel indicating it would have been rust.

D1-4 Spindle.jpg
BisonChuckFront.jpg
BisonChuckRear.jpg
 
Last edited:
Get that sucker under power and lets see what you can do with it ;)

John

My friend, when you see what I can do with this lathe, LOL You'll just lower your head and shake it slow like...

here is my last little project i did... I made Anode Rods out of Rebar for an Electrolytic rust removal tank I built... For you guessed it... another lathe that this new lathe just replaced. that is the extent of my knowledge of lathes. I made 38 of them in varying lengths but I used a tap & die set for the threads... this go around I will learn how to make the threads on the lathe too..!

That will also be the first project for this new lathe, Ill turn down rebar and thread it on the lathe, but this time it is for holding wood shelves to a wall for floating shelves i'm making for my new home.

lathebathrebar1-jpg.241967


lathebathrebar-jpg.241966


lathebathrebarend1-jpg.241971
 
Last edited:
I looked at the manual and it calls out a D1-4 spindle so I must be wrong but I don't see any camlock cams on the rim of the chuck in the picture shown so how is the chuck being held onto the spindle?

Thanks you sir for posting that PDF manual for the lathe.. Much appreciated.
 
Hello...
Just figured I would post a couple Pic's for Archival record...

Motor removed from lathe for cleaning and to install a new 12/3 25Ft cord with Nema 6-15 plug.

MotorRemoved.jpg

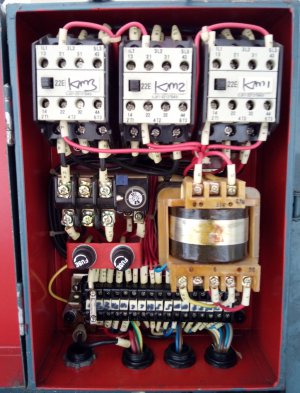
Power Box Wiring. NOTE: I will replace with a better focused one in the morning.

PowerBoxFullSize.jpg

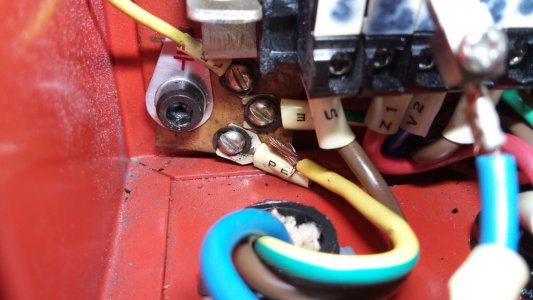
While I was rewiring the 220V lines and checking the power box I found the Cabinet 220v Ground wire was lose from its crimped connector, along with several wire hold down screws that were not fully secured. But the worst of potential issues I found was the blue - hot leg wires plastic retaining case was severed which sits just over where the the lose ground I found is... glad I found that now.

PowerBox.jpg

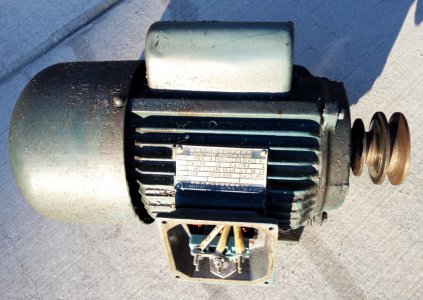
This is the original motor to the lath.

Motor.jpg

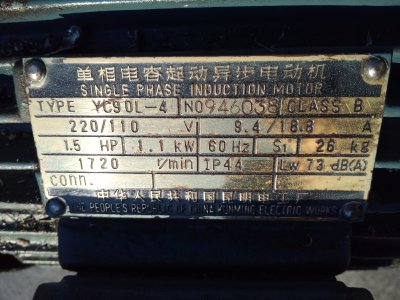
A close-up of the motor plate.

Its interesting they call this a 1.5 HP motor when it uses over 2KW, Common Math Says 220V X 9.4 amps = 2068 Watts / 746 watts per HP = 2.7Hp, Weird right..? Ill check with my amp meter tomorrow, the 9.4 amps is probably just FLA for the motor starting up.

MotorPlate.jpg
 
Last edited:
Hi all...

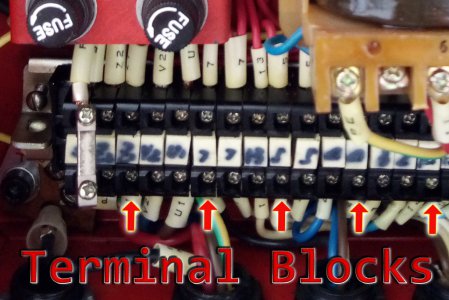
Need some help locating replacement Terminal Blocks for the power distribution lines.. Any help with this would be appreciated..! I checked Grizzly Parts Site with no luck...

I need to replace a few of them... Ageing has made them really fragile, I cracked two of them while trying to fix one. They will be fine for now and wont effect the operation of the lathe but will need to be replaced to be in top shape.

On another note, I got allot done on the lathe today... Ill be test running the lathe tomorrow to check my work.

TerminalBlocks.jpg

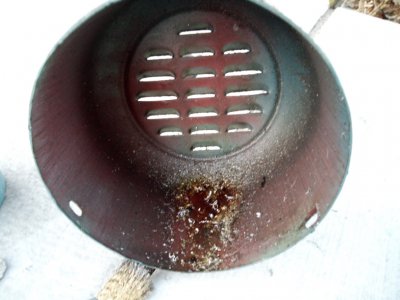
While I was cleaning grime off the motor casing I was amazed to find chips and oil inside the fan shroud..

Fanshroud.jpg

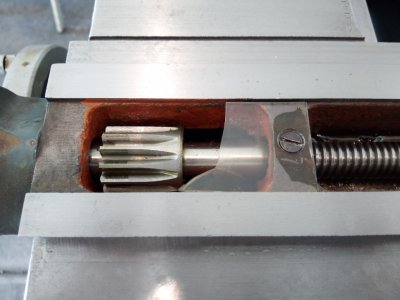
I also have to make a new transparent chip guard for the cross slide gear, Honestly don't know why I need to see it but there must be some reason.

CrossSlideGearWindow.jpg
 
Here you go

 
I really like McMaster-Carr for their detailed descriptions, easy search, and no BS ordering. Often get stuff the next day and shipping is reasonable.

John
 
I also have to make a new transparent chip guard for the cross slide gear, Honestly don't know why I need to see it but there must be some reason.
No reason that I know of. Mine is made of sheet metal and it has not cracked.
Have any plexiglas bits fallen into the apron gears?
 
Last edited:
Back
Top