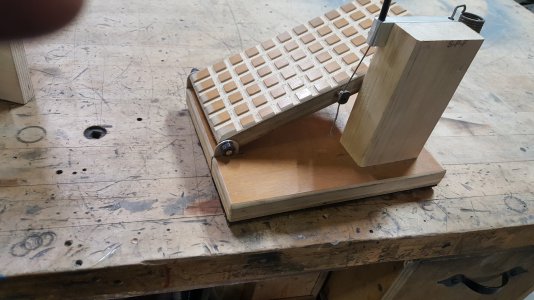
Leather sewing machine project.

cathead

CATWERKS LTD
Registered
Joined
Feb 7, 2013
Messages
2,485
There are several projects I would like to complete using a heavy duty leather machine. Most of these machines are quite expensive
with the exception of the "cobblers sewing machine" you can get on E-Bay for $100. I have one on order and plan to electrify it using a
gear reduction wheel chair motor that has been laying around in the shop just waiting for an application.
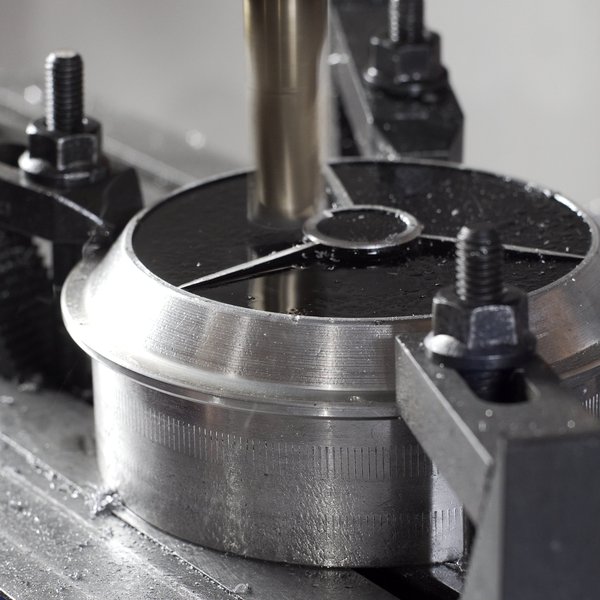
This will involve some machining to make it a powered machine. external-content.duckduckgo.com.jpeg
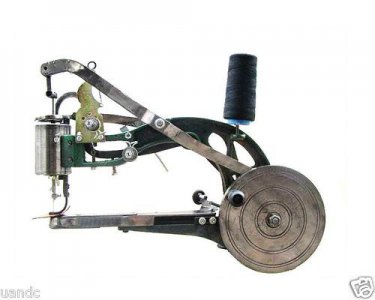
The project will involve building a stand as well as motorizing the unit. These machines are quite crude and do require a bit of
fine tuning to be a nice working leather machine. The wheel chair motor will be powered using a Variac and a home made DC
power supply. The Variac will provide the ability to have a dependable variable speed machine. With a long projection on the
business end of the machine, you can put patches on the knees of jeans easily. That's something not possible on the standard
Singer type machine plus the Singer will not sew through 3/8 inches of leather. It will be a good winter project and I can see many
uses for it already when it is up and running.

I will make several more posts as the project unfolds so will take several photos along the way.


The more I think about this, it might be better to use a mosfet transistor for the variable supply but have not had
much experience using them. The Variac will work but I'm not so sure I want to be constantly be varying the Variac
control. Maybe someone has some experience with some sort of solid state DC voltage control.
 
Last edited:
Does that machine have the feature that allows the foot to turn according to the users needs so that it "walks in" the material from the needed direction of travel?

I had a childhood friend who use to make saddles/bags and all sorts of other leather goods as a form of therapy for about 20 years. That whole time he used one of those basic manual machines. He added a removable stand and a Foot treadle for power and Never looked back. He also kept the hand wheel in tact to act like a fly wheel that helped to increase torque when needed which was a more precise way for controlling the needle punch through thicker material which also helps keep them needles from snapping like tooth picks. Have fun and be sure to post up some of your work or at least pics of the mods to the machine.
 
I have been sewing all of my life. When I was in grade school I wanted the legs on my jeans shortened. Instead of doing it for me my mom showed me how to use her sewing machine. I now have my grandmother's ancient singer sewing machine. It will sew through 8 to 10 layers of just about anything. I use it for canvas work on my sailboat and general sewing. The only upgrade I made is a new foot control that I bought from Sailrite. It made a world of difference in using the machine. You might want to consider a sewing machine foot control to control the speed of the motor. And definitely keep the big hand crank flywheel. All sewing machines have a flywheel of some sort to smooth the sewing. Especially in heavy fabrics.
 
Does that machine have the feature that allows the foot to turn according to the users needs so that it "walks in" the material from the needed direction of travel?

I had a childhood friend who use to make saddles/bags and all sorts of other leather goods as a form of therapy for about 20 years. That whole time he used one of those basic manual machines. He added a removable stand and a Foot treadle for power and Never looked back. He also kept the hand wheel in tact to act like a fly wheel that helped to increase torque when needed which was a more precise way for controlling the needle punch through thicker material which also helps keep them needles from snapping like tooth picks. Have fun and be sure to post up some of your work or at least pics of the mods to the machine.

Yes, you can rotate the foot.

I will keep the flywheel and make a new longer shaft and power the machine from the back side. I will post some photos
but right now my camera is broken so I ordered another one. After it arrives and I have something meaningful to post, I will
have some photos of the progress. I'm still not exactly sure how I will configure the variable DC voltage supply. Likely
it will end up being a variable resistor controlling the gate of a MOSFET transistor. I will have to do a bit of reading to
figure it all out.
 
Last edited:
I recall seeing a video wherein a guy adapted a (3-phase) hoverboard motor to run such a sewing machine (he called it a "patcher"). He was obviously NOT a machinist, but crude as it was, the adaptation worked. Here's a link to the article. Hope it's of interest to you.

 
Very interested to see how this progresses.
Part of the deal for turning half the basement into my shop was helping to convert one of the spare bedrooms into a sewing room for her. She likes to make Renaissance outfits so lots of heavy cloth and leather. We have been watching for a good commercial sewing machine (luckily there was a big textile industry in SF and LA at one time so these machines turn up on CL fairly frequently), but that cobbler machine might be a nice addition for the leather work which can be tough even for some commercial machines.
 
I just completed the same project! I needed to make a new cover for my hot tub, and for what the local tent& awning shop wanted to sew it, I got a the exact same machine for less.
I didn't get so high tech on the motorizing though. After I scoured the net for ideas, I found a simple ,cheap solution. Instead of a sewing machine motor, or a dc motor, or a complicated gear reduction system, I used something I had laying around......a corded variable speed hand drill. I removed the chuck and replaced it with a pulley I made. Give me a moment and I will get some pics up.
 
Well, the machine showed up today. My first impression was not the best as nuts and bolts were falling out of the box before I even had
it open. After a basic assembly however, I find this machine to be quite impressive. It has a lot of rough edges that need to be worked on
as well as some refinement but the basic operation is flawless! The unit came with 3 extra bobbins and I was able to wind one up and install it in the
machine without any major difficulties. Fortunately, the machine was threaded already with some test thread so I was able to recreate
the thread path and also fill up another bobbin. I can see where if you lose this information that it could be a struggle to make it sew.
Anyway, it looks like a good machine even if I use it manually with the crank. The 3 legged stand thing is too low but at least it
gets one up and running. I will have to give this an A rating considering the price and the fact that it's sewing ability is impressive.
 
They are definitely crude....like cave man crude, but despite the fact, they seem to work well. No doubt, some TLC and some upgrades are in order. The first thing you'll wanna do is take it apart and give it a good cleaning. This machines are full of sand, cast iron dust and other oriental "schmoo". There are several youtube videos that address that and some worthwhile upgrades. I probably did more upgrades than most, just for ease of operation and practicality.
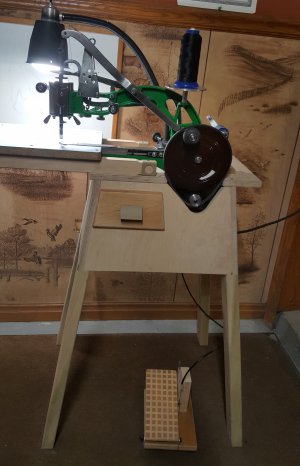
The little pipe stand is a joke, and was probably meant for small people who squat a lot when they work. Well, my body's "squat" feature doesn't work anymore, so a comfortable stand was a must.
20191218_185216.jpg
The table extension is made to slide off when I need to get into tight spots. The motor drive is simply a 3/8" variable speed drill. Because it already has some gear reduction, it retains torque at low speed. I built this to also work with the hand crank, so I made a belt tensioner to disengage the drill to crank by hand. This is almost a must when setting up the machine, threading needles, winding bobbins and when you need surgical precision on stitches.
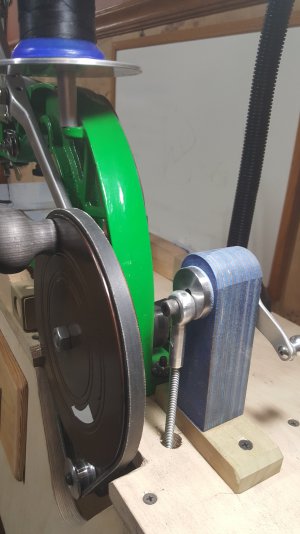
20191218_185334.jpg
The tensioner is an eccentric that pushes down on the hinged motor mount. When it's flipped up, it moves about 1/2", just enough to take the tension off the belt and free up the crank, but not enough to displace the belt from re-engaging the pulley. The drive train is so low tech it's probably considered red neck by some standards.
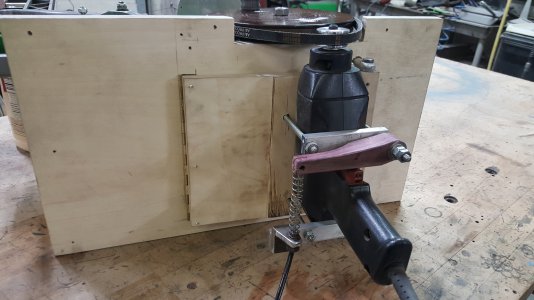
20191218_190110.jpg
The speed is controlled by a lever against the trigger of the drill, operated via a bicycle cable hooked to a foot pedal.
20191218_190252.jpg
Now I couldn't tell you what top speed is, but when you mash the pedal, it's about as fast as you want to be sewing stuff like leather. :eek 2:
 
Hey Derf!

Thanks for taking the time for posting some photos of your work. I can see a bunch of improvements on your machine which inspires me to
get on with the program. I like your drill drive method but I am going to give the wheel chair motor a try though because it is geared down and
has a neutral position as well. It does require direct current though requiring me to build up a variable speed DC supply. Your stand
looks very nice and functional compared to the rinky-dink stand it came with. I did set it up though as you can't even test the machine
without some sort of stand. All in all I am very impressed with the results of your work and hopefully I can build up something worthy of
a photo or two.

Maybe other Hobby Machinists will join in and order a machine. That would be pretty neat because there is so much
ingenuity on this site just waiting to sprout.
 
Back
Top