Levelling a bench top lathe

Ben17484

Registered
Registered
Joined
Jul 6, 2022
Messages
498
Hi All,

I’ve been playing around with my lathe for a while now and decided to try and level it as it cuts quite the taper (I’ve since discovered my tail stock is out of alignment despite me thinking i’d aligned it properly already, so I will start there for the taper). On larger lathes I see there are feet that are in some way threaded to allow for easy levelling - just twist each corner and re-measure. On my lathe (a south bend 9 copy), I’m assuming you have to shim under the corners. This isn’t the easiest thing to do accurately, so I wondered what people generally do?

I’ve not got a machinist level, but do have an electronic level that shows 0 degrees horizontally, but 0.45 degrees length ways. Is chasing this extra .45 degrees worth it?

8486d8b27bc669e5905b23b96456a3fa.jpg


What’s an acceptable/expected taper to turn on a machine of this age and size? Over say, 12inches?

Sent from my iPhone using Tapatalk
 
Last edited:
Hi All,

I’ve been playing around with my lathe for a while now and decided to try and level it as it cuts quite the taper (I’ve since discovered my tail stock is out of alignment despite me thinking i’d aligned it properly already, so I will start there for the taper). On larger lathes I see there are feet that are in some way threaded to allow for easy levelling - just twist each corner and re-measure. On my lathe (a south bend 9 copy), I’m assuming you have to shim under the corners. This isn’t the easiest thing to do accurately, so I wondered what people generally do?

I’ve not got a machinist level, but do have an electronic level that shows 0 degrees horizontally, but 0.45 degrees length ways. Is chasing this extra .45 degrees worth it?

8486d8b27bc669e5905b23b96456a3fa.jpg


Sent from my iPhone using Tapatalk
What matters is not that the lathe is level in the absolute sense. You need to measure, using your level (which isn't that sensitive, by the way) for lathe bed twist. Twist is what you are trying to remove. So you might want to put your level across your compound (and the ways) and move your carriage from the chuck to the tail stock. If it is the same (no matter what it is) then there is no twist. What kind of accuracy does the level promise? Plus or minus 0.01 degrees? If true, that would be equivalent to about 0.175mm/m if true. I think it is unlikely that it is that accurate. There are levels that are sensitive to 0.02mm/m, on eBay for around $52 USD, but they are hard to use. Depending on your floor, just standing nearby can change the bubble position! You have to wait for the bubble to stop moving, which can take minutes. It can be a slow process.

You may need to shim the lathe feet to get the twist out. With the level you have, you will be able to get some of gross error. After that, you will have to resort to cutting and measuring your taper. If you search on HM, I believe you can find several approaches to getting this done. Two collar test, and Rollie's Dad Method are some of the methods that come to mind.

The thing is there are multiple potential sources of error that can confuse you, and they all contribute to the measured taper. If the headstock is not aligned to the ways you will get taper. If the bed is twisted, you will get taper. If the tail stock is misaligned (and you use it) you will get taper. There may be others, I will leave that to others more knowledgeable than myself to explain. It takes a systematic approach to get most of the taper out. That being said, it is possible to correct these errors to get minimal taper.
 
You could never keep a bench lathe that sits on a wooden bench truly level, things are too flexible for that. True South Bend bench lathes had a 3 point bearing on the feet, two on the headstock end and one on the tailstock end, so as to avoid twist. Some had four point bearing, but had a means of adjustment on the tail end. I think the two collar method would be a good approach for you, with shimming at the corners of the feet until you can eliminate as much taper as possible. It depends how much wear there is on the ways as to how much taper can be eliminated. I would make the two collar bar about 5 - 6" between the collars for a lathe that size and about 1" diameter on the collars themselves. I will not get into the detaila of the method, too many have already done that.
 
My iGaging digital level isn't reliable to much better than .5º. A carpenter's spirit level is just as accurate. Ni ether is very much use for leveling a lathe for the purpose of removing twist. @WobblyHand is correct regarding the causes of turning a taper and the process of minimizing the same.

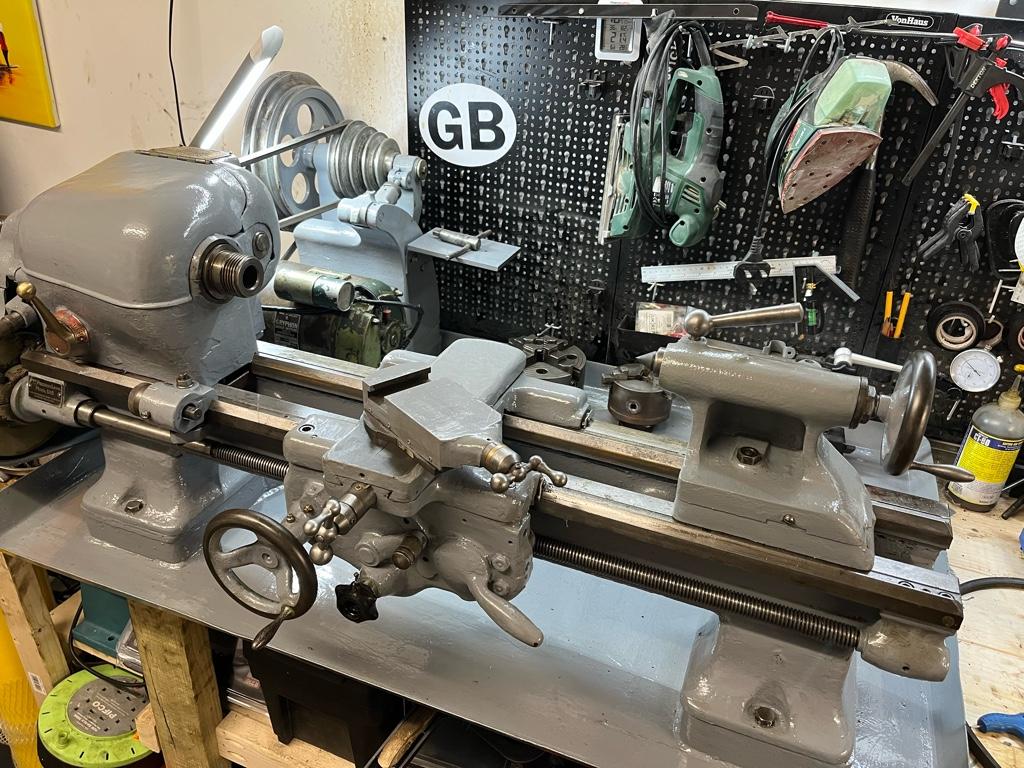
First off, the tailstock is not involved when trying to remove a taper caused by one of the above . A tailstock. aside from support of the work, is used to intentionally introduce a taper and, as such, can be used to correct a taper. Checking for bed twist using the two collar method must be done without the aid of the tailstock.

The first thing that I would do would be to place the lathe on a reasonably flat surface totally unfastened or at a minimum with the tailstock end unfastened. This will tend to eliminated any bed twist caused by forcing the lathe to conform to an uneven surface. I would check for the ability to cut a flat face by facing a disk located as close to the headstock as possible. Working close to the headstock minimizes the effect from any bed twist so the primary cause of failure in this test is headstock misalignment. Some lathes are not capable of changing headstock alignment and any misalignment would have to be corrected for by twisting the bed. (sometimes two wrongs can make a right).

The next step is to deal with bed twist. To do this, the headstock end is firmly fastened to the surface. The tailstock end is lightly fastened as well. There are two methods of checking for taper; the two collar method and the RDM method (Rollie''s Dad's Method). My preference is the latter. For the two collar method, a rigid bar is mounted in the chuck, unsupported by the tailstock, and a collar is turned close to the headstock and a second at the far end of the bar. A micrometer is then used to measure the turned diameters to determine taper. It is a definitive test as youe are actually measuring the defect you are trying to minimize but has some pitfalls, mainly that the bar can flex when turning so a rigid bar is required and light spring cuts must be used for the final cuts to avoid deflection buy the cutting tool. The RDM method doesn't require turning and only the force created by the dial indicator or dial test indicator figure in so bar rigidity isn't as critical. You are making four measurements rather than two and more than likely not using an indicator capable of measuring to a tenth so it is potentially less accurate. It is more convenient however as no cutting is involved, any runout in the mounting doesn't enter in to the test, and the same bar can be used many times. I do a two collar test as the final test to check my alignment.

Assuming that the two collar test or the RDM test shows a misalignment, the method of correction is to shim or otherwise elevate the tailstock feet. If the tailstock diameter is smaller than the headstock diameter, the carriage is closer to the work and the bed needs to be twisted to move the carriage further from the spindle.axis. This is done by shimming the back feet appropriately. If the taper is larger at the tailstock, the bed must be twisted so the carriage is closer to the work so shims should be placed under the front feet. In either case a shim would be put in place and the mounting tightened and another test done. This process is repeated until the taper is removed to your satisfaction.

A few things to note. Twisting a lathe bed to remove taper puts a load on the 4mounting surface. A less than rigid mounting surface will flex as well and the effects of shimming may be not as great as one would expect. To add to the mix, environmentally unstable surfaces can change their shape with both temperature and humidity. For this reason, I prefer to mount to metal rather than wood. If I had to mount on wood, I would fasten the lathe just enough to prevent movement during use with the tailstock fastened to just snug. Another consideration is wear of the ways on the lathe bed. Another consideration is the lathe stand itself. It must be sturdy and stable enough to not shift or deform. Otherwise all your hard weork becomes meaningless. Finally, used lathes often have considerable wear in the regions most commonly used and any alignment will necessarily be a compromise.
 
Leveling is an index to a common reference, and is a very good starting point for alignment, but the two collar test is the truth of your setup.

If you are left with a bit of twist in the end, finding taper per foot (the sine of the angle) is far easier to manage when doing work in the moment, and it commonly referenced. If you know your machine's taper, you can compensate on the fly.
 
I dont have the perfect table for my lathe. So I got a piece of granite left over from a kitchen remodel, leveled it the best I could, and then made sure the lathe was bolted to the granite surface. I know It is not the best piece of granite for this purpose but I was able to true up the lathe. I am kind of new to this. Just wondering if this would be a good solution or maybe I am missing something?

TDS
 
Precision leveling shims are available from McMaster-Carr (search for the part number on their site—this set is for half-inch anchor bolts but they have other sizes, too):

93369DE6-2101-411B-8FA4-447F7AA42AEA.png

The problem with a two-collar test is that it measures two things at once: tailstock alignment and bed leveling.

Align the tailstock first using a rule or razor blade between the points of centers. The centers are aligned when the blade is at right angles to their centerline when pinched between the points.

Then do the two-collar test and adjust one foot of the tailstock until there is no taper. Remember, the two-collar test should work between centers, not using a chuck.

Then, check tailstock alignment again. If you have to adjust it, do the two collar test again. Repeat as necessary.

Blondihacks has a good video on the topic specific to bench lathes.


Rick “who added leveling feet to his floor-model SB 14-1/2” Denney
 
I dont have the perfect table for my lathe. So I got a piece of granite left over from a kitchen remodel, leveled it the best I could, and then made sure the lathe was bolted to the granite surface. I know It is not the best piece of granite for this purpose but I was able to true up the lathe. I am kind of new to this. Just wondering if this would be a good solution or maybe I am missing something?

TDS

Granite counter tops are too thin to prevent twist, but it should work fine if solidly supported using vertical timbers (at least 4x4 or two 2x4’s at right angles) in the corners. Wood is dimensionally unstable across the grain but fairly stable along the grain.

Rick “lots of industrial lathes worked accurately on wooden factory floors” Denney
 
I've employed granite tiles and remnants to use for their flatness. They're not King Way quality, but they are significantly flatter than plywood and shift less from morning till noon as the humidity changes. I wouldn't dismiss the material based on it being less flat than a certified surface until you try to use it as one. For less precise use, it's useful.
 
Thanks everyone for your detailed responses to this. I’ve watched various videos on lathe levelling and most of Blondihacks videos, but somehow I’ve never seen the video posted above (which as usual, was great and explained it very well). I won’t have much chance over the next few weeks, but as soon as I can I’ll do the two collar method and see where I get. I guess to one of my original questions on ‘is there an easier method than shimming’ the answer is no. I’ve got some shim stock, but as I’m guessing I’ll need a bunch of different sizes to get it right, I’ll order some more.


Sent from my iPhone using Tapatalk
 
Back
Top