Logan 400. Headstock. (Total Logan 400 Rebuild)

Can't help with your questions (but I have a thought on the 36/72) .... but dang that lathe is looking nice. How did you get the polish on the gears?? Look too pretty to lube up.

By the way, that follow rest is on its way. So I'll either have one for the 10/11" lathes or will have one for sale, for a 9".
 
Thanks Mister Ed and glad to here you got the follower rest.

The gears as well as most of my parts were first cleaned with Purple Power, then soaked in Carburetor cleaner then cleaned with soap & water. After that all non-functional surfaces were painted Baby Seal Black or my custom mix lighter shade of grey. The functional surfaces as well as the sides of the gears were were then sanded flat using 320 grit sand paper on a flat block, buffed out with a wheel or hand filed. Most came out nice. I am most disappointed with the back gears. They look bad still. Not sure if i will try again with them.

No real progress last night.

Anyone have a 3/8-16 STI tap laying around i could borrow? Hate to buy one for one hole....
 
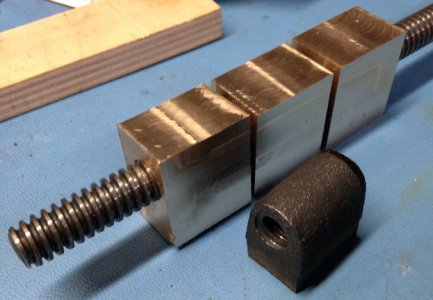
Got back from Camping this weekend and i had a package waiting for me. I have a new friend in the South Bend 9" community who has access to a 7/16-10 Left Hand ACME tap. I sent off three pieces of Bronze round stock to be tapped and received them over the weekend. This is the last missing part aside from the "wants list" i have.

Thank you South Bend Community. The fit to the screw was perfect.

I sent off round stock to make it easier to tap. Last night i started to square up the three pieces. Next step is to indicate in the rod and cut the bottom accurately to the shaft. Then cut the sides at the bottom to fit where it mounts. The side tops and top are pretty much cosmetic.

IMG_0940sm.jpg

Hope to have one of these installed by the end of the week.

Matthew

IMG_0940sm.jpg
 
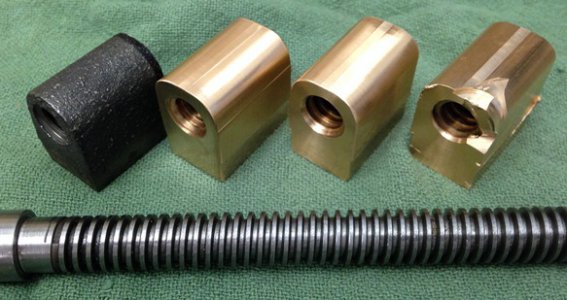
Cross feed nuts are complete.

IMG_0944sm.jpg

The one on the far right has some one-off customization. One must remember to tighten the vice..... :banghead:

Will try and install tonight to confirm fit and function.

IMG_0944sm.jpg
 
They look like they should work fine ... even the customized one, LOL.
 
Unfortunately the tapped hole to mount it is not deep enough

Will try again tomorrow
 
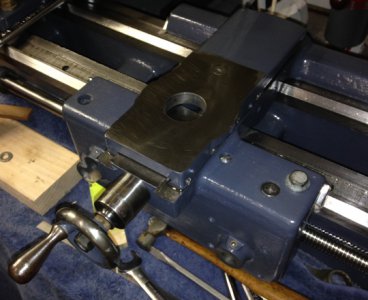
Success. I now have a saddle that is smooth with no back-lash. Nice.:allgood:

IMG_0983sm.jpg

Next step is the compound. I am missing a set screw for that. I am also still trying to source a 3/8-16 STI tap to repair the apron. Just do not want to spend $12 for a tap I will use once....


So now some bad new. I have a noise in my head stock that does not sound good. It is speed dependent. It is coming from the left side or the smaller bearing area. It sounds like something metallic rubbing.

Upon closer inspection I can see that the Bellville spring washer is spinning against the "C" clip.

Guess I know it is coming apart again so I can figure out why. :think1:

Matthew

IMG_0983sm.jpg
 
It is looking very nice!! However, I was hoping at this point to see a write up on putting a big fat readable dial on it.:thinking: Maybe even with 200 graduations ... hint, hint.
 
Mr. Ed.

That would be spending more $$. I know what you mean though. The reality of the matter is that my lathe does not get a lot of use. It is a nice tool to have around but if I use it a few times a month that is a lot. Alas, upgrading the dial, unless it fell into my lap was not on the list of things to do.

So, I found the source of the noise and it is fixed. I am getting good at taking the spindle apart. (Probably not something I should brag about)

The bellville spring washers were in backwards. They were pushing against nothing and hence were spinning. :*****slap2:

Once reversed and applying a load to the bearings I could tell the difference as I tightened the lock nut. Instead of just locking down now there was pre-load. All is good.

Learned a trick tonight. How do you get the spindle out without removing the front bearing? The woodruff key gets in the way. I

- take off the lock nut.
- Loosen the set- screw retainer for the smaller gear
- Keep the front bearing cover in place but remove the chuck.
- Tap the spindle from the rear. Keep your eye on the bull gear. As it hits the inside edge of the head stock slide it, the pulley and small gear towards to small bearing. This will reveal the spindle.
- Keep an eye out for the bull gear woodruff key as you tap.
- At some point, the rear of the spindle will slide out of the rear bearing. The spacer and lock collar will fall off. Keep tapping and watching the woodruff key.
- Once the bull gear just clears the bull gear stop tapping. Push the bull gear, pulley and small gear all the way to the left.
- Take a pair of long nose pliers and grap the woodruff key. Pull it out of the spindle. You will have to rotate it 90 degrees to get it out from between the bull gear and head stock.
- Now you can tap the spindle out farther to remove it, the bull gear, pulley and small gear.

Assembly is the reverse.

Saved me some time tonight.

Matthew
 
Ha!

So the Great Belleville Fiasco just makes you like everyone else, mate. Goes back to my standing advice to take more pictures and notes than you think rational. So many details thought trivial will loom large when it comes time to re-install stuff. It is also common folly to think you'll remember...

I'm envious of your compound nut. You're going to force me to buy one, I can see. So, you have had success with a new nut on the old screw? This obviously suggests the screws are the stronger of the two. You do not notice any drag from a worn section of screw, eh? Hmmmm....

On your stripped hole, if possible, just drill and tap to the next convenient size up and move on. It may be a bit sacrilegious to some, but it will work just fine and no one will know but you.
 
Back
Top