Long Chang LC-30A mill resto

I have a pile of 48.3 mm scaffolding pipe and a big box of assorted clamps. Very handy for knocking up a temporary gantry for a hoist among other things. Cheap to source second hand and new clamps are only a few dollars.
Now that would be a handy bit of kit to have around!
 
It has saved the day on many occasions. I have made feet from scrap and have some jack heads from the scrap yard that got soaked in the Molasses solution, water-blasted, wire buffed and painted. I can knock up a gantry to lift large items off a trailer in the drive in under 20 minutes. Jack heads alone are a good investment. Wood is amazingly strong but my garage is 20' wide so if I use one of the joists to dangle a hoist off I support as close as possible with the jack heads for extra safety.
 
I spent most of my adult life fooling around with sailboats. During that time I used more gallons of epoxy than I can remember doing all kinds of repairs and even made a stitch and glue dinghy. What Stefan did to tram his mill is quite common in building and repairing boats to make bases for winches and other fittings.

First thing is that anything that you don't want to glue together or for the epoxy to stick to you have to put on a thin film of mold release wax. This is especially important on the threads of screws and what they are screwed into if you every want to take it apart. Epoxy with no fillers tends to be brittle and is easily cracked. You can use just about anything you want as a filler. The most common fillers in boat work are microballoons and cabosil. Microballons make the epoxy very easy to sand. Cabosil on the other hand is made out of silica and makes it harder than rocks and will dull tools. Aluminum powder is another common filler. As is copper powder. You could probably use the fine grit from your power hacksaw as a filler.

Straight epoxy is pretty runny. As you add fillers it gets thicker. The most common consistency that I use is similar to the consistency of peanut butter.

If I was doing what Stefan did I would use thicker copper wire either "L" shaped at each corner or wrapped around the bolt like a crush washer and then tram the column first before squirting in the epoxy. With thickened epoxy you could push it into the gap with a putty knife and there would be no need for the foam that Stefan used to keep the epoxy from running. After a couple of hours and before the epoxy has fully cured I would remove each bolt one at a time just to break any bond with the epoxy.

If you could securely fasten a block to one of the beams in your garage you could run a cable through the block to a come a long to lift the mill onto its stand. First the base and table. Then the column and head.

My stand has wheels. When I brought it home I had it in 4 pieces in the back of my truck. The stand, base and table, head and column, and finally the motor. I slid the base and table onto the stand. Then I slid the column and head next to the base and table and rocked the column and head onto the base. Bolted it down. Attached the motor and wheeled it to its place in the garage. Broken down to its basic pieces makes it a lot easier to maneuver.

You'll figure it out.
Thanks, I've used the West epoxy system a bit in the past, microballoons and cabosil brings back memories of fibreglass boat repairs.

I think I'll rent a hoist to put it on the stand. Seems easiest and safest to me.
 
Just checked the spindle pulley with a magnet and it is actually steel.
I’m kinda surprised.


Sent from my iPhone using Tapatalk
 
Next step?
Rented a hoist so I can get the mill off the floor and onto its stand for cleaning etc.
I've determined that it's final location will allow me to build a small gantry using the 3-ply 2x12 beam my garage as one side of the gantry. That way I can lift the head as necessary during the cleanup.
 
All righty folks.
Big progress tonight.
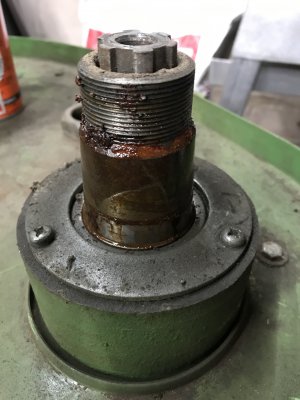
I stopped by a local store with the intention of buying a puller to liberate the spindle pulley.
Turns out they have a program where they sell you the tool and you can bring it back and get a full refund. How cool is that?
So I pulled the puller out of the case and pulled the pulley. (see what I did there? ;) )

A bit of clean up required here!
spindle top.jpg

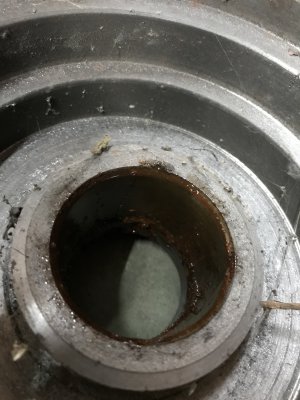
Pulley bore.
pulley bore.jpg

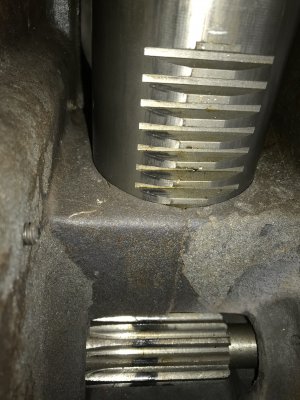
Since I had the sheet metal off I snapped a couple of the inside of the head. Not a pretty sight. For some odd reason there were two pieces of corrugated cardboard inside the head. Odd, very odd...
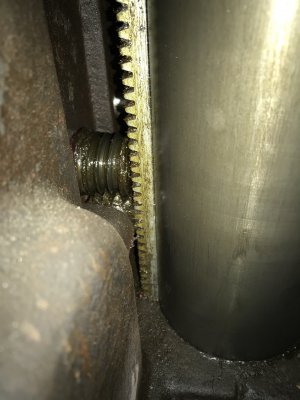
head 1.jpg

head 2.jpg

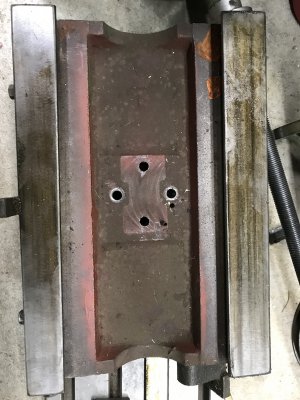
Then I pulled the table. This is the top of the Y-axis. A bit of cleanup required.
I didn't take a pic of the lead screw but it's in excellent condition.
One thing I noticed is that that nut isn't split to allow for backlash adjustment like I've seen on other RF's. Which would explain why I don't have a hole to make any adjustment. Yes, those are spider webs...
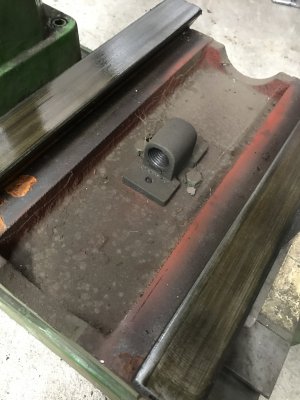
table bottom.jpg
Here's the bottom of the Y-axis. This was pretty challenging to remove because I had to unbolt the leadscrew nut by sticking my ratchet underneath and try to locate the bolt and loosen it.
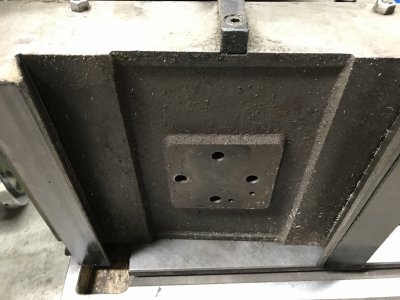
Y axis.jpg

Y axis 2.jpg

Overall I'm impressed by the condition. Bolts came loose easily which is always my hope. The only thing that was a problem was the Y-axis gib would not come out by turning the adjustment screw even when the lock was fully removed. That will need some investigation.
 
Last edited:
Back
Top