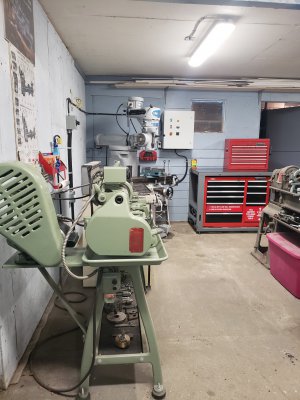
Machining work bench

Hey Guys, so I finally got a decent tool box to hold my machining tooling...

Craftsman 41inch tool chest...
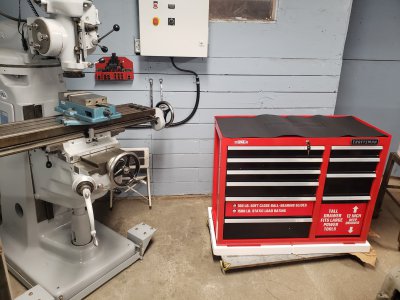
20201225_122524_resized.jpg
To house the tool chest I decided to build a nice sturdy metal work bench. It will be really nice have to have a bench near the Mill and lathe.

So the plan is to build a sturdy metal frame around the tool chest and then put a 1/4in steel top on it. This is just a work bench NOT a welding table, so a really thick top isn't required.

I'm also going to incorporate a system so that the bench can have wheels that raise/ lower if I want to move it.

Here's all the steel that will soon become a bench...
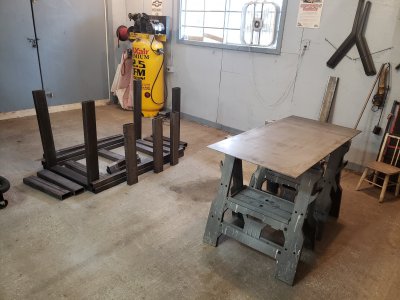
20201225_122601_resized.jpg

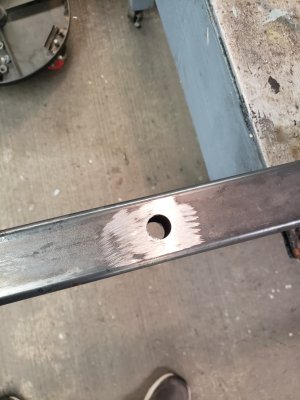
I used my mill to drill out holes in the front and back pieces of the frame.
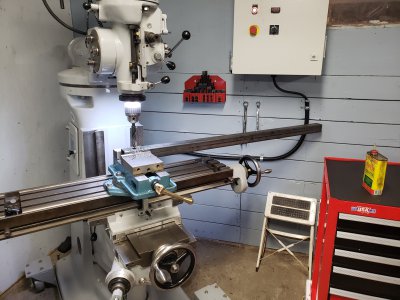
20201226_133658_resized.jpg
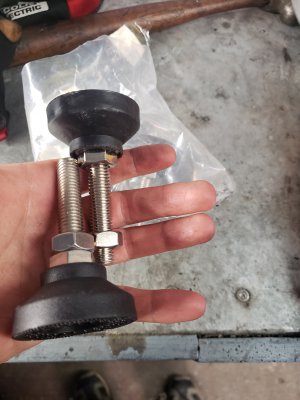
The holes on the bottom frame will be for leveing feet...
20201228_144046_resized.jpg
20201226_151315_resized.jpg
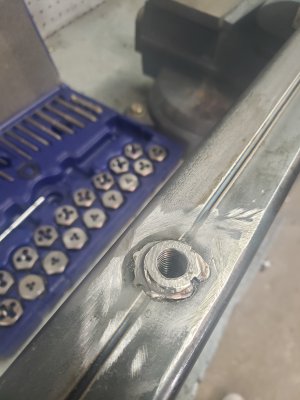
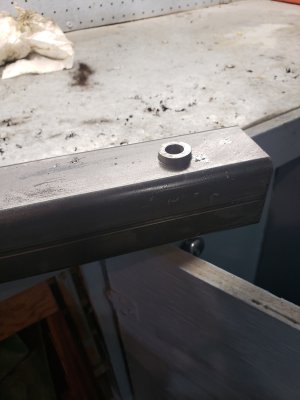
I cut to length some 3/4in steel round stock and pre-drilled to size the ID for threading.
20201226_152311_resized.jpg
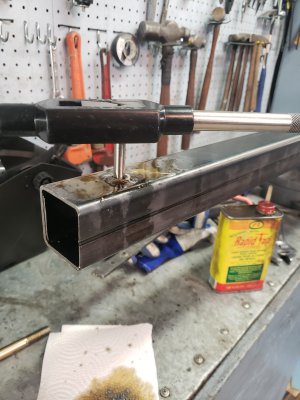
Next the round stock was welded in place and threads cut through the whole 2.5in length...
20201228_144051_resized.jpg
20201226_171234_resized.jpg
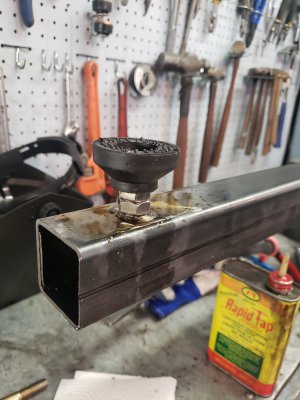
pre-fit of leveling feet...
20201228_144217_resized.jpg
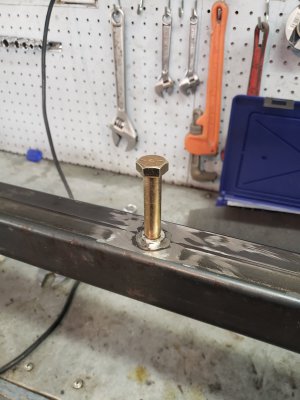
I used the same process for the top frame. The threaded holes in the top frame are to allow attachent points if the bench needs to be hoised in a truck etc... 1/2-13 bolts can be used.
20201227_145100_resized.jpg
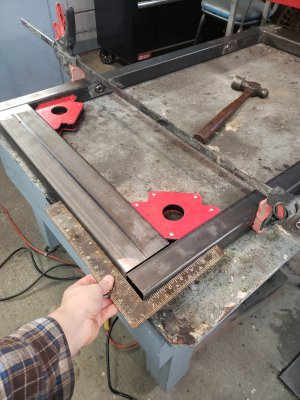
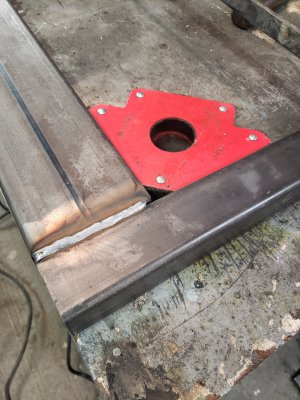
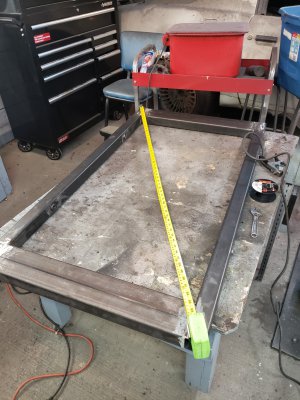
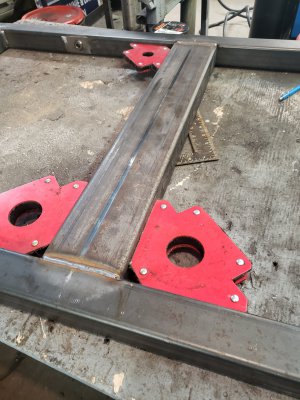
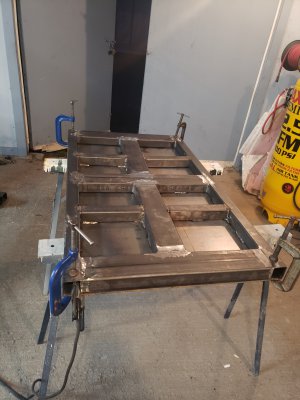
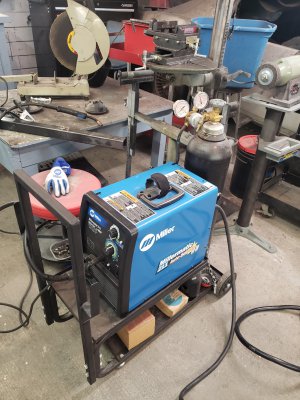
Now that that was done it was time to start building the the frame for the top out of metal 2x2 and 2x4 (1/8 wall). Yhe dimensions for the top is 28in wide × 50in long.
20201227_135335_resized.jpg
20201227_163418_resized.jpg
20201227_163612_resized.jpg
20201227_165801_resized.jpg
20201227_171437_resized.jpg
20201228_170402_resized.jpg
20201229_165239_resized.jpg

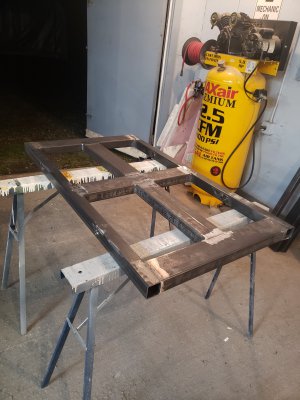
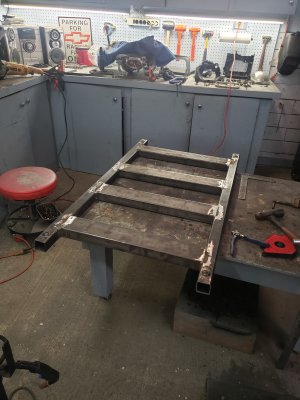
Next up was to build the bottom frame that supports the tool chest...
20201229_161720_resized.jpg
I ran out of welding wire, so that's as far as I got for now.
 
I proabbly would have left the mill scale alone in an ideal world.

However, It was raining hard the day I picked up all the steel and it all got wet in the back of the truck and to make matters worse the top sat in the rain in the bed for an extra hour, because I had to wait for a friend to help me unload it as it was just a little to heavy to carry myself.

I blew everything off with an air hose and dried it with rags when I got the steel in the shop but the top in particular still got quite rusty and when when I removed the rust with a wire wheel what was underneath looks aweful. So i'm sort of stuck removing it.

Your right I could proabbly paint the top, but I think it would get scratched pretty bad over time. My plan is to remove the mill scale, then sand it with increasingly higher grit sand paper until it has a nice finish, then heat it up just a little with a blow torch and rub oil into it when its warm for rust resistance. I don't tend to have to worry much about rust as my shop is kept at at 50-60F in the winters and isnnsulated with vapor barrier, so that should be enough to keep the top from rusting.

**If it was in a garage where wet cars were parked regularly painting might be the only option**
I think your polished top will be very nice. The work will bear good rewards every time you use it. Maybe keep cardboard, MDF, or similar on hand to cover it when completing tasks that may mar or scrape the surface?
 
I think your polished top will be very nice. The work will bear good rewards every time you use it. Maybe keep cardboard, MDF, or similar on hand to cover it when completing tasks that may mar or scrape the surface?
Thanks ya I think it will look nice, I'm not going to go too crazy on polishing it just want it to have a decent shine and smooth surface.

Ya, I could use something like that to protect the surface and I may do that depending on the task, but I think geberally it'll be ok it is a work bench after all so the odd scratch is ok. Also despite its heavy construction I actually don't forsee a lot of heavy work happening on the top, its more or less just going to be a place I can setup and clean up tooling etc... for the mill and lathe, I don't plan to use it as a fab or welding bench.

But it sure will be nice to have a place to set stuff up right next to the machines, right now I have to walk the other side of the shop as there were no benches by my Mill and lathe and because i'm some times lazy I tended to set stuff up on the top of the old kitchen stove that lives between my machines which was a bad place to put things and work on setup.
 
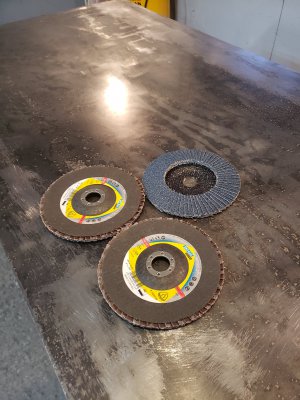
I also thought I'd let you guys know I went out today and visited the local tool place and got some flap wheels for my grinder (no-multi surface pad avaliable)
Frusteratingly they did not have hardly anything for 7in grinders, but I got 3 6in flap wheels instead. Hopefully they still work in the 7in grinder.
20210115_164918.jpg Hopefully I can get that aweful mill scale off now. I've got to work at least half the day tomorrow but sometime this weekend i'll try to get the scale off.

Also dropped off 13 of my drill bits that were dull for sharpening today, and while driving ther and back I thought about how to stop the play sizor jacks when the wheels are lowered...
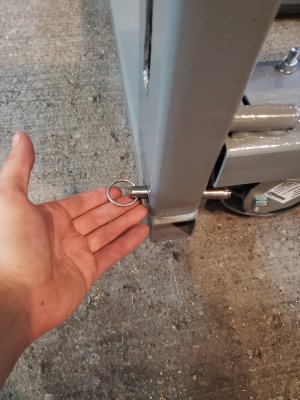
I think i've got a simple plan, I'll drill a hole in each front leg and weld on a corresponding thick walled tube on the top of the metal 2x4 that the casters are mounted to. I'll then use a remove able pin to hold everything steady when the wheels are down. and when I want to raise the wheels I'll just pull the pin out. I even have the materials I need laying around the shop to make this setup.
 
I also thought I'd let you guys know I went out today and visited the local tool place and got some flap wheels for my grinder (no-multi surface pad avaliable)
Frusteratingly they did not have hardly anything for 7in grinders, but I got 3 6in flap wheels instead. Hopefully they still work in the 7in grinder.
View attachment 351283 Hopefully I can get that aweful mill scale off now. I've got to work at least half the day tomorrow but sometime this weekend i'll try to get the scale off.

Also dropped off 13 of my drill bits that were dull for sharpening today, and while driving ther and back I thought about how to stop the play sizor jacks when the wheels are lowered...
I think i've got a simple plan, I'll drill a hole in each front leg and weld on a corresponding thick walled tube on the top of the metal 2x4 that the casters are mounted to. I'll then use a remove able pin to hold everything steady when the wheels are down. and when I want to raise the wheels I'll just pull the pin out. I even have the materials I need laying around the shop to make this setup.
Good idea. Wonder if you could even drill a hole and slide a pin through the side of the 1" square tube and the tube on which the casters are mounted to.
I see several potential advantages.
-- no need to weld on your nice paint job.
-- you could use pins to lock both front and back if ever needed
-- no need to have excess holes in the front of the legs (cosmetic only).

Of course this means you couldn't lock them until you get access to the sides. May also be suboptimal depending on how tight of a fit the cabinet is
 
I suppose another approach to avoiding more welding but with out losing the front-access pins would be to lower casters, insert pin from front, and raise rhe casters slightly until their tube stops at the pin.

Just some ideas.
 
Good idea. Wonder if you could even drill a hole and slide a pin through the side of the 1" square tube and the tube on which the casters are mounted to.
I see several potential advantages.
-- no need to weld on your nice paint job.
-- you could use pins to lock both front and back if ever needed
-- no need to have excess holes in the front of the legs (cosmetic only).

Of course this means you couldn't lock them until you get access to the sides. May also be suboptimal depending on how tight of a fit the cabinet is

I suppose another approach to avoiding more welding but with out losing the front-access pins would be to lower casters, insert pin from front, and raise rhe casters slightly until their tube stops at the pin.

Just some ideas.
Those are all great ideas, I appreacite you taking the time to share them. I will take them under consideration.

I don't really mind having to weld again and repaint, i've got about 1/3 of the 1 quart paint can left so I should have plenty left to touch up from welding.

I am going to try to maintain the ability to not have anything stick past the sides as its quite possible the bench could one day end up being pushed up beside something. But I could potentally add rear locking pins, if the front pins alone don't feel sturdy enough.

Thanks again for taking the time to give me some good ideas.
 
Hey everyone, so I had hope to finish the bench this weekend but had to work half the day yesterday and also today which cut into my time, however I did manage to get the lock pin system for when the caster are down finished.

The whole lock pin system was just made out pieces of spare thick walled round stock I had laying around.

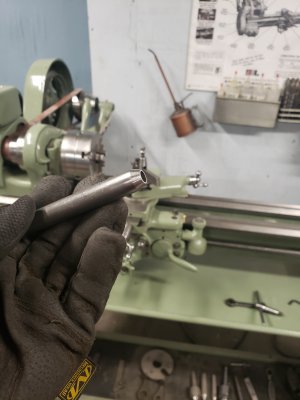
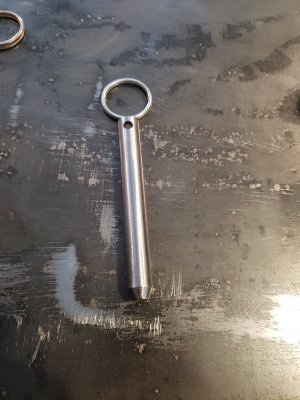
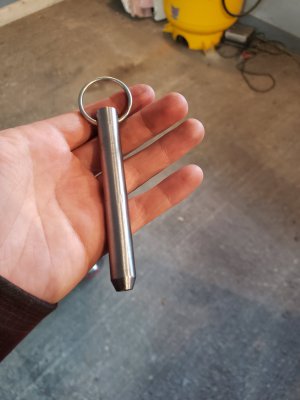
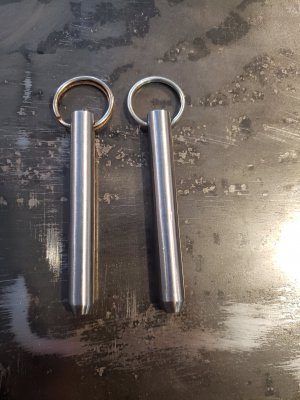
First step was to make some pins...I used thick wall 1/2 round stock. Aftwr cutting to length I used my SB 9a to machine some tapered ends on them
20210117_120444_resized.jpg
That was followed by drilling some holes for the rings in the end and polishing. I think they turned out pretty good for pieces for left over steel.
20210117_121730.jpg20210117_121754.jpg
20210117_122540.jpg
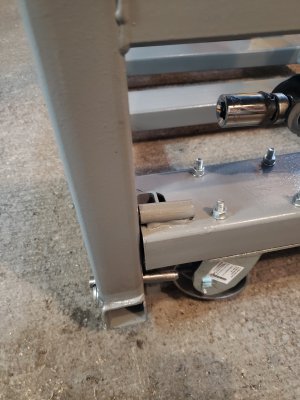
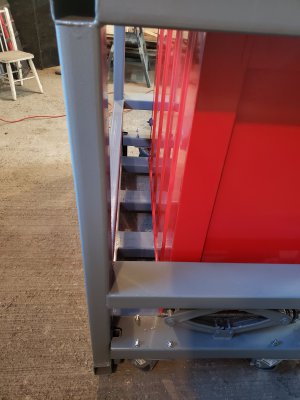
Next up I drilled some holes in the front legs and added a 'sleeve' for the pins to slide into and repainted the area when it was done. I also leveled the whole thing befor welding eveything in place...
20210117_124603.jpg
20210117_143348_resized.jpg
20210117_143353.jpg
Just to be clean when the wheels are down the pins do slide inside that little tube, I just forgot to grab a picture until I had raised the wheels...

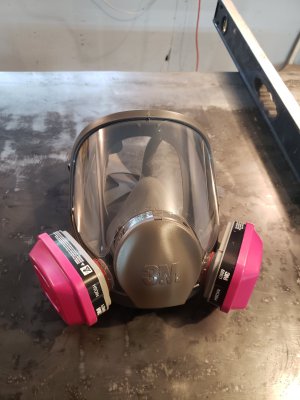
Since i'm in my early 30's and want to be working in the shop for a long time without causing myself health problems i'm fairly big into safety items.

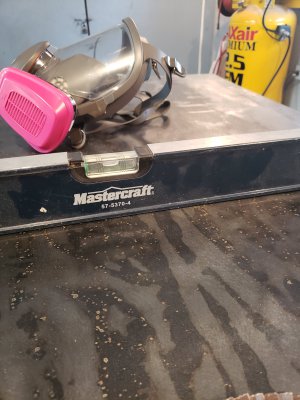
My old dust respirator broke in a non-repairable way (after 10-12 years of service) so I picked up a new 3M respirator and filters. It seems pretty nice and i'm happy with it.
20210117_124554.jpg
I'll use the respirator for all my grinding and NON-Paint 'hazzardous' type work. I use a supplied air reapirator for paint work to be extra safe.

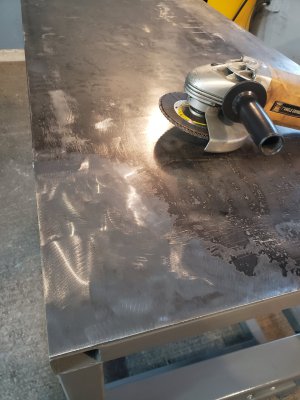
I didn't have enough time to strip the whole top today, but I gave the flap disc on the grinder a try to see how it works...this represents 3-4min of work on the top
20210117_143321.jpg
So based on that i'm guess 1-2hours hours work should get the top looking how I want it.
 
Sorry guys, I forgot to mention the the 2 locking pins work great, they eliminated 90-95% of the movement the table had with the wheels down which is very acceptable for my purposes and i'm happy with how the system works now.

I could proably eliminate that last little bit of movement (less than an 1/8in at the top) by adding rear locking pins, but its so minor I don't see much point, espcially since the wheels will only be down when it is being moved, when I work on it, the bench will always be sitting securely on the leveling feet.
 
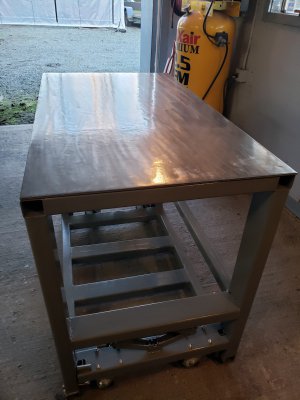
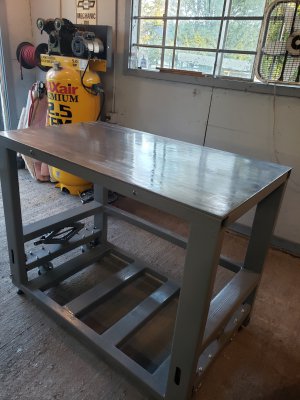
I finally got around to getting rid of all that mill scale on the top today and it was a pain, but its all gone. I was going to spend a lot of time polishing the top to perfection, but after thinking about it, I decided that was kind of silly since this is a work bench and will be used for work. Anyway here's what I ended up with... and i'm happy with it.
20210121_155130_resized.jpg20210121_155157_resized.jpg
The top looks a little shiney because I gave it a lite oil rub down for rust protection, after its had a few days to soak in I'll clean the top with some cleaner so it doesn't attract dust.

Next up was installing the tool box...
20210121_160257_resized.jpg
20210121_160301_resized.jpg
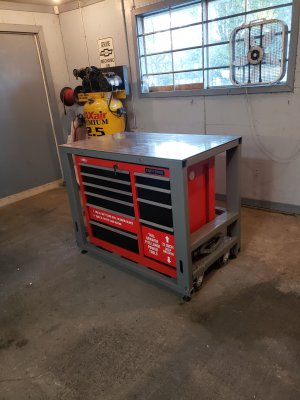
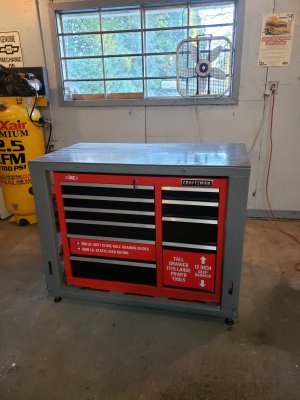
The tool box fit exactly as planned.

There is a little space behind the box, trying to think if there is anyway I can make use of it...
20210121_160315.jpg

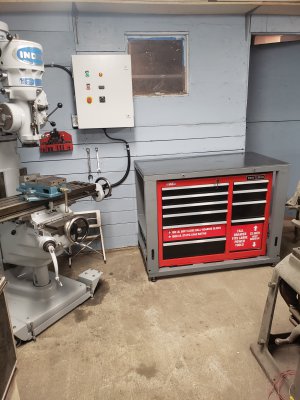
Next up I put the wheels down and easily rolled this 600lbs beast (with the tool box) into its place, then wheels went back up and its rock solid and ready to go.
20210121_163623_resized.jpg
20210121_163645.jpg
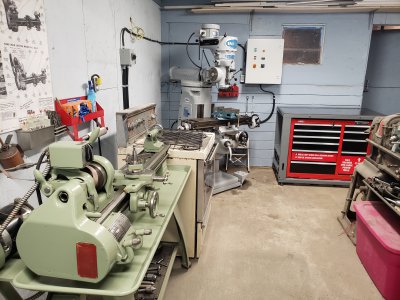
I think my solidly made machine bench looks right at home next to the machines. The lathe on the right of the picture is a SB 13 that I really need to get working on restoring... but that's for another day.

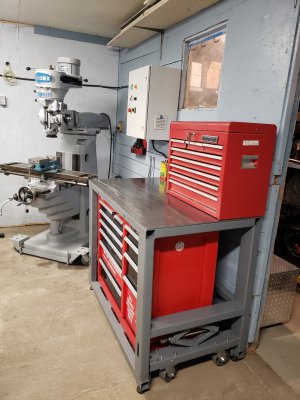
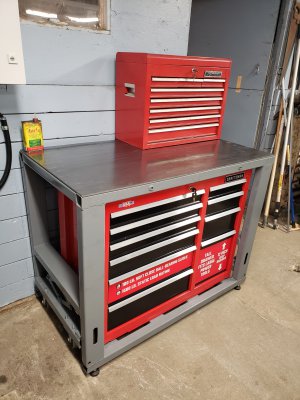
I had a mastercraft top chest that I had been using to store my tooling, I transfered the tooling to the new tool chest but figured might as well keep the top chest for now. I may sell the top chest at some point...20210121_165245_resized.jpg
20210121_165217_resized.jpg
One last picture...
20210121_164840_resized.jpg
Its sure going to be nice having that bench right by the mill, perfect for setting things up on.

Well I guess that about wraps up this project.
 
That looks very, very nice!
I suggest you keep the top box. Eventually (probably sooner than you think) you'll need the space for storage and it'll cost a lot more to replace if you buy new.
 
Back
Top