MachTach Kit information

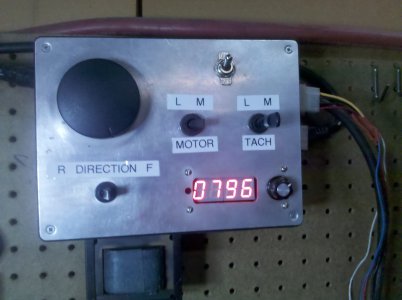
I got one for my lathe. Works great. Best thing is that you can easily change to surface feet per minute instead of rpm so you know the speed of the actual cutter.

When I built mine I just had the directions from the web site up on the screen and followed the directions so I could see the pictures as I went.

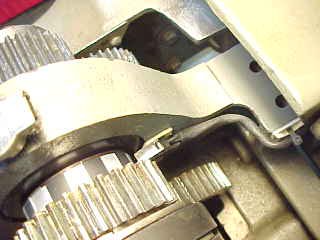
It is also modular (Sensor plugs in) so you could get one unit and change between a lathe and mill if you had sensors put on both.
 
I have a machtack that i switch between my lathe and mill, I mounted it in with the motor control that also switches between the two, i use the large treadmill motors on both. I have had excellent luck with the mach tack, I actuall leave it set on the FPM more than the tack as that is what you are really looking for anyway.

IMG_20141018_175415.jpg mvc-576e.jpg
 
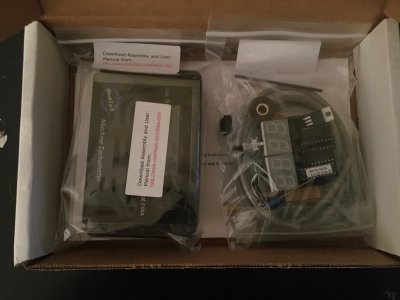
Thanks for all of the input everyone. I just got my kit in the mail today. Now I guess I know what I am going to be doing this weekend! With me luck on my first electronics project!


IMG_0113.JPG

IMG_0113.JPG
 
Thanks for all of the input everyone. I just got my kit in the mail today. Now I guess I know what I am going to be doing this weekend! With me luck on my first electronics project!


View attachment 92427

IMO you will do fine. If it were me... I would practice soldering a bit before going after the kit.
Use a small tip low wattage soldering pencil to solder... excessive heat is not good.

How about a build thread... :)
 
IMO you will do fine. If it were me... I would practice soldering a bit before going after the kit.
Use a small tip low wattage soldering pencil to solder... excessive heat is not good.

How about a build thread... :)

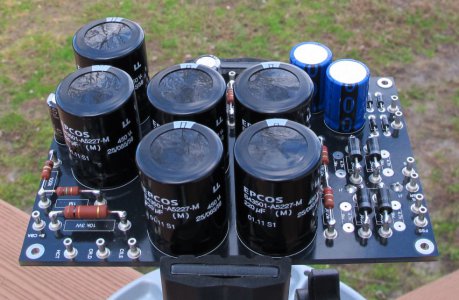
Negative Gyro bad idea on that low wattage iron. If you want pretty solder joints like this board below here are a few tips.

1. Use lead solder its a lot easier. Lead free solder takes more practice. Did you know critical components are exempt from RoHS lead free regulations by the way.

2. The trick to soldering well is transferring the heat very QUICKLY from the iron to the components, then pulling off QUICKLY. You don't want to hold a low wattage iron on the components, the longer you do the more the heat soaks out into the board and components. Typically this is why things go wrong soldering, not enough wattage resulting in having to hold the iron on longer and thus heat soak.

3. Your components and board need to be clean, and ideally pre-tinned. Your iron also needs to be clean, heat it up, wipe it on a damp sponge to clean off the crud, and apply some solder to tin the tip. Again its about transferring heat quickly and if the iron, components, and board are tinned you are mostly heating the solder, it wets out and flows fast, you will get very quick heat transfer indeed.

4. Use heat sinks to isolate the components from the heat. Go to Radio Shack, they sell packages of 'flat' tipped chrome alligator clips, no teeth, they are quite small, cheap, and make excellent heat sinks.

ps3.jpg

ps3.jpg
 
Negative Gyro bad idea on that low wattage iron. If you want pretty solder joints like this board below here are a few tips.

1. Use lead solder its a lot easier. Lead free solder takes more practice. Did you know critical components are exempt from RoHS lead free regulations by the way.

2. The trick to soldering well is transferring the heat very QUICKLY from the iron to the components, then pulling off QUICKLY. You don't want to hold a low wattage iron on the components, the longer you do the more the heat soaks out into the board and components. Typically this is why things go wrong soldering, not enough wattage resulting in having to hold the iron on longer and thus heat soak.

3. Your components and board need to be clean, and ideally pre-tinned. Your iron also needs to be clean, heat it up, wipe it on a damp sponge to clean off the crud, and apply some solder to tin the tip. Again its about transferring heat quickly and if the iron, components, and board are tinned you are mostly heating the solder, it wets out and flows fast, you will get very quick heat transfer indeed.

4. Use heat sinks to isolate the components from the heat. Go to Radio Shack, they sell packages of 'flat' tipped chrome alligator clips, no teeth, they are quite small, cheap, and make excellent heat sinks.

View attachment 92428

Thanks for the Tips. In high school and college I built a few small electronic kits. One of them when I was about 12 was a Sinclair computer. It was a 16 bit machine with super low res output. It was fun to learn some basic programing on. I also spent 5 years as a plumber, so am familiar with how soldering works and controlling heat. I have welded lead for old school shower pans, and braised brass fittings, sot I am confident I will get through it ok. I will get the alligator clips though, I appreciate the tip. Worst case is that I fry a part and have to replace it. The cool thing will be using after I complete the assembly.

Thanks again everyone for all the help!
 
Negative Gyro bad idea on that low wattage iron. If you want pretty solder joints like this board below here are a few tips.

1. Use lead solder its a lot easier. Lead free solder takes more practice. Did you know critical components are exempt from RoHS lead free regulations by the way.

2. The trick to soldering well is transferring the heat very QUICKLY from the iron to the components, then pulling off QUICKLY. You don't want to hold a low wattage iron on the components, the longer you do the more the heat soaks out into the board and components. Typically this is why things go wrong soldering, not enough wattage resulting in having to hold the iron on longer and thus heat soak.

3. Your components and board need to be clean, and ideally pre-tinned. Your iron also needs to be clean, heat it up, wipe it on a damp sponge to clean off the crud, and apply some solder to tin the tip. Again its about transferring heat quickly and if the iron, components, and board are tinned you are mostly heating the solder, it wets out and flows fast, you will get very quick heat transfer indeed.

4. Use heat sinks to isolate the components from the heat. Go to Radio Shack, they sell packages of 'flat' tipped chrome alligator clips, no teeth, they are quite small, cheap, and make excellent heat sinks.

View attachment 92428
In My opinion, most of what you say is correct. However, I disagree with your comment on low wattage irons.
A low watt iron (say around 25w) is perfect for soldering small components to a pc board, especially IC chips. As long as a fine gauge solder is used (Yes, leaded is best). Heat sinks are great for certain applications but are a unnecessary waste of time soldering ICs, when it can be done safely and quickly by using proper technique.
Also, The circuit you have in the picture is nothing like the MacTach kit, not the same type of soldering, at all.

I think you are making a bunch of assumptions, I solder IC's and tiny components under a magnifying glass all with the same adjustable to 50 watt station and pencil tip. Nothing wrong with a quality 25 watt iron, I'm saying avoid those $9 cheap 15 watt irons. Here's my station its nothing fancy http://www.mscdirect.com/product/details/83725192
 
I agree with the previous comments [including cooledge's selection of soldering stations even though it is about 4 times the price of the MachTach kit itself :phew:] but feel that item number 3 with any reasonably good iron is the most important item ...

3. Your components and board need to be clean, and ideally pre-tinned. Your iron also needs to be clean, heat it up, wipe it on a damp sponge to clean off the crud, and apply some solder to tin the tip. Again its about transferring heat quickly and if the iron, components, and board are tinned you are mostly heating the solder, it wets out and flows fast, you will get very quick heat transfer indeed.

The very nice Weller Soldering Station along with an assortment of tip styles that cooledge and I have means nothing if #3 is not followed.

At least that has been my experience.
 
I have the same Weller soldering station and have been doing thru-hole soldering and some Surface mount for most of my life. Anyway I have my iron set to 700 degF most of the time and almost never use a component heatsink. If your timid then a heatsink might be a good idea but anyone with experience in melting metal to join parts in almost any form should have not real problem with electronic scale soldering.

As for the MachTach. It looks like a great addition to the tools. I think I am going to have to get one or two (or four ...)
 
Back
Top