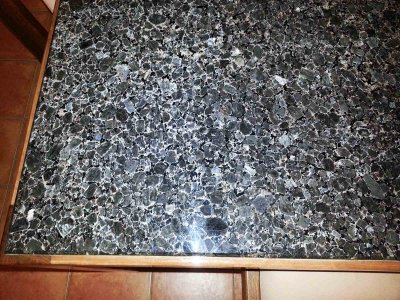
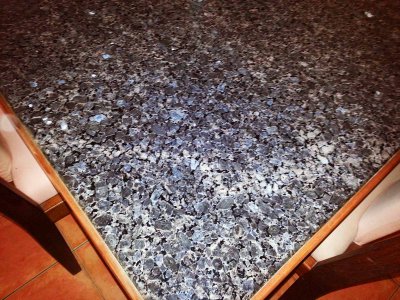
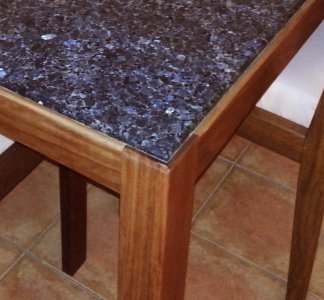
Made a granite topped family room table with Ironbark frame

Ed.

Active User
Registered
Joined
Aug 31, 2011
Messages
164
Hi, I had this granite slab for quite a while whilst waiting for my Ironbark timber to dry, had to cut it to size, square it and do the chamfer on the edge, polished it up and
then sealed it to protect the surface from food spills etc.

The legs are "L" shaped and joined to the sides with Titanbond 3 wood glue, made a 10mm recess around the sides and the top of the legs for the slab to sit inside. There are also 2
pieces of timber under the slab to support it. Where they join on to the sides there is a glued block on either side of them to glue the crosspieces to the table sides.
In addition there are two pieces of dovetailed timber which are glued at 90 degrees in the inside corner of the legs and overlap the the side timbers to tie the legs to the
sides, as well as 10 stainless screws just in case the glue cracks, with that much weight I don't want a leg to crack off if it gets bumped. It took 2 other guys and myself to
get this table inside the house from under the carport where I built it.

I glued the whole lot with Titanbond 3 but it didn't stick to the granite, so when I took the sash clamps off, the entire timber frame separated from the granite. I then had to clean up the glue and then used
Sikaflex-11FC which worked well. Had to wait for two days for the Sikaflex to cure before I took the clamps off.

The 4 Jarrah chairs were made 19 years ago for a Jarrah dining table I made, I made 10 chairs but it was too crowded with that many and so I ended up with these 4 as spares. Over
that period of time the Jarrah has darkened and now is almost a perfect colour match for the Ironbark timber. The granite table colour changes with the direction of light and
ranges from steely metallic grays with pink and cream highlights to grey, white and black.

The Ironbark timber is coated in Cabots interior/exterior clear gloss polyurathane which will give it good protection from food and moisture or liquid spills.

Cheers

Ed.
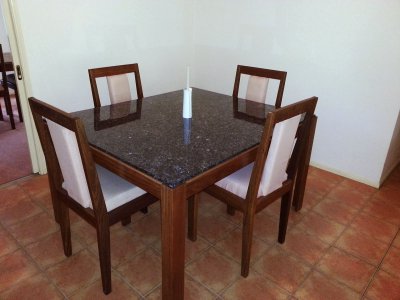
Table 1 142331.jpg Table 2 142618.jpg Table 3 142447.jpg Table Leg corner 4142437.jpg
 
That is a beautiful table and chairs. Wish I had talent to make something like that. Very nice!


Sent from my iPhone using Tapatalk
 
Simple but elegant, great job!
This is the furniture which can last for decades not just for the robustness, but also for the style without fashion frills which will make it look outdated and funny in a couple of years (before to return as "vintage style" after 30 or 40 years :D).
That granite is fantastic!
Is it typical from your area?
 
Hi, Thanks guys, this style of table is fairly easy to make, but the chairs... well that is another matter, they are a real pain to make.

As for the granite, I am not sure where it originally came from, definitely not from around here, I was visiting a monumental mason trying to find some slabs of granite to make some paving, as soon as I saw it I knew what I would do with it and bought it on the spot. I think it is a natural rock but not sure what type/name it really is, it looks like a heap of some type of gravel at been deposited somewhere and then solidified together under pressure and heat. I used a diamond cut off disk attached to a 9" grinder to cut it to shape and bevel the edges, took several hours and then the final polish up using diamond impregnated rubber pads from 50 to 3000 grit. I was also lucky that it was 20mm thick and not like the others I bought which were 30mm thick, otherwise it would be extremely heavy.

The missus is quite happy with it, so I am in the good books for a while :)) and also now she can use the carport again.

Cheers

Ed.
 
I really like the clean simple design of the chairs and table. Like others have said, it's a timeless style. I'd really like to see a photo of the underside of the chairs to see how they're put together. I'm assuming you used dowels in most of the joints. It can be a challenge to make a sturdy chair with no bottom bracing on the legs. Nice job.
 
Looks really nice. Good idea to use that granite. It will be a lot lighter than if you had made the top out of that ironbark :)

- - - Updated - - -

As for the granite, I am not sure where it originally came from, definitely not from around here,


The granite would be usually called Labrodorite. It might or not actually be from Labrador but that is where the stuff like that was first from.
 
Beautiful!


Slick way to get a surface plate into the dining room!:))
 
I really like the clean simple design of the chairs and table. Like others have said, it's a timeless style. I'd really like to see a photo of the underside of the chairs to see how they're put together. I'm assuming you used dowels in most of the joints. It can be a challenge to make a sturdy chair with no bottom bracing on the legs. Nice job.

Hi xalky, when I made those chairs it was 19 years ago and they and the Jarrah table were my first attempt at making furniture. I had intended to use dowels to join the chair components but due to my lack of experience and lack of the right tools my attempts at putting in dowels were a total disaster, I could never drill the holes accurately and straight enough with the result that the dowels would never line up properly or fit, so in the end I just glued them together with PVA glue. I also didn't know that there were different qualities of PVA glues, so just went out and got the cheapest glue available which was a big mistake as after several years the glue I used in half the chairs started to crack. The other half of the chairs were glued with a different brand as I had run out.

So I reinforced all the corners under all the seats by gluing in a triangular piece of 35mm thick Jarrah timber (from the leftover scrap) with 100mm sides into each corner and then put in 2 socket cap recessed galv. wood screws at the ends, this seem to do the trick as it has been about 7 years since I have needed to reglue anything. Those chairs even survived my kids growing up and climbing all over them but I certainly wouldn't lean back on them. Unfortunately only one glued surface would crack at any one time so I couldn't really fix it properly without the risk of breaking off a piece of the remaining joints, so I filled a syringe and needle with glue and squirted the new and better glue into the loose joints, where possible if there was enough room I would try to roughen up the two mating surfaces. Seems to have worked so far, if I had to make more I certainly wouldn't build chairs again without dowels, even if I had to pay a cabinet maker to drill the holes for me, it would be worth it.

Oh well, I suppose that's how you get experience! live and learn.

Cheers

Ed.
 
When you built those chairs, they probably didn't have biscuit joiners either. A biscuit joiner works really well for those types of joints. File that in the back of your mind for any future projects. It's really hard to screw up a biscuit joint because the biscuit jointer has a blade height and depth adjustment and you can buy different size biscuits. You can get a decent biscuit joiner for about $100 around here. Well worth it .

Still a nice job.:))

Marcel
 
For those who wanted to know what the slab is, I spent some time today going through hundreds of pics of granites on the web (drooling for the most part) and I think that my slab is a variation of Granite - Bahia Café, from Brazil. There are a lot of variations of this granite type, ranging from almost exact to not even close to mine, but I am about 95% certain that it is mine. As it is a natural rock there is a huge variation of colour and internal structure, and mine is more steely grey/cream than the general brownish colour theme.

I never realized how many variations of granite there were till I started doing Google image searches on granite.

Cheers

Ed.
 
Back
Top