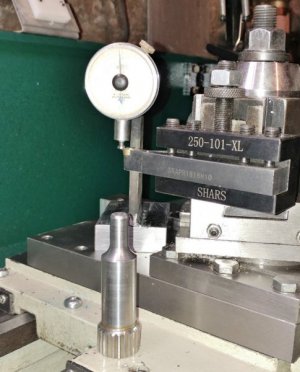
Making Tips for a Dial Indicator

cathead

CATWERKS LTD
Registered
Joined
Feb 7, 2013
Messages
2,485
The project started while building a comparator stand and looking at several forlorn looking dial indicators with parts
missing. The indicator tips were gone as well as the plastic dial covers were unusable or missing. Apparently the
plastic dial covers have a tendancy to shrink over time so they were with the indicators but would not stay affixed to the
front of the indicator. I did have some nice .125 inch plascic sheet so cut some rounds of the approximate right
size and ground them on the disc sander till they fit the outside plate of the indicator. The only problem was that the
needle would rub on the face of the cover... To make that work, I put some pressure on the center of the lens
and applied some heat with a heat gun to make a convex lens that would clear the needle. That worked well enough
to be acceptable so used some cyanoacrylate to glue the lens to the face of the indicator.

The missing tips is where this project was getting interesting. My material was 3/16 brass rod and the object was
to make some tips with 4-48 thread for the indicators. It was easy to run the lathe with a 48 pitch but to accurately
see the threading required two pair of 3.0 reading glasses! Actually it went pretty well and the tips turned out
just fine.

My comparator stand project which gets worked on occasionally finally had an indicator on it that was usable so
am including a photo of that as well.

Anyway, the project was basically done on the cheap and I didn't have to buy anything as it was all fabricated.

Here's a couple photos of the indicator project as well as the comparator stand in relative completion.
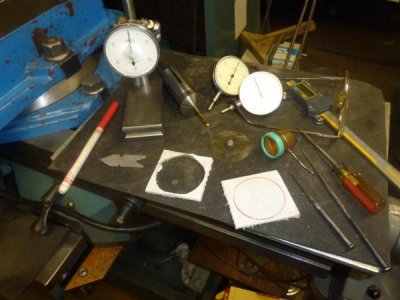
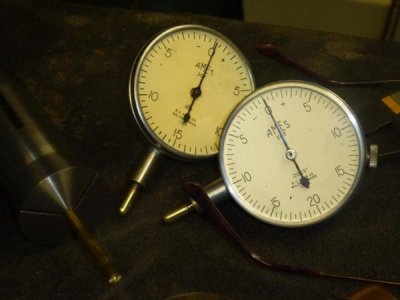
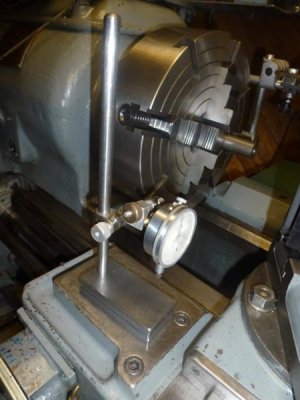
P1020132.JPG


P1020131.JPG


P1020133.JPG
 
The stand is looking good cathead, the brass tips look nice, you should get your-self a Visor Magnifier for those hard too see items.
 
The project started while building a comparator stand and looking at several forlorn looking dial indicators with parts
missing. The indicator tips were gone as well as the plastic dial covers were unusable or missing. Apparently the
plastic dial covers have a tendancy to shrink over time so they were with the indicators but would not stay affixed to the
front of the indicator. I did have some nice .125 inch plascic sheet so cut some rounds of the approximate right
size and ground them on the disc sander till they fit the outside plate of the indicator. The only problem was that the
needle would rub on the face of the cover... To make that work, I put some pressure on the center of the lens
and applied some heat with a heat gun to make a convex lens that would clear the needle. That worked well enough
to be acceptable so used some cyanoacrylate to glue the lens to the face of the indicator.

The missing tips is where this project was getting interesting. My material was 3/16 brass rod and the object was
to make some tips with 4-48 thread for the indicators. It was easy to run the lathe with a 48 pitch but to accurately
see the threading required two pair of 3.0 reading glasses! Actually it went pretty well and the tips turned out
just fine.

My comparator stand project which gets worked on occasionally finally had an indicator on it that was usable so
am including a photo of that as well.

Anyway, the project was basically done on the cheap and I didn't have to buy anything as it was all fabricated.

Here's a couple photos of the indicator project as well as the comparator stand in relative completion.


View attachment 259531


View attachment 259532


View attachment 259533
Cathead, just last week I made an indicator tip for an Ames dial indicator. Talk about coincidence! I could have bought a tip but what I needed was one which was adjustable. I single point threaded the 4-48 thread. My first attempt failed when I broke the threaded portion as I was nearing completion. I resharpened my threading tool and carefully adjusted the tool height to be dead in center and the next attempt was successful.

My intended use, ironically, was a precision tool height adjustment gage. Here is the gage and a height standard that I made for calibration. Tool Ht. Gage .JPG
 
Hi RJ,

That's interesting. The Ames dial indicators are really well made tools. I obtained a big lot of Ames indicators on E-Bay
several years ago. They all needed some sort of repair so the price was right. On threading 4-48, I sharpened my
threading tool to a point and it seemed to work fine with the brass rod. I may give it another go this morning and try
some threading on some sort of steel for a few more tips. I don't spend a lot of time setting tool height but maybe
the exact height is important in some setups. I can see you pay particular attention to the exact height. I am more
likely to set the height using a visual aid(loupe) than to actually use a measurement. It seems to work for me. At
times I will use a little stand I made with a mark scribed on it for height settings.

I'm not sure yet what my comparator stand will be used for but it looked like a handy thing to have around. I can see that
if one needed identical parts for something, it would be helpful. Thanks for the photo of your set up.
Cathead, My indicator has a history too. It was given to me by a friend who worked at a munitions factory. It helped making small caliber ammo for Viet Nam. The plastic lens was caved in, the hairspring was messed up, and it was missing the tip.

I turned a new lens from acrylic, using a 1/4" mandrel (there's a Delrin plug in the center hole). As I recall, I turned and polished a counterbore on the inside of the lens for relief for the pointer and I turned a chamfer on the edge to get the proper seating depth in the bezel. The only issue that I have with the Ames indiccator is the higher deflection force compared to my other dial indicators.

I don't normally set my lathe tool hieght to great precision. The $7 lathe tool height gage(https://www.ebay.com/itm/Lathe-Gage...l-center-height-setter-USA-MADE-/370592279135) will get you within .01" which is close enough for most purposes. Threading the 4-48 thread was the exception, however. With a major diameter of .112", .01" higher or lower is ten percent of the diameter. In my first attempt, it was enough to ride under the screw and twist it off.

The reason I decided to use a dial indicator rather than a simple gage block was that it permitted me to offset my tool height should it be desired. Some tools and/or operations seem to prefer an offset and the reading lets me repeatably set it.
 
I'm lazy. I haven't had to make indicator tips, but if I did i'd get some 4/48 3/8" set screws and Locktite one in the tip.
 
Can't you buy a whole set of different tips and extension for pretty cheap? I know at work we have these kits and seem to cover many setups. I don't know either if these kits cover most all dial indicators or not. Unless you are really looking for something to do the kit just seems a bit more practicale.
 
It's actually more fun for me to make what I want than order some tips that come from China
and wait for days for them to show up. Not only that, I can make them exactly
they I want them. The sets of tips contained only several that I would use anyway.
If you make your own, you have the satisfaction of making them the way you
want them and you have them immediately. I bought one of those kits some years
ago and the thread tolerances were pretty poor as I remember as they would get loose and
fall into the abyss of the the pan, never to be seen again.

That's what makes this hobby interesting as one can do as little or as much as he wishes.
 
There are all kinds of good DI tips from Mitutoyo, B&S and Starrett. LongIslandIndicator.com also has a long list of USA made tips of every imaginable size, style and length. Inexpensive too.
 
Can't you buy a whole set of different tips and extension for pretty cheap? I know at work we have these kits and seem to cover many setups. I don't know either if these kits cover most all dial indicators or not. Unless you are really looking for something to do the kit just seems a bit more practicale.
In my case, I wanted a longer thread length. It is possible that I could have found a 4-48 crew locally but I certainly wouldn't bet on it. It is hard enough to find 4-40 hardware. Faastenal has them but I would feel kind of rediculous walking out with a $.50 purchase. Asode from that, I needed a cheese head style head but no drive slot and I do have a lathe so....
 
Back
Top