Mid 80's Schwinn Refresh

TomKro

Active User
H-M Lifetime Diamond Member
Joined
Dec 27, 2012
Messages
341
Seeing the "Skinny Tire Bike Build" convinced me start breaking down my Schwinn Traveler salvage bike. Mid 80's construction, as best I can guess.

I sure could use some guidance on proper disassembly. There are what appears to be stainless steel plates attacked to the rear wheel lugs that don't want to pop off without a fight. Does anyone know if these are meant to come off? Not sure if the dimples are some sort of staking. I guess I can wire brush and repaint around them, but would prefer to remove prior to painting, if possible.
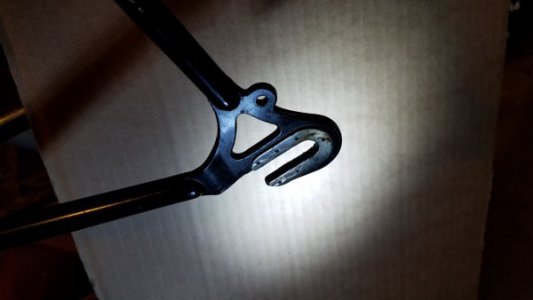
LhLug_20181226_094532_resized.jpg

Also, I've never removed this style of derailleur. I assume I unscrew at the pivot point, but wondering if I'll get a handful of springs and washers. Is that the proper way to remove?
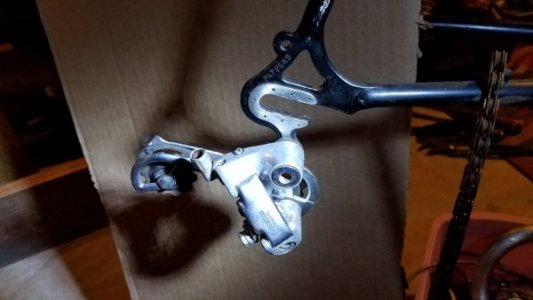
RhLug_20181226_094448_resized.jpg

Any guidance is appreciated.
TomKro
 
On the derailer you are correct, just remove the pivot screw. It should all be held together with a clip so parts dont get launched. I'm not sure on the drop out brackets. But if they are staked I think I would leave them alone and paint around them.
 
+1 with Greg , clean them and mask . For full disassembly you will need a few Bottom bracket wrenches and for the headset too . There is a tool that knocks out the headset cups , I have never used one . I prefer to tap them out with a brass tube (courtesy of a old wind chime) . To reinstall definitely use a headset cup press tool (make one) . Those are just some of the basics . And if you really want to be nice to yourself get a work stand , Mark .
 
The pivot screw released surprisingly easy - it must have seen some lube at some time in its life. Those plates on the drop outs are on there to stay. Thanks to all for the guidance.

I only lost one washer so far - from the seat post lock bolt. Top race of headset still putting up a little fight, and the sprocket side of the crank bearing presently soaking in oil.

Interesting the way the tubes are brazed in. Looks like some sort of square locking tabs used to locate the frame tubes.
FrameBrazing.jpg

I did pick up a bike stand a while back. Sure does help with dis-assembly.
 
I agree with Mark on the brass punch to knock out the bearing cups in the headset, I dont have a press to put them back in but I always have a nice flat piece of hard maple around and I just use that on the bearing cup and wack it with a hammer, never had a problem and never damaged a bearing cup. Over the years I have acquired many bicycle tools, like bottom bracket tools etc. I just by one when I need it. I just ordered a new tool box/cart from harbor freight to house them all, lol.
 
I found a piece of 3/4 inch copper water pipe - it worked real nice for knocking out the upper cup. It really wasn't in there super tight, but I needed to stabilize the frame a little better in order to get it out.

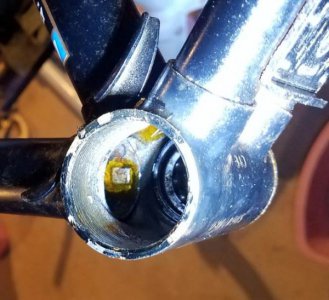
Still to find a bigger wrench for the flats on the sprocket side. Looks like there's an inner bearing cup threaded in place. Hopefully, not too much of a fight to get out. Still soaking a while before I give it a try.

Thanks for all the help.
TomKro
 
Tom, check with your local bike shop for a park tool wrench for that bearing cup not, they are not real expensive. For older bikes like ours you'll probably have better luck sourcing tools and parts st a shop that has been around a long time and still does work on the older bikes.
 
I found a flat jaw wrench big enough to grab the flats, but only managed about an 1/8 of a turn. That took one person holding the frame and my son (AKA big boy) on the wrench. It didn't appear to loosen much, so I want to keep soaking it. I sure hope that's a right hand thread.

I plan to purchase the correct wrenches, mainly to get it back together properly.

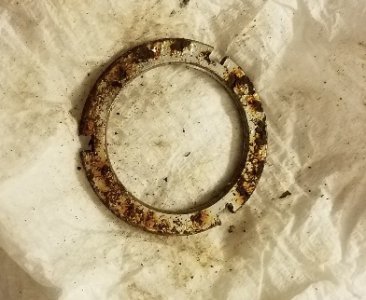
Here's a pic of the locknut - sort of rough.
SadCrankBearingLocknut_Cropped.jpg
 
Back
Top