Mini-lathe tailstock adjuster with differential screw

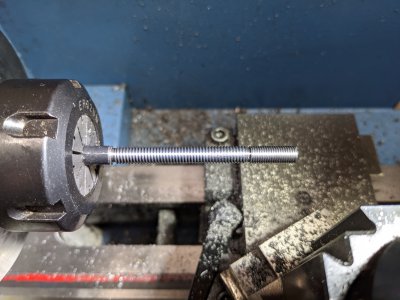
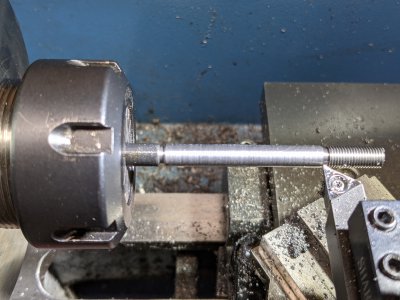
Back to this. Today decided to finish the longer screw. Did not use the follow rest, but really should have. Just too much deflection when threading.
PXL_20210517_175533428.jpgPXL_20210517_193907960.jpg
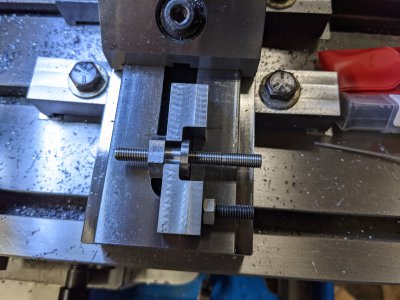
You can see the threads are ok nearer the chuck, but not deep enough far away. I measured the threads near the chuck using the 1 wire method and found them to be on the high side of nominal. I decided to part off the piece and finish the rest of the threads with a die. As it turns out, the die just barely cut metal, so it was pretty close. Here's a shot of the new screw with nut and bracket.
PXL_20210517_212122132.jpg
Tomorrow we figure out how to drill the tailstock and install everything.
 
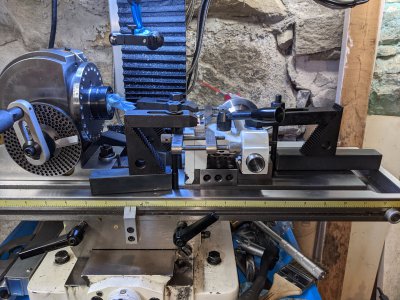
So today is the day. Stared at the tailstock for a while thinking about what needed to be done. Tried a set up and didn't like it. Came up with this.
PXL_20210518_144020088.jpgPXL_20210518_144104005.jpg
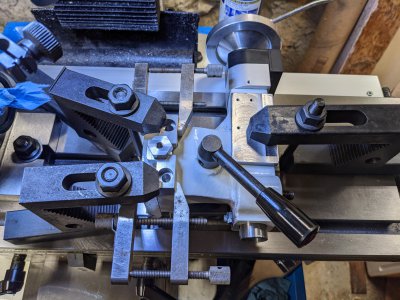
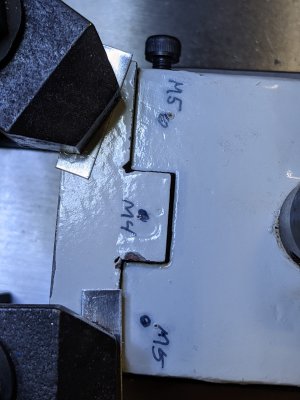
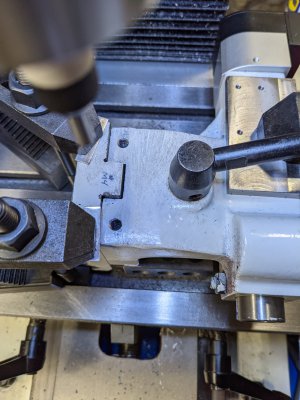
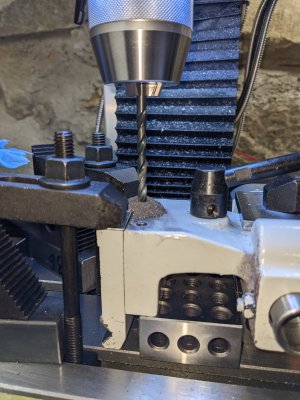
Didn't want to move the dividing head, so it stayed. Removed my toolmaker's vise and spaced the tailstock from the table with 123 blocks. It was really overkill. But I was able to hold the bracket in place so I could eventually use some transfer punches. I used some 0.020" shim stock to space the bracket away (above, when assembled) from the bottom casting. That is why there are the toolmakers clamps. They are clamping the bracket to the shim and lower base casting. The lower base casting is raised by 3 or 4 mm, just enough to clamp. After using the transfer punches, the bracket was removed so I could drill the castings. First did the outside holes, which are marked M5 (original design used M5, I changed my design to use M6). Since I am going to tap the hole M6x1, I used an M5 screw drill. Drilled the holes 12.7mm deep. Tapped to M6x1 first using a tapered tap, then a bottoming tap. Starting the thread was a little strange, but I figured it was just the cast iron. Tapped it dry. Sure made a lot of dust at the bottom of the hole. Hopefully I got most of it out. Got more than enough threads in, but the tap handle interfered with the stud in my clamp set up. (Stud was too tall.) When the tailstock is off this fixturing, I will finish the tapping, if I need an extra thread.
PXL_20210518_150416519.jpgPXL_20210518_162843815.jpg
One last hole and the moment of truth... That's this afternoon's work.
 
Overall, things went ok. Basic design appears sound. Originally thought I might need a slot in the screw, or a knob on the end to turn the screw, and it appears I do. When everything is installed, and tightened there is a slight binding. Not a lot, but there is some.

Here is the last hole.
PXL_20210518_183830475.jpg
Lots of dirty, tiny chips. Tapped the bottom casting at M6x0.75. Was sweating it a bit, but the threads went in uneventfully. Here are a couple of views of it all put together.
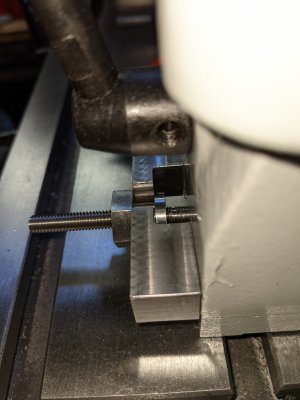
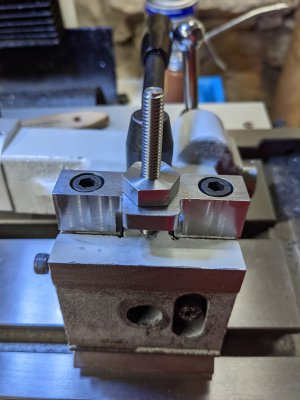
PXL_20210518_201745947.jpgPXL_20210518_201913196.jpg
The first is the top view as the tailstock is upright. The second view is of the bottom side of the tailstock. If one spins the nut and the screw is held captive (does not turn), then the top of the tailstock is displaced at the 1mm pitch rate. If the nut is held by a wrench, and the screw is turned, the tailstock is displaced at 0.25mm per turn. My initial adjustment should have the screw turned in 10T into the bottom casting. This gives +/- 6T fine tuning. I am using 4T minimum in the bottom casting.

Next steps. I think I will make a removable knob for the screw. I will put in a flat on the end of the screw and put in a set screw in the knob. The setscrew will engage the flat. Think I will make the knob out of brass.

When I get a chance, I will make a square nut to replace the M5 screw on the bottom of the tailstock. Then I will drill out the threaded hole all the way through. That way I can lock the tailstock from the top, rather than the bottom. Doing it from the bottom, is a pain.
 
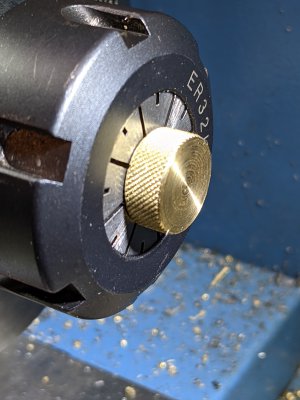
Partially made a knob last night from some 5/8" brass. Turned it down to 10mm for 8mm in length. Knurled the edge. Plan is to partially thread it and install a set screw. I will mill a flat on the differential screw for the set screw to bite and prevent further rotation. Here is a picture after I turned it down and knurled it. The 10mm diameter is in a 13/32" collet. (10.32mm) I was facing off the parting divot. Knurling came out barely acceptable, but ok considering I had never tried knurling brass before, nor practiced in 6 months.
PXL_20210519_141239172.jpg
 
Drilled and tapped the brass in a blind hole. Was kind of tricky getting the chips out. (No brass magnet :p ). When it was done, I went out to the garage and blew out any remaining chips. Had a minor mishap - somehow I didn't edge find correctly and I initially started drilling the hole, fortunately I only had made a minor dimple on the surface. A little voice said to me, "that doesn't look right, stop!" Sure enough there was an obvious offset in X. Did the edge finding again. It isn't really centered, but it is close enough. Jeesh, this wouldn't have happened on a lathe with a decent tailstock... This whole effort has me really appreciating the need for a tailstock adjuster!

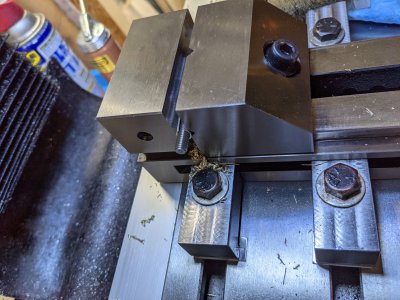
Then made a flat on the screw with a 1/8" end mill at 4mm from the end. I wrapped a piece of soft aluminum around the screw and put it in the vee of the vise. The aluminum prevents the screw from being marred.
PXL_20210519_185318029.jpg
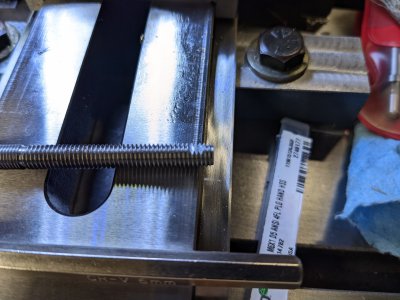
The flat is for the set screw to prevent rotation of the knob and is just below the surface of the minor diameter. I will use a flat bottomed set screw.
PXL_20210519_192150750.jpg
I shouldn't have removed the screw from the vise... Oh well, wasn't thinking. I think I will use the dividing head again to orient the flat properly. After that I will zero the DRO on the end of the screw as well as the sides. Then screw on the knob, and drill it 4 mm from the end of the screw. That way the hole will be in the right place, which is straight over the flat.
 
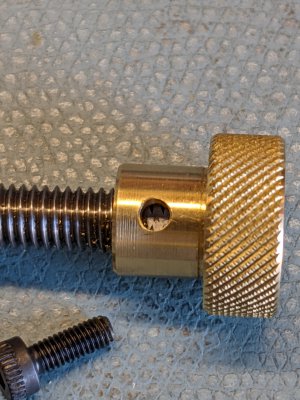
Brass knob complete. Made it as described. Tapped it for an M3 set screw. Should have the set screw tomorrow.
Flat lines up exactly with the hole - it's like I planned it :)
PXL_20210519_222051082.jpg
 
Set screw is a mm too long. Oh well, I'll grind off the tip. But everything seems to basically work. The initial set up is a bit tricky, but it's fine. Next step is to drill out the 4mm tapped hole, so I can install a screw from the top side of the tailstock. I'll need to make a square nut to fit in the slot. Try to get that done tomorrow.
 
Back
Top