Monarch 612-2516 lathe

Is the gear rubbing against the bed casting now?

I think you may be able to shorten the gear and have the interface between the gear and the pinion prevent it from touching.
 
Critical Design Review
My background is in engineering, but electrical not mechanical. When I worked on gov contracts, we had PDRs and CDRs, etc. (Powdered Donuts Review and Coffee & Donuts Review). So my coffee & donuts break on this design has arrived ;)

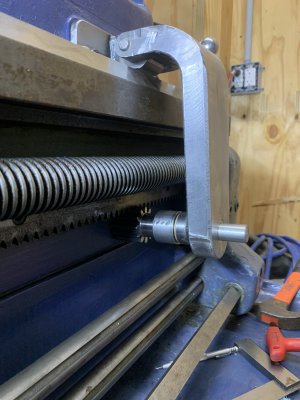
The bed is indeed milled below the rack, it actually looks like most of the bed face is milled. I cleaned it up and painted it, with a roller and brush, so it is not the ideal contact surface, but certainly could be used. I also looked at what pictures I could find and asked on practical machinist's Monarch forum and one of the helpful folks there did some digging. It looks like at least on the older model 61's, they did use a collar that contacted the rack face. So either approach, teflon plug or collar appear viable, nor are they mutually exclusive.
IMG_4168.JPG

Getting the gear fit to the rack was the biggest challenge of this project so far. Fortunately these are fairly large gear teeth so that increases the tolerance a bit. I had done a test fit before using the boring head, and actually bored the final hole for the bronze bushing a bit off center (low) as my initial fit up needed about 1/32 more clearance. The challenge is that the hinge pin is just about vertical over the pinion/rack engagement. If it was perfectly vertical, that means the pinion would be moving horizontally at the bottom of the swing as it engages in the rack. Not having any vertical movement means interference between the gear and pinion can't be used as a limiting factor to keep the pinion from hitting the bed.
IMG_4169.JPG
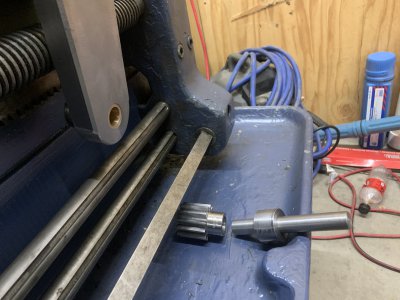
This second picture shows the current pinion and shaft disassembled. Note that the shaft is going to be forced horizontally along the bed by the gear force when being used, that force pushes the arm and thus the tailstock. That means the shaft is going to be torqued pretty well in the bushing. You can see I put an enlarged area on the shaft to act as a spacer between the arm an pinion. Ideally I would have made the bushing that is welded onto the arm longer as this would reduce the torque and wear on the bronze pressed-in insert. While I could correct that, mill off the existing bushing and add a larger bushing, the bronze bearing is easy enough to replace and I'm guessing if I keep it oiled will outlast my use of this lathe. While my arm is an inverted J shape, Monarch's arm is a more of a backwards C shape. Replicating that would have made getting the right pinion/rack engagement a little more difficult to pick up.
 
I think the gear has the most chance of impacting the bed when you are cranking on the handle. A button of delrin or bronze in the end of the gear would help with that and you most likely will not be moving it so often that there would be any issue either way. Not like, at least to my understanding, you will be using this in a production environment.

I really like the thought process and execution, well done.
 
Now, knowing the the area below the rack is a machined surface and with all the details you provided, I completely agree that the button-in-the-bore idea is a good one.

Thanks for taking the comments in the spirit they were offered. This type of discussion can be helpful to all readers faced with applicable circumstances.
 
Thanks for taking the comments in the spirit they were offered. This type of discussion can be helpful to all readers faced with applicable circumstances.
I appreciate the comments. I don’t necessarily ask direct questions, but at least in this case I’m posing a problem as I think through it. The discussion helps that process.
 
Belt and suspenders
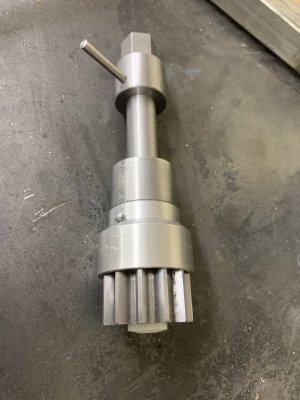
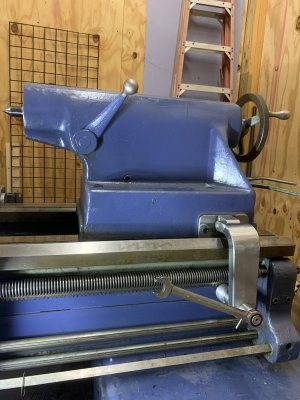
I ended up with both approaches, an aluminum collar and a nylon button. I'd started on the collar and mail ordered the nylon about the same time. Also some delrin. I was thinking of making a crank handle for this, but a ratcheting 7/8 wrench works really well. That is intentionally the same size as the carriage lock, so I am going to skip the crank handle and dedicate a wrench to share between those uses. It slides amazingly well with the wrench action, although it is counter-intuitive, as clockwise moves the tailstock toward the chuck, counterclockwise moves away.
IMG_4171.JPGIMG_4172.JPG

I'll paint it when I next break out paint, I will want to paint parts of the cross slide after I service that, so I'll combine that painting.
 
And the next chapter - working on the cross slide.
I decided to take the cross slide apart. It was just a little stiff to turn, not bad, but the size of this thing means anything less than perfect makes it difficult to turn leadscrew accurately.

I used the hoist to take the compound off. I'd bet the compound weighs at least 100lbs. Note one problem, the oil line is disconnected. This was under a sheet metal chip shield so I had not noticed this earlier. Fixing that would be straightforward, but it appears that the oil for this was sourced from the reservoir in the back of the carriage. I'd taken the cover off the reservoir in my attempts to figure out how to remove the cross slide.
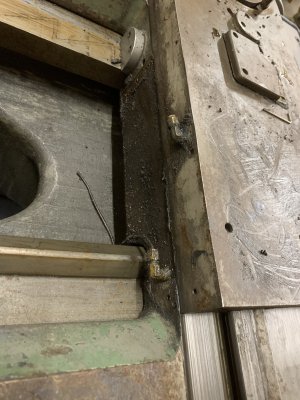
IMG_4176.JPG
That reservoir is associated with the remnants of an electronic tracer mechanism, basically a missing (servo?) motor which could drive the back end of the leadscrew. The wires here are part of an electromagnetic clutch for that motor. That motor also turned an oil pump even when the clutch was disengaged, but the motor is currently missing. So no oil pump action to the cross slide. I will need to explore exactly what was oiled from that pump and how it was routed. I may just install a manual one-shot oiler.
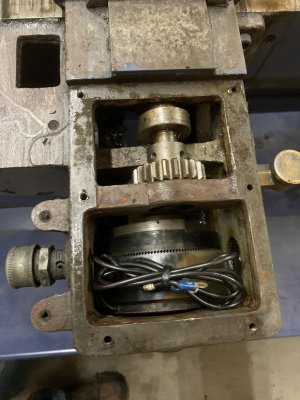
IMG_4175.JPG
Took me a little bit to figure out the way to remove this cross slide was to pull the gib out. I was expecting it to slide off of one end or the other.

Here is the bottom of the cross slide, resting on its side, and the cross slide ways, leadscrew and leadscrew nut below. The 123 block is for scale.
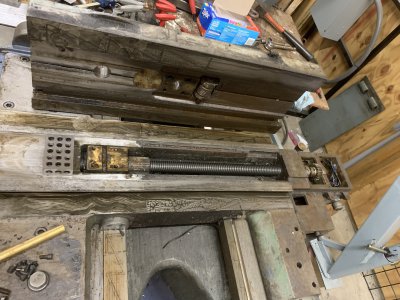
IMG_4180.JPG

Looking closer at the leadscrew nut, you can see it has four tapped holes and a slot across the top. The four holes match to the bolt holes in the cross slide with the hole in the casting. That hole normally has a plug with a V'd bottom that sits in the slot in the nut. Not sure exactly what that accomplishes. But more interesting is the brass/bronze pinion to the right of the nut. The pinion is threaded onto the leadscrew, but is independent of the main leadscrew nut. The worm drive in the bottom of the cross slide engages that pinion and turns it into/away from the main nut. The worm drive is turned by a deceptively small allen head on the end of it's shaft on the side of the cross slide. This mechanism allows the backlash in the nut to be adjusted. From what I can tell this mechanism was an option included on the 612 model if it had either a tracer attachment or the electronic tracer.
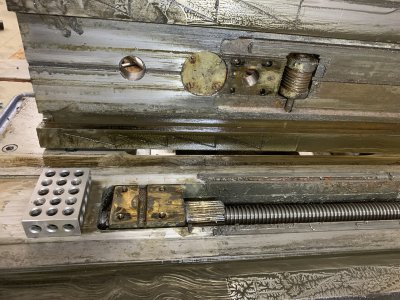
IMG_4179.JPG

Stopped for lunch there. Next step will be to remove the leadscrew itself, and start cleaning everything. Then check the bearings. If you look back at the first of these pictures, you'll see the square plate on the top of the cross slide is cracked. That plate is what holds that worm gear. So I'll need to dissassemble that and either braze up the casting or fabricate a new piece.
 
I'm enjoying seeing the details of the machine as you progress. Thanks for posting. IMHO, it's a great project.
 
Back
Top