Mounting a Sherline 4400 Lathe on 80/20

Not sure just yet , just got done milling all the 80/20 to size . I'm waiting on material for the base . I'm not even suppose to making this as it's a machine shop job , I'm in the maintenance shop . :dunno: Either way , I need material to finish it up .
 
This week, I made two changes to the 80/20 base of my lathe:
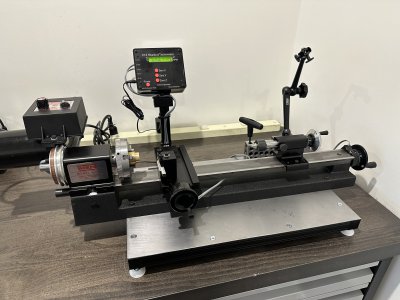
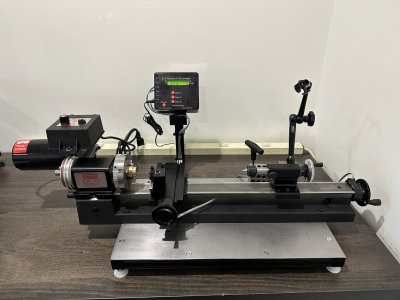
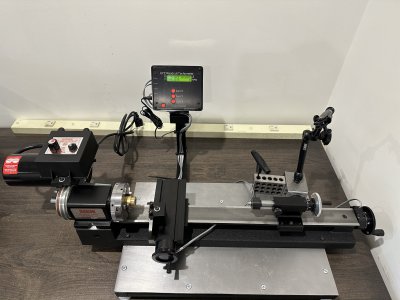
- I moved the DRO-box mounting post to the right and to the rear. The post was originally also the rear, left leg. The DRO box was too close to the headstock; it interfered with with turning the headstock 30 degrees for tapers. The post was too close to the cross slide; it interfered with the rear-mounted cut-off blade and with the compound slide.
- I replaced the two right feet with one foot that is centered under the lathe. The lathe is insufficiently heavy for two feet on the right side; the right, rear foot tended to levitate. The extra foot from the right side is now under the DRO-box mounting post.

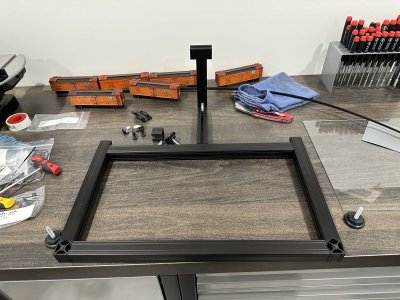
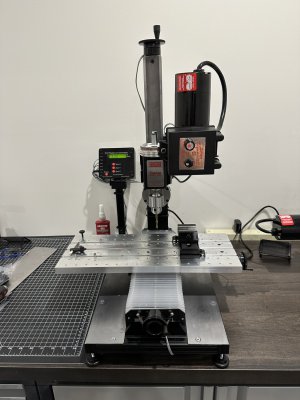
Here are two photo that show the changes:
DSCF6380 lathe on base.jpg
To move the DRO-box mounting post, I added a 4-inch long 1001-S T-slotted extrusion (horizontal), a 4136 4-hole inside corner gusset, and 4 each 3393 1/4-20x1/2" BHSCS & T-nuts. To replace the mounting post with a foot at the left rear corner, I installed one 1-inch-long 1001-S T-slot extrusion (vertical, with center tapped with 1/4-20 threads), one 3391 anchor fastener, one 3085 double anchor T-nut, and one 10-32x0.75" SHCS.

DSCF6377 under right side.jpg
To add the foot on the right side, I cut the 8-inch T-slotted extrusion into two lengths: 2-inches and 5 inches. I mounted a 1-inch long 1004-S T-slot extrusion between them using two 3391 anchor fasteners, two 3056 10-32x0.75" SHCS, two 3085 double anchor T-nuts, one 4118 3-hole joining strip. and three 3321 1/4-20x1/2" FBHSCS and T-nut. I installed the anchor fasteners underneath, to leave the T-slots available on top for mounting the lathe. The 1-inch long extrusion for the foot is threaded 1/4-20.
 
If I were to make another lathe base, I think for fasteners I would use double anchors instead of single anchors + flat plate / corner gussets at the corners. I think that I would also have had 80/20 Inc. do the machining: counterboring for the anchors, and tapping the threads for the feet. Current prices of these services are $3.22 and $2.79 each, respectively..
Black anodized 80/20 framing is not inexpensive. So far, for my lathe and mill bases, I have spent $488.29 total on four orders to 80/20 Inc. That's with sale tax (10%) and shipping included.
I am two-and-a-half years into my machining hobby. Making and modifying the bases for my lathe and mill has taken more time than I expected. I am also spending considerable time learning about single-point cutting-tool geometry for the lathe, and in modifying a belt sander for grinding such tools. If you look at the cross slide in the photo that I posted, you can see a tangential tool holder that I am developing, for use on the cross slide and on the compound slide (for both turning and facing).
An alternative path would have been for me to mount the lathe and mill on shelf material, as described in the Sherline instruction manual, and to buy and use Arthur R. Warner Co. turning and boring tools.
 
Last edited:
I have a small amount of 80/20 laying around the place . Making tables and shelves for different machines . Fun stuff to work with . :encourage:
 
I am not sure mine will turn out as well as Karl’s but my parts for my lathe base have arrived and I am working though the process of mounting… only one broken tap so far
 

Attachments

  • CCD4AC80-C575-4916-BCDE-62350A6F67C3.jpeg
    CCD4AC80-C575-4916-BCDE-62350A6F67C3.jpeg
    600.7 KB · Views: 23
Well I think I am “done” with my lathe stand. Took way longer than I expected but I learned a lot. The mill stand needs steel plate and then it should be about “done”.

If I had to do another I might do a few small things differently but generally I am happy with it. Thanks to Karl for his idea and support
 

Attachments

  • B8CFAD4A-5D95-48D3-93A2-A2DC4CA1C8BC.jpeg
    B8CFAD4A-5D95-48D3-93A2-A2DC4CA1C8BC.jpeg
    494.5 KB · Views: 32
  • 9911EB98-FBDB-4628-9F94-AFE722730B72.jpeg
    9911EB98-FBDB-4628-9F94-AFE722730B72.jpeg
    446.7 KB · Views: 32
  • 401E0679-8F76-485A-8D83-9FDE89363789.jpeg
    401E0679-8F76-485A-8D83-9FDE89363789.jpeg
    475.1 KB · Views: 32
Well I think I am “done” with my lathe stand. Took way longer than I expected but I learned a lot. The mill stand needs steel plate and then it should be about “done”.

If I had to do another I might do a few small things differently but generally I am happy with it. Thanks to Karl for his idea and support

Looks good and that is how machine projects always go for me. I think, I'll just knock this out in a day, and then everything is apart for 6 months while I try to find the time to finish it up.
 
Finished the Mill, time to start to actually learn these tools now
 

Attachments

  • F634AB3B-52F1-4CD6-ADE5-49269846A7BA.jpeg
    F634AB3B-52F1-4CD6-ADE5-49269846A7BA.jpeg
    258.6 KB · Views: 18
Back
Top