My adventures with my RF-30

In this thread I will document my adventures in getting this mill from the dealer to up and running in my garage. I have another thread here that documents some of the early research and mills I looked at.

I just bought an RF-30 clone. It was originally sold by Rutland Tool, which I remember as a local SoCal company in the 80's. I bought it at a machinery dealer in Pomona, Wheeler Machinery. Nice people, very reasonable to deal with. I was pleasantly surprised. I got the mill and a 5" Kurt vise for $975 out the door. After the sale I asked if I could get a t-shirt, too, and they said yes.

1. LOADING
They loaded it with a forklift into my truck. I have a Chevy 1500 so the 600lb weight was no problem. The put a 2x4 between the quill and the column and picked it up with a forklift. It balanced really well and the 2x4 held the weight just fine.
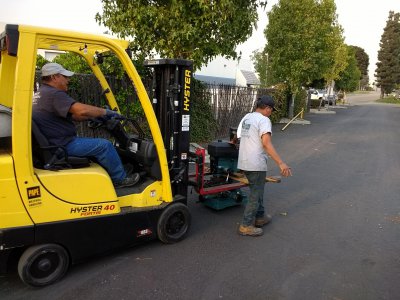
IMG_20201026_165216372.jpg

Once in the truck they pushed it to the back with the forks.
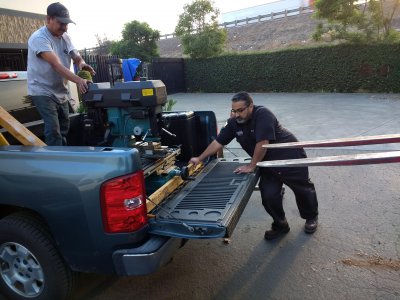
IMG_20201026_165515507.jpg

I tied it down with just two straps wrapped around the column. It didn't move at all.
 
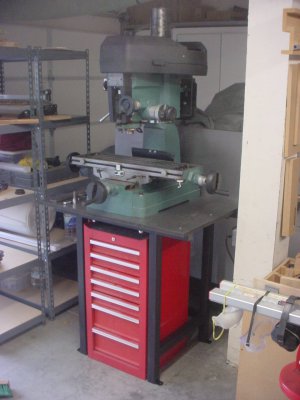
My Jet 15 (same as an RF-30) came with a stand bent up from steel plate. Sorry for the bad picture, it's the only one I could find. I don't know its origin, it came with the (used) mill, but it's very stable. No feet, the ends of the angle rest on the floor, so I sandwiched some squares of 1/2" thick rubber under the legs.

We didn't have much trouble unloading it... the stand was just about the same height as my pickup bed, so we just put the stand just inside the garage door, slid it off the truck onto the stand, bolted it on, and then slid/manhandled the whole thing into position.

The tray (which is highly recommended, it's a drip tray from the local auto parts) just sandwiches in between. I don't remember how I lifted the mill to slip it in but I don't remember it being a big deal.


IMG_20190303_171324.jpg
 
After all this I decided to go with a metal stand. I think wood would work, based on what I've seen here and elsewhere, but I just have this vision of the wood giving way one day and all hell breaking loose. I thought of designs that use angle iron and bolts, but by the time I get the metal and a cut-off saw (even used), I'm close enough to a welded stand anyway, and there were little issues with the fitting of all the pieces of the designs I thought of. It just seems safer to go with a welded metal stand.

I found another welder who seems more professional and was very clear with me about what he was going to do and how much it would cost. He offered to put feet/mounting brackets on all the legs and also cap the ends of the front and rear cross members. He was less expensive than the other one, too.
I cancelled a trip, so I'm using the money for the stand. Also, it just seems safer and sturdier.
I'm going to have to figure out what rattle can color matches my mill. I'm not going to cover up the stand; I'm paying for it, may as well show it off!
 
3. STAND (conclusion)

I got the stand and painted it (couldn't find a close enough match to the machine, so I used stain black) and added the top and back, then mounted the mill to the stand.
mill on stand.JPG

I need to finalize the exact location then drill holes for the anchor bolts.

The top and back are 3/4" MDF with a 16Ga cold rolled steel top. I painted the edges satin black. I used grade 12.9 14mm SHCS's (200mm long), washers and nylon insert locknuts to mount the mill. The back is secured to the stand through the rear cross member with four 1/4-20 bolts, nuts and washers.
 
Now that I have the mill mounted, on to the rest of the machine. I'm starting at the top and working my way down.

5. PULLEYS

A. TOP CAP

The top cap on the column was on crooked. Do I just tap it back on straight with a hammer? It holds the gear rack in place.

B. IDLER PULLEY
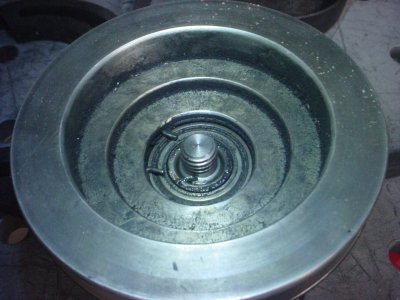
I took off the idler pulley. The bolt was easy to unscrew and I was able to pull the pulley off by hand very easily. Has some black dust on it. Bearing rolls fine. Anything else I should look for?
mill top pulleys (1).JPG

C. SPINDLE PULLEY
I also removed the spindle pulley. The nut is a left hand thread (loosens by rotating clockwise), then I was able to pull it off by hand with a little effort. Also has some black dust and the bearings work fine. Anything else I should look for?

There is some sort of black fuzz/powder/string in the pulley cover area. I'm assuming this is normal and comes from the belts?
 
Now that I have the mill mounted, on to the rest of the machine. I'm starting at the top and working my way down.

5. PULLEYS

A. TOP CAP

The top cap on the column was on crooked. Do I just tap it back on straight with a hammer? It holds the gear rack in place.

B. IDLER PULLEY
I took off the idler pulley. The bolt was easy to unscrew and I was able to pull the pulley off by hand very easily. Has some black dust on it. Bearing rolls fine. Anything else I should look for?
View attachment 343392

C. SPINDLE PULLEY
I also removed the spindle pulley. The nut is a left hand thread (loosens by rotating clockwise), then I was able to pull it off by hand with a little effort. Also has some black dust and the bearings work fine. Anything else I should look for?

There is some sort of black fuzz/powder/string in the pulley cover area. I'm assuming this is normal and comes from the belts?

B.5.A yes. Loosen the set screw before tapping the cap down.

If everything is smooth then you’re in good shape.
There is a chance that the spindle drive beating could use a replacement but that can only be determined with measuring tools.


Sent from my iPhone using Tapatalk
 
5. PULLEYS

The various manuals I've downloaded call for different size belts: A30, A33, B33, B33 and B34 for one and A38, A39, B41 and B42 for the other. The ones my machine came with are B33 and B40.

For those of you following along, belts come in a few flavors:
3L, 4l and 5L are used on lower HP applications, like fans.
A, B, C, D and E are used on machinery. An X means they have cogs on the inside. They are 1/2", 5/8", 7/8", 1-1/4" and 1-1/2" wide at the top.

Depending on which particular machine, you'd need A or B belts.

D. What sources do you use to buy belts? It looks like one of mine came from Napa Auto.

-----
These machines are metric so it surprises me that they don't spec out metric belts.
SPEC (width at top)
SPZ (10mm)
SPA (13mm)
SPB (16mm)
SPC (22mm)
E. Does anyone use metric belts? Where do you buy them?

Edit: I just checked McMaster-Carr. Metric belts are about 10x the price of regular ones!
 
Last edited:
5. PULLEYS

The various manuals I've downloaded call for different size belts: A30, A33, B33, B33 and B34 for one and A38, A39, B41 and B42 for the other. The ones my machine came with are B33 and B40.

For those of you following along, belts come in a few flavors:
3L, 4l and 5L are used on lower HP applications, like fans.
A, B, C, D and E are used on machinery. An X means they have cogs on the inside. They are 1/2", 5/8", 7/8", 1-1/4" and 1-1/2" wide at the top.

Depending on which particular machine, you'd need A or B belts.

D. What sources do you use to buy belts? It looks like one of mine came from Napa Auto.

-----
These machines are metric so it surprises me that they don't spec out metric belts.
SPEC (width at top)
SPZ (10mm)
SPA (13mm)
SPB (16mm)
SPC (22mm)
E. Does anyone use metric belts? Where do you buy them?

Edit: I just checked McMaster-Carr. Metric belts are about 10x the price of regular ones!

My machine has a B34 and a B41.
Works just fine.


Sent from my iPhone using Tapatalk
 
5. PULLEYS

A. The top cap went on with no problem. Not sure why it was crooked in the first place. I put the one set screw that hold it on by the rack.
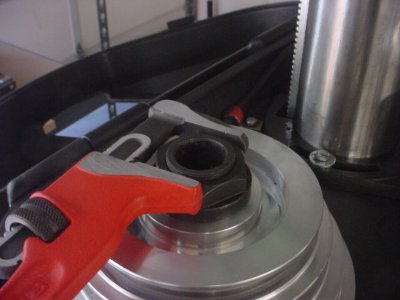
B. & C. I took these off, cleaned them up and put them back on. I did not tighten the retaining nuts much at all. I used a smooth-jaw pipe wrench to just barely snug the big nut on the spindle pulley down after tightening it by hand. I turned it very little, maybe 1 degree; just enough so it's just barely more than hand-tight.
DSC00329.JPG
D. Looks like Napa has them.
E. There appears to be no need for a specifically metric belt, since inch sizes are readily available and work. They are even spec'd in the manual, even though these are metric machines.
 
Last edited:
Back
Top