- Joined
- Dec 13, 2016
- Messages
- 142

Not sure how I missed all the posts... seems like I missed the past 6 months or so. I thought this thread had gone cold but nope, your all here.
A lot of nice work showing in those posts too! Good Job.
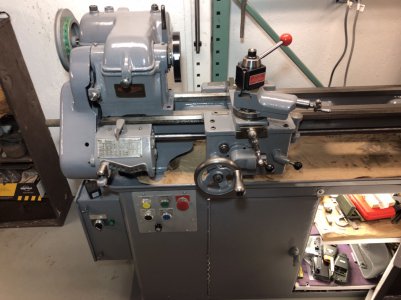
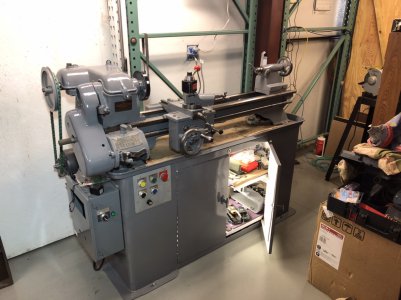
I had been reading this thread earlier and I never got any updates it seems. So I was surprised to trip over and see all the progress. And very nice looking progress as well. Glad you got the cover, it would've been a bear to make one. I didn't know that cub website was still going! I thought they died off... I must live in a cave! LOL... That Farmall is a "47" A, next to it are a 169 & 73 Cub Cadets.. all in various states of completion.. LOLWell this project has been going for eight months. Another milestone, bolted the cabinet to the floor tonight. Started out just a fast paint job but mission creeped in.
Yeah hate threads that go cold. I am guilty of a few projects not getting completed. Will see this thread to point with lathe running again then just update the thread doing cross slide scale, DRO mount and spindle tachometer.
Need to complete my previous project putting power steering on my mowing Cub.
https://www.onlycubcadets.net/forum/showthread.php?t=57307
By the revisiting this thread the photo of your snowblower Cub, is that a Farmall B in far left corner?
HaHa my mowing Farmall B was first incomplete project when dating my wife 20 years ago.
Bob G.
I have been on the IHcubcadet site since the beginning, when it was simply a bulletin board. Went through all the dramas too. But I am still there and never went anwhere else. The "A" is a wide front and yes, it runs, good too! We had a Cub for a # of years and then sold it to someone on the other side of town, so I drove it over, clear fall day, "brisk" I guess would be the word to describe it. Was quite a ride LOL. Projects that need finishing? The 169, it just won't start easily. Need to discover why.. and tune it up. I've been thinking it's getting time to retire so that means selling off the cubs and some other "stuff".. we'll see.Glad you came back. Hard to keep up with all the threads. For the Cubs, I mainly use IHCudCadet and OnlyCubCadet. I was trying hard to see if your Farmall was an A or a B. Could not determine if it had a wide front end. Is your A still running? I grew up in New Jersey with Farmall M’s. We bought our 1941 Farmall BN back in 1982 and I drove it home 40 mile on a beautiful Saturday afternoon. My brother followed with the pickup truck...
What project you are working on? It starting warm up here no freezing at night. See how long that will last.
I'll always be a beginner! LOL and my name is Mike Frade. IH Registry, yes, it is one of those ordeals.. it was never really a "home" for me but I did like to keep up with a lot of the members who had been "across the street" prior. You are doing some wonderful work on this lathe, maybe after I retire I'll do the same to mine... or.. maybe not! LOLHi 34_40, Do you have a first name and are you still ‘Just a beginner’? ( ;<)
Are you referring to the ‘IH Registry’ meltdown crash? A lot of the members never found their way home. I missed Ken from Nova Scotia.
Now in the process leveling the cabinet and lathe bed.
Bob G.

Mike, As you noticed this project is still going - I am still working for at least another four years. I keep saying the same thing.. Just 1 more year, 3 times!
The plan is the level the lathe with my Starrett 98-6 level then final tune doing the ‘collet to collet’ test.
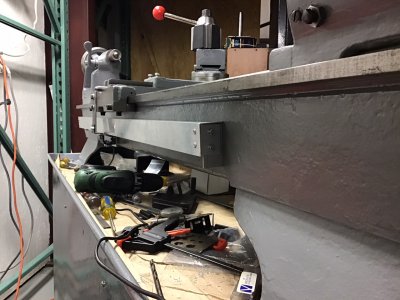
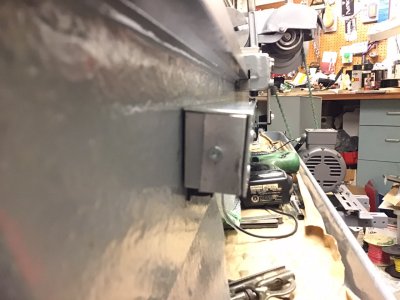
Doing all the shimming at the headstock / tailstock. The back headstock mount was the highest elevation. Started leveling doing headstock / headstock align then will level to the tailstock end. Had to shim front headstock about 0.155” to level. To level the front tailstock mount to the headstock would require about 0.250” shim to level.
So this is what I am doing now since will not require minimum amount of shims. For real thin shims possible using aluminum foil .001”, yogurt cover foil .004” , aluminum duct tape .005 , aluminum flashing .011”. Made several 1/8” thick shims using 1-3/4” hole saw and drilling out 1/4” pilot hole with 3/8” bit. Also using large fender washers .064” thick for shims. I've done some reading on leveling but I don't remember anyone mentioning shimming the headstock separately.. or am I mis-reading this?