My DIY Atlas 618 milling attachment

WCraig

Registered
Registered
Joined
Oct 10, 2018
Messages
543
Hey! I made diy milling attachment for my tiny Atlas 618 lathe!!

I don't have a mill and acquiring one is not in the cards for the foreseeable future. But then I ran across Harold Hall's amazing website and the idea of using an angle plate to enable the compound to move a vise in the vertical direction. So I did that:

290087

Since I'm a newbie, there were a couple of missteps and a piece that had to be remade. I already had the vise which had 3/8-24 mounting holes on the bottom. I had to add an extra set of mounting holes to get a better range of travel.

Here's a sort of 'exploded' diagram:

290088

I know this isn't a real mill. I know I'm not going to be taking heavy cuts and I plan to mostly use it with aluminum and brass. Hopefully it will work OK for that.

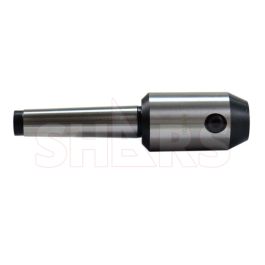
It isn't hard to set up or tear down. Two allen keys are all that is necessary to mount it. A 1-2-3 block in the vise helps to get it pretty square to the spindle. I need to buy proper end mill holders. I see Shars has some for $12 USD per size.

All in all, this has been a fun project. Hopefully I'll get some use out of it. First thing I want to try is a carriage stop.

Craig
 
My first attempts at cutting a simple part in mild steel were abject failures. The "Y axis" (which uses the lathe's compound) was moving on its own while I was advancing the X axis (the lathe cross-slide). The resulting slot was crooked and well off the planned line. Also had a lot of vibration and cutter was grabbing the work and self-feeding (X).

I decided that I needed to lock the gib screws as best I could for the Y axis whenever possible. And tighten the X axis gib screws much more than I do for normal turning. Tightened the belts somewhat so it wasn't so easy to stall. Moved the mount for the vice so the fixed jaw would come right up to the centre line of the cutter.

I'm now much happier with the result:

FirstSuccess.jpg

This is straight from the machine; no deburring or filing.

Remaining issues:
1) I wanted to start with a pass down the middle of the slot. However, the cut was 10-15 thous above the line. I know I've taken up the lash in the compound so I'm not sure why this is happening. In fact, I had already used this set up to drill the "Q-sized" holes at either end of the slot. There was apparently no slippage during that and I left the Y locked when I changed over from the drill to the end mill.

2) The connection to the cross slide slipped a couple of times causing the vise to rotate out of square to the end mill. Atlas designed compound to lock with screws at 120 degrees angle. I used 3 screws at 90 degrees and I think that is less effective. I don't see any realistic way to switch to 120 degree spacing as the piece is square. I will double-check the locking pins in case they weren't oriented the right way.

The bottom line is that until a well-equipped small milling machine drops into my lap, I now have at least some basic machining capacity.

Craig
 
Greetings Craig, realize that flex is the enemy. Your cutter is a long way out, you should get a mt2- 3/8" endmill holder. I have an Atlas milling attachment for my 618 and i make sure all gibs are snug.Lots of little bites and sharp cutters is the way to go. Have fun.
 
Craig,

One should never use three set screws at 90 deg. Nor for that matter, three at 120 deg. Two at 90 is almost as good as two at 120. The basic idea is that both set screws should be forcing the inner part against the far side of the hole in the outer part. The reason not to use any configuration that has set screws on opposite sides of the outer part is that the inner part is only locked and supported by the tips of the set screws, not by part of the fixed part, whether inside or outside.
 
Greetings Craig, realize that flex is the enemy. Your cutter is a long way out, you should get a mt2- 3/8" endmill holder. I have an Atlas milling attachment for my 618 and i make sure all gibs are snug.Lots of little bites and sharp cutters is the way to go. Have fun.
Thanks! That's an older picture in the first post. I did get an end mill holder:


Craig
 
Craig,

One should never use three set screws at 90 deg. Nor for that matter, three at 120 deg. Two at 90 is almost as good as two at 120. The basic idea is that both set screws should be forcing the inner part against the far side of the hole in the outer part. The reason not to use any configuration that has set screws on opposite sides of the outer part is that the inner part is only locked and supported by the tips of the set screws, not by part of the fixed part, whether inside or outside.
Thanks @wa5cab I'll try that next time.

Craig
 
Craig do you have a drawbar arrangement in the spindle? You don't want the cutter assembly to come loose
Mark
 
Cool idea! Can you swivel both the compound the angle plate and the compound to vise?

Would it be better to reverse to orientation of the compound, so it remains vertical, and the vise can swivel off of it?

Im a noob and want to make something similar, any advise relating to this would be appreciated!!

John
 
Back
Top