- Joined
- Nov 16, 2012
- Messages
- 5,596
All,
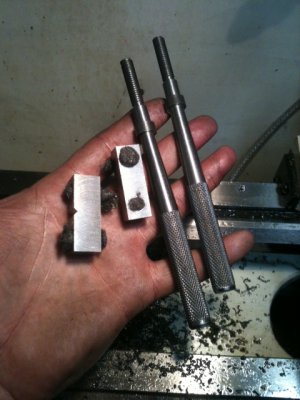
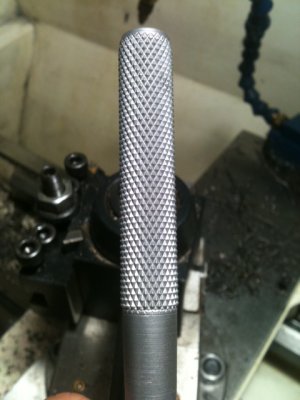
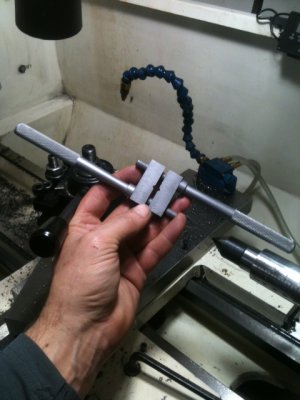
Here's a photo of my favorite tap handle. I made this over 40 years ago at roughly the age of 12 or 13 and it's a regularly used tool in my shop. The V-blocks are wearing out because the metal is not hardened at all.
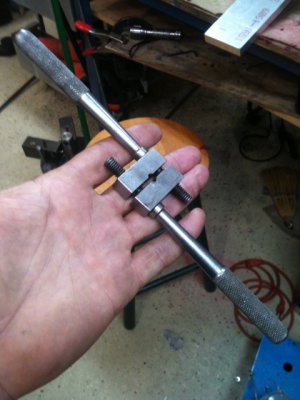
I've been meaning to re-make this tool for a long time and I felt like celebrating a little today because, yesterday was the official end of my old job and today, I officially got the approvals, permits and filings to start my own consulting company. I'm thinking of making that tap handle the official logo. -We'll see.
Anyhow, without further delay, we'll kick-off this fun little project and as always, I'll toss-in some tidbits of information along the way.
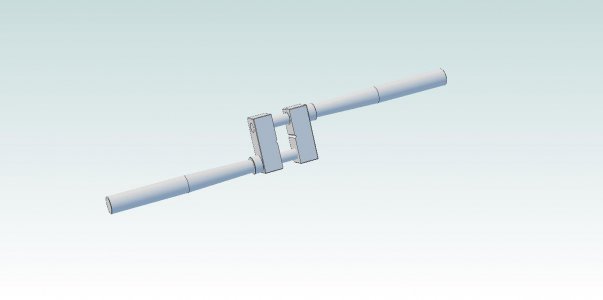
Here's a 3D model and two drawings with dimensions needed to make this. If anyone can't see/read the dimensions, just contact me offline and I'll send you better drawings. For some reason, the PDFs I make of drawings are very large and I don't want to eat-up all of Nelson's disk space...
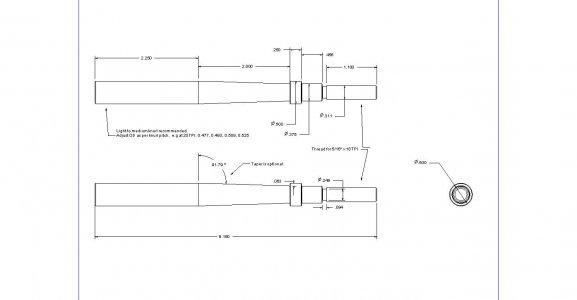
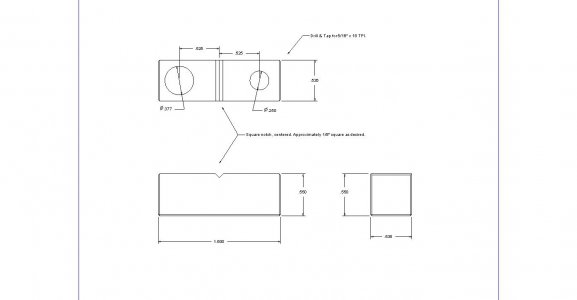
Fist, let's talk about material selection... The original is made of mild steel and believe it or not, the threads are wearing-out a bit -and as mentioned the v-blocks are worn to the point they won't hold a tap too well. There's also been times when turning a bigger-size tap, I felt the arms on this thing were going to bend a little too much. Given all this, we'll make it out of either 1045 or 4140 and, we'll heat treat it to Rockwell 45 C or so. Remember now, untreated 1045 or 4140 is not much stronger at all than plain-Jane 1018 or 1020. At Rockwell 45, it will have about twice the tensile and yield strength as unhardened metal would.
It turns out, the scrap pile has a small block of 1050, just the perfect size for the v-block and there's plenty of 4140 rod laying around too. -We're set for metal...
I'm using a 1" dia, two-point carbide insert cutter to shave the block down to dimensions. I'm going to leave things about 5 thou oversized and it will be ground to size after heat treating.
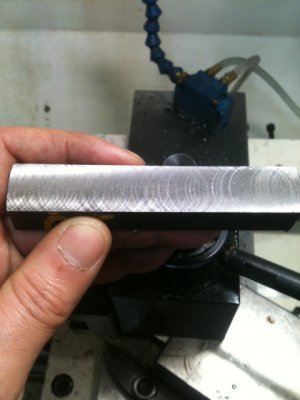
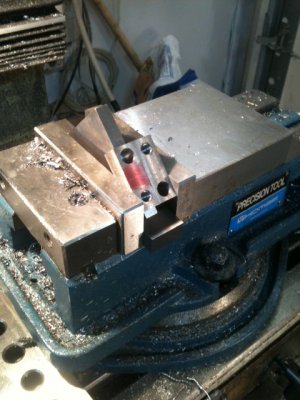
In this picture I want to point-out what is the sign of a well-trammed mill. That piece had just one single pass taken over the top. The DoC was about 30 thou. Notice that you can see two circular patterns. This means that the leading edge of the inserts were cutting AND the trailing edge of the inserts were cutting as well. If the mill were not trammed properly then, the cutting edges would not be perfectly flat with respect to the piece and you would only see one circular pattern in one direction. Hope that made sense... Let me know if you need a better explanation.
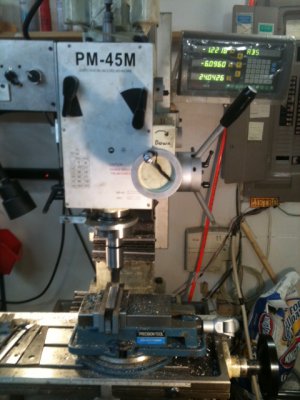
The parts are so simple (as you can see in the drawing) I'm not going to describe how to drill the holes etc... Suffice it to say that by now, you can drill the holes and tap for 5/16-18.
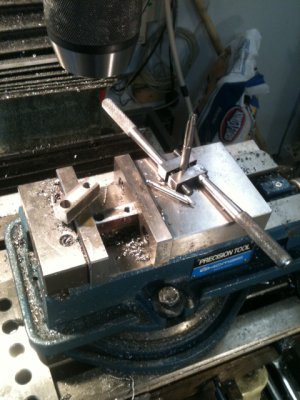
What I will describe is now to cut the square notch... Here, a 45 degree square is set in the bed of the vise and the pieces are held and clamped at a 45[SUP]o[/SUP] angle. Also notice the red layout ink has a line scribed at the half-way point on the block.
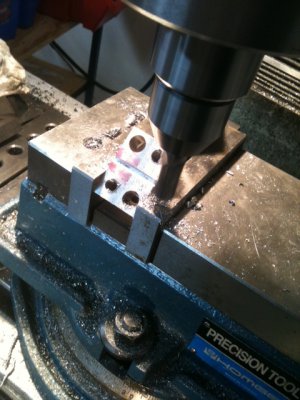
To make the notch perfectly centered, you cut it in two steps. First, position the very edge of the cutter right on the scribed line until it just makes contact. For the first cut, move the table into the cut by a known amount -in this case, just a little under 1/8" and make a pass (x direction) across the blocks. Next, keep everything the same position but, lower the cutter (z direction) the same amount as you moved it in the first cut. Make the cut. When you check the position, you'll see it's perfectly centered.
If you want, you can repeat this process on the backside of the blocks but next time around, you can make a different sized notch. For really small taps, you can use the small notches -or you can flip the blocks around and use the bigger notches for bigger sized taps. -That's up to you, I'm not going to bother with that little detail but, I have seen folks do this...
OK, that's it for now... We'll finish making the handles tomorrow and we'll do the heat treating on Sunday.
Ray
EDITED to fix a typo.


Here's a photo of my favorite tap handle. I made this over 40 years ago at roughly the age of 12 or 13 and it's a regularly used tool in my shop. The V-blocks are wearing out because the metal is not hardened at all.

I've been meaning to re-make this tool for a long time and I felt like celebrating a little today because, yesterday was the official end of my old job and today, I officially got the approvals, permits and filings to start my own consulting company. I'm thinking of making that tap handle the official logo. -We'll see.
Anyhow, without further delay, we'll kick-off this fun little project and as always, I'll toss-in some tidbits of information along the way.
Here's a 3D model and two drawings with dimensions needed to make this. If anyone can't see/read the dimensions, just contact me offline and I'll send you better drawings. For some reason, the PDFs I make of drawings are very large and I don't want to eat-up all of Nelson's disk space...


Fist, let's talk about material selection... The original is made of mild steel and believe it or not, the threads are wearing-out a bit -and as mentioned the v-blocks are worn to the point they won't hold a tap too well. There's also been times when turning a bigger-size tap, I felt the arms on this thing were going to bend a little too much. Given all this, we'll make it out of either 1045 or 4140 and, we'll heat treat it to Rockwell 45 C or so. Remember now, untreated 1045 or 4140 is not much stronger at all than plain-Jane 1018 or 1020. At Rockwell 45, it will have about twice the tensile and yield strength as unhardened metal would.
It turns out, the scrap pile has a small block of 1050, just the perfect size for the v-block and there's plenty of 4140 rod laying around too. -We're set for metal...
I'm using a 1" dia, two-point carbide insert cutter to shave the block down to dimensions. I'm going to leave things about 5 thou oversized and it will be ground to size after heat treating.

In this picture I want to point-out what is the sign of a well-trammed mill. That piece had just one single pass taken over the top. The DoC was about 30 thou. Notice that you can see two circular patterns. This means that the leading edge of the inserts were cutting AND the trailing edge of the inserts were cutting as well. If the mill were not trammed properly then, the cutting edges would not be perfectly flat with respect to the piece and you would only see one circular pattern in one direction. Hope that made sense... Let me know if you need a better explanation.

The parts are so simple (as you can see in the drawing) I'm not going to describe how to drill the holes etc... Suffice it to say that by now, you can drill the holes and tap for 5/16-18.

What I will describe is now to cut the square notch... Here, a 45 degree square is set in the bed of the vise and the pieces are held and clamped at a 45[SUP]o[/SUP] angle. Also notice the red layout ink has a line scribed at the half-way point on the block.

To make the notch perfectly centered, you cut it in two steps. First, position the very edge of the cutter right on the scribed line until it just makes contact. For the first cut, move the table into the cut by a known amount -in this case, just a little under 1/8" and make a pass (x direction) across the blocks. Next, keep everything the same position but, lower the cutter (z direction) the same amount as you moved it in the first cut. Make the cut. When you check the position, you'll see it's perfectly centered.
If you want, you can repeat this process on the backside of the blocks but next time around, you can make a different sized notch. For really small taps, you can use the small notches -or you can flip the blocks around and use the bigger notches for bigger sized taps. -That's up to you, I'm not going to bother with that little detail but, I have seen folks do this...

OK, that's it for now... We'll finish making the handles tomorrow and we'll do the heat treating on Sunday.
Ray
EDITED to fix a typo.


