

-
Welcome back Guest! Did you know you can mentor other members here at H-M? If not, please check out our Relaunch of Hobby Machinist Mentoring Program!
You are using an out of date browser. It may not display this or other websites correctly.
You should upgrade or use an alternative browser.
You should upgrade or use an alternative browser.
My first Bridgeport
- Thread starter Petrolero
- Start date
I'm doing all of mine with #1's also - I was talking about which line position on the manifold goes to what port in the saddle. I think it shouldn't matter where they go.I replaced all of my meters with 1's, so in my case it didn't matter. If you are keeping the two 2's, they should be plumbed where they belong.
What matters is that the proper size meter feeds the appropriate oil passage. The meters have a number stamped on them to indicate the flow rate. On my Lagun, the nuts had #2 meters, and the ways had #3 meters. I'm guessing the higher the number, the higher the flow rate, as the nuts wouldn't need near as much oil feeding them as the ways would.
Akjeff- H&M said to just use all #1's and don't worry about it. Mine had zeros and ones.What matters is that the proper size meter feeds the appropriate oil passage. The meters have a number stamped on them to indicate the flow rate. On my Lagun, the nuts had #2 meters, and the ways had #3 meters. I'm guessing the higher the number, the higher the flow rate, as the nuts wouldn't need near as much oil feeding them as the ways would.
- Joined
- Oct 14, 2013
- Messages
- 981
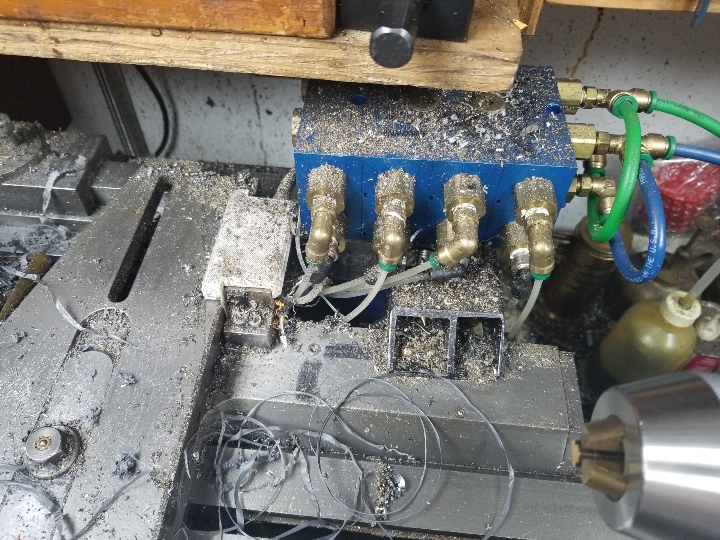
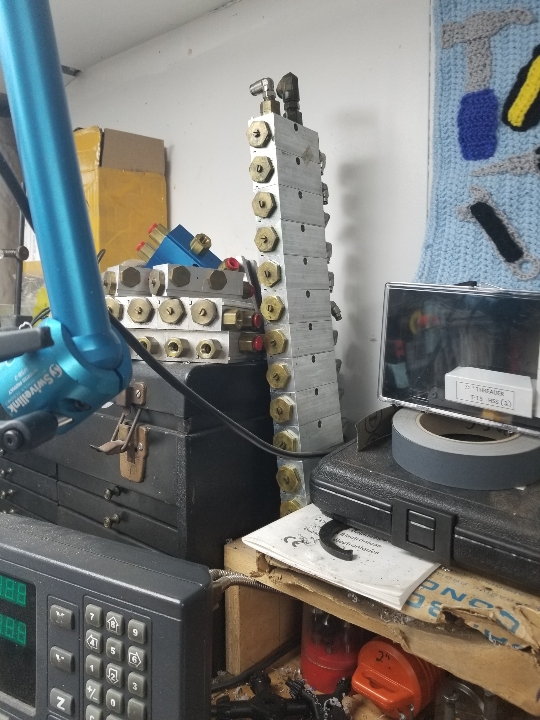
Just throwing out a bit of over-the-top insanity, I use oil-rite pumps for this stuff. One pump per hole, and you get one shot of oil each time you apply air pressure. The shot volume can be turned down if you want to. Guaranteed oil for all, and they can reach 1,000 psi on shop air.
You can find blocks of them on ebay; that's where this stack came from. It's going on my Rockwell mill!
Sent from my SM-G892A using Tapatalk
You can find blocks of them on ebay; that's where this stack came from. It's going on my Rockwell mill!
Sent from my SM-G892A using Tapatalk
Not many folks have laid hands on more BP's than those guys! Should be sound adviseAkjeff- H&M said to just use all #1's and don't worry about it. Mine had zeros and ones.
 . For my Lagun, I went with Carmen's instructions, he's the USA service guru for Lagun.
Question for the group regarding ram maintenance, head tilt maintenance, etc.
I'm going to have to pull the head off the machine when I get the bottom part done - the bolt that rotates the head about the centerline of the quill housing has sheared off sometime in the past - and the DPO or one of them put this bolt on a lathe and turned it down so that it fits in the hole nice and snug but does nothing. I suppose when I do that I'd be in a good position to remove the ram and clean it up. I see no way to lube this thing and it's sticking severely at the front of the travel, i.e. where the head is in the full rearward position.
Where do you lube the ram? What do you use? Likewise the turret (which moves freely). I guess there's not a gear which regulates the turret, it just turns by hand?
I have a picture of the bolt that sheared but I can't get it off the phone for some reason. Other pictures have come off just fine but this one won't show up with the rest of them-
Today I mounted a 2X6 on the table so I could halfway control it and wheeled it out for a session with the power washer. Most satisfying!
Monday my pard comes over to help with knee removal and cleaning.
Parts are starting to arrive - I've got a message in to the local vo-tech about an opportunity to repair the broken lock bolt housing on the saddle...

I have a new bolt from H&W and it fits pretty snug - won't wobble - there's a temptation to just put it back on but I'd really like to get it fixed while it's off the machine. I'm thinking braze the missing part in, rather than welding, because the braze is easier to drill back out and thread, vs welding rod. If anyone has done one of these repairs I'd appreciate your wisdom. Would have been really, really nice of the DPO to give me that part-
I'm going to have to pull the head off the machine when I get the bottom part done - the bolt that rotates the head about the centerline of the quill housing has sheared off sometime in the past - and the DPO or one of them put this bolt on a lathe and turned it down so that it fits in the hole nice and snug but does nothing. I suppose when I do that I'd be in a good position to remove the ram and clean it up. I see no way to lube this thing and it's sticking severely at the front of the travel, i.e. where the head is in the full rearward position.
Where do you lube the ram? What do you use? Likewise the turret (which moves freely). I guess there's not a gear which regulates the turret, it just turns by hand?
I have a picture of the bolt that sheared but I can't get it off the phone for some reason. Other pictures have come off just fine but this one won't show up with the rest of them-
Today I mounted a 2X6 on the table so I could halfway control it and wheeled it out for a session with the power washer. Most satisfying!
Monday my pard comes over to help with knee removal and cleaning.
Parts are starting to arrive - I've got a message in to the local vo-tech about an opportunity to repair the broken lock bolt housing on the saddle...
I have a new bolt from H&W and it fits pretty snug - won't wobble - there's a temptation to just put it back on but I'd really like to get it fixed while it's off the machine. I'm thinking braze the missing part in, rather than welding, because the braze is easier to drill back out and thread, vs welding rod. If anyone has done one of these repairs I'd appreciate your wisdom. Would have been really, really nice of the DPO to give me that part-
It would take so much heat to properly braze that I would worry about warping the saddle.
I would be tempted to try a metal bearing epoxy. Mould release on a bolt, some drilled pins or machine screws to mechanically reinforce the patch and a form to define the outside shape. The form could be a permanent part that's bolted on with the epoxy only forming the threads.
Hard to do an all metal repair without a functioning mill
It would take so much heat to properly braze that I would worry about warping the saddle.
I would be tempted to try a metal bearing epoxy. Mould release on a bolt, some drilled pins or machine screws to mechanically reinforce the patch and a form to define the outside shape. The form could be a permanent part that's bolted on with the epoxy only forming the threads.
Hard to do an all metal repair without a functioning mill
Are you saying use JBWeld? That's my favorite! My buddy asked me if I thought JBWeld would fix that, laughingly...
Seriously though - I'd be ok with something like this - I just need some lateral stability on the bolt.