I'll need to describe all of this process in a couple of different entry's, but I'll keep them all under this post. Let me apologize in advance for bouncing around a bit on this post, didn't give myself much time to gather my thoughts.
I built 4 different calibers of tooling, .177, .20, .22, .25. I need to state also that the basic tool is not my design, but it has been highly modified to suit my ideas, limitations and abilities. The punches, the actual design of the pellets (all diablo style but to my dimensions), the cutters, extrusion die for lead wire, and the lead wire cutting device are all my design, more on those later.
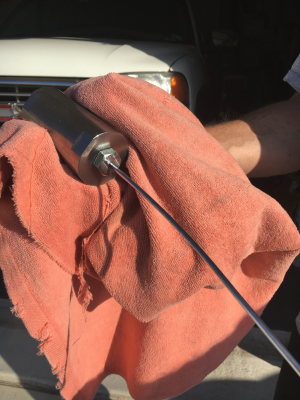
Here is the completed, assembled unit, the two rods sticking up are punches used for swaging the lead and shaping the back of the pellet:

Here they are removed. Note the left one is cupped. It is used to force a length of lead wire down into the cavity. The right one finishes the work and puts the cavity at the back of the pellet.

Here is the exploded pic. From top to bottom, left cavity, right cavity, base, top with guide holes for punches, 3 cavity assembly bolts, 2 punches:

Here is the custom ground 4 flute carbide cutter. There are several places online to get them, if you can provide them with enough detail. The further right of the dot you go, the more expensive they get ie .001 dimensions on your drawing cost a lot less than .00001.

And finally, here is a couple of pellets:

I am pleased the way they turned out, and they shoot well. You can see a faint parting line when blown up to this size, but they are almost non existent in reality.
The cavity halves and the top are made from precision ground A2. For me, it machines well and is plenty strong. Precision ground because I don't have a surface grinder. After I have drilled and tapped, installed the locating pins and cut the cavities, I assemble the two halves and stone the cavity opening sides flat by hand. I do this mostly because I don't have a surface grinder, but secondly because I want to remove an absolute minimum of material and I want a very fine finish. The setup for milling the cavities was pretty straight forward, I will cover that as well.
The base is made from 11L44, but any steel can be used. It provides a work surface and protects the pellets on the opposite side from where you are working. It is relieved between the pins so that the cavities can be turned over when you are making pellets 10 through 18. The relief is there so that you don't disturb the base of the pellets you made. The relief is in the top so that extruded lead has a place to escape during swaging. It about .200 deep. The holes are reamed just a shade undersized in the top so that I can roller burnish them into a great finish and a precision fit. I should also mention here that I use a No1 arbor press to push the punches down. I even made an adapter for the arbor press so that I have a half inch torque wrench for a handle so the operator knows when to stop pulling down.
The punches are made from 5/16" turned ground and polished rod, O1 I believe. The outside (fat part) is 12L14. The inner rod slides up and down inside the 12L14. The 12L14 provides a positive stop so that you get the exact same depth every time without over travel. My pellets stay within a few tenths of a grain.
When swaging, some lead extrudes past the punches. You want that, you need something to plane off when you are done if you want truly accurate pellets. After you have used both punches, the top lifts off and you use a razor sharp cutter to shave off the excess lead leaving a perfectly flat, smooth base on the pellet. For a razor, I use a hand planer blade. They are sharp when you buy them, but I stone them and then strop to a polished edge. Sharpness is key, if its not razor sharp, then the lead deforms during the planing operation. You can kind of see the polish on the blade but the light wasnt great. Its a mirror finish and scary sharp. After you plane off the first side, flip the tool over in the base and do side two (do a search on Youtube for HM HEN and you can see this basic design in action):

Although you can't change the shape of the pellet without making new tools and buying a new cutter, you can continue to change the second punch, experimenting with skirt thickness, depth of cavity, taper etc. This will also change the weight of the pellet. It seems to make a difference. I have found a great contour for one of the .177 pellet guns, but the other I am still working on for example. I will have a punch for each gun. I have a few old Sheridans, I hope I dont need a punch for each of them but if I do, so be it. Punches are cheap, a 3' stick of drill rod or turned, ground a polished cost a couple bucks and you are set for a lot of experimenting, roughly 17 -18 pieces at 2" each.
Let me also be clear on the fact that you could buy a box car full of factory pellets for what you will have in one of these tools. I think I have around $125-$150 in material alone, another $150 ish on the cutter (depends on the size of the cutter). The builds were slow, but quite enjoyable. The kids enjoy making their own, and I suspect my grandkids will as well.
I like the fact that it is a zero waste activity. I save old pellets, all my shavings and failed experiments. I melt them down in a lead melting pot, poor them in 1/2" x 2" round cavities. I save the ingots and when i get a few, I extrude them into lead wire with my 20 ton press. One ingot will extrude out to about an 18" wire 1/8" diameter. An 18" wire 1/8" will make about 30-35 .20 cal pellets. I'll get more into that later.
My wife tells me I have to BBQ a turkey tomorrow and I am sure that wont be all. I might not get back to this post with more pics till next week.
Wishing everyone on HM a Happy (and safe) Thanksgiving
I built 4 different calibers of tooling, .177, .20, .22, .25. I need to state also that the basic tool is not my design, but it has been highly modified to suit my ideas, limitations and abilities. The punches, the actual design of the pellets (all diablo style but to my dimensions), the cutters, extrusion die for lead wire, and the lead wire cutting device are all my design, more on those later.
Here is the completed, assembled unit, the two rods sticking up are punches used for swaging the lead and shaping the back of the pellet:
Here they are removed. Note the left one is cupped. It is used to force a length of lead wire down into the cavity. The right one finishes the work and puts the cavity at the back of the pellet.
Here is the exploded pic. From top to bottom, left cavity, right cavity, base, top with guide holes for punches, 3 cavity assembly bolts, 2 punches:
Here is the custom ground 4 flute carbide cutter. There are several places online to get them, if you can provide them with enough detail. The further right of the dot you go, the more expensive they get ie .001 dimensions on your drawing cost a lot less than .00001.
And finally, here is a couple of pellets:
I am pleased the way they turned out, and they shoot well. You can see a faint parting line when blown up to this size, but they are almost non existent in reality.
The cavity halves and the top are made from precision ground A2. For me, it machines well and is plenty strong. Precision ground because I don't have a surface grinder. After I have drilled and tapped, installed the locating pins and cut the cavities, I assemble the two halves and stone the cavity opening sides flat by hand. I do this mostly because I don't have a surface grinder, but secondly because I want to remove an absolute minimum of material and I want a very fine finish. The setup for milling the cavities was pretty straight forward, I will cover that as well.
The base is made from 11L44, but any steel can be used. It provides a work surface and protects the pellets on the opposite side from where you are working. It is relieved between the pins so that the cavities can be turned over when you are making pellets 10 through 18. The relief is there so that you don't disturb the base of the pellets you made. The relief is in the top so that extruded lead has a place to escape during swaging. It about .200 deep. The holes are reamed just a shade undersized in the top so that I can roller burnish them into a great finish and a precision fit. I should also mention here that I use a No1 arbor press to push the punches down. I even made an adapter for the arbor press so that I have a half inch torque wrench for a handle so the operator knows when to stop pulling down.
The punches are made from 5/16" turned ground and polished rod, O1 I believe. The outside (fat part) is 12L14. The inner rod slides up and down inside the 12L14. The 12L14 provides a positive stop so that you get the exact same depth every time without over travel. My pellets stay within a few tenths of a grain.
When swaging, some lead extrudes past the punches. You want that, you need something to plane off when you are done if you want truly accurate pellets. After you have used both punches, the top lifts off and you use a razor sharp cutter to shave off the excess lead leaving a perfectly flat, smooth base on the pellet. For a razor, I use a hand planer blade. They are sharp when you buy them, but I stone them and then strop to a polished edge. Sharpness is key, if its not razor sharp, then the lead deforms during the planing operation. You can kind of see the polish on the blade but the light wasnt great. Its a mirror finish and scary sharp. After you plane off the first side, flip the tool over in the base and do side two (do a search on Youtube for HM HEN and you can see this basic design in action):
Although you can't change the shape of the pellet without making new tools and buying a new cutter, you can continue to change the second punch, experimenting with skirt thickness, depth of cavity, taper etc. This will also change the weight of the pellet. It seems to make a difference. I have found a great contour for one of the .177 pellet guns, but the other I am still working on for example. I will have a punch for each gun. I have a few old Sheridans, I hope I dont need a punch for each of them but if I do, so be it. Punches are cheap, a 3' stick of drill rod or turned, ground a polished cost a couple bucks and you are set for a lot of experimenting, roughly 17 -18 pieces at 2" each.
Let me also be clear on the fact that you could buy a box car full of factory pellets for what you will have in one of these tools. I think I have around $125-$150 in material alone, another $150 ish on the cutter (depends on the size of the cutter). The builds were slow, but quite enjoyable. The kids enjoy making their own, and I suspect my grandkids will as well.
I like the fact that it is a zero waste activity. I save old pellets, all my shavings and failed experiments. I melt them down in a lead melting pot, poor them in 1/2" x 2" round cavities. I save the ingots and when i get a few, I extrude them into lead wire with my 20 ton press. One ingot will extrude out to about an 18" wire 1/8" diameter. An 18" wire 1/8" will make about 30-35 .20 cal pellets. I'll get more into that later.
My wife tells me I have to BBQ a turkey tomorrow and I am sure that wont be all. I might not get back to this post with more pics till next week.
Wishing everyone on HM a Happy (and safe) Thanksgiving