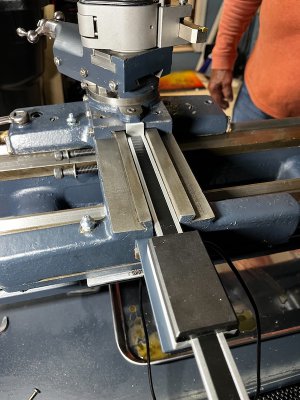
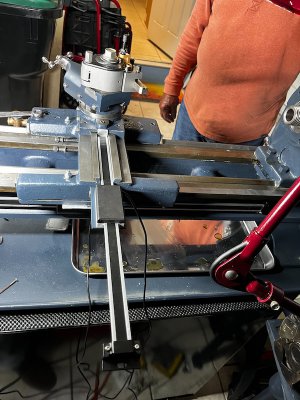
My Logan 820 Lathe Journey

Awesome! I'm glad they got there safe and sound :)
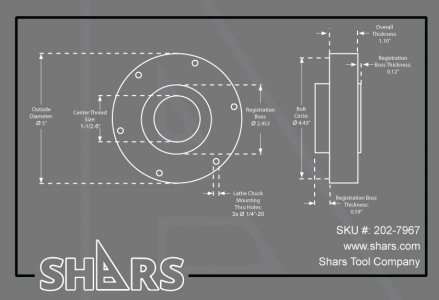
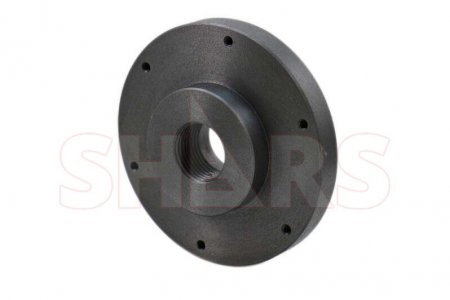
Thanks again. I went ahead and ordered a backplate... hoping I have to do minimal work on it to make it work... Only dimension that I do not like is the thickness... it reads overall 1.10" but the schematic shows that it is only the larger diameter section... I sure hope that is incorrectly stated in the schematic and it is not that thick... Sure hopes it is overall 1" and not 1-3/4"

Shars 5- 1.5 x 8 TPI Backplate.jpeg

202-7967-diagram.jpeg
 
Share photos!! :)

Yeah, I’ll add them to my build thread when I’m a bit further through. I’ve been adding the same to my mill as well. Shouldn’t be too long before theyre both done and ready to post about on here


Sent from my iPhone using Tapatalk
 
Thanks again. I went ahead and ordered a backplate... hoping I have to do minimal work on it to make it work... Only dimension that I do not like is the thickness... it reads overall 1.10" but the schematic shows that it is only the larger diameter section... I sure hope that is incorrectly stated in the schematic and it is not that thick... Sure hopes it is overall 1" and not 1-3/4"

View attachment 418968

View attachment 418967
You can always turn the thickness down... On my old Atlas I did not want all the added distance, so I removed the registration boss and turn the backing plate thickness down, then turned a new registration boss. -- no need to have all the mass sticking out any further than necessary.
 
You can always turn the thickness down... On my old Atlas I did not want all the added distance, so I removed the registration boss and turn the backing plate thickness down, then turned a new registration boss. -- no need to have all the mass sticking out any further than necessary.
Thank you! Good to know. I will share photos when it arrives... if indeed it is almost 2" wide, I will do just that...

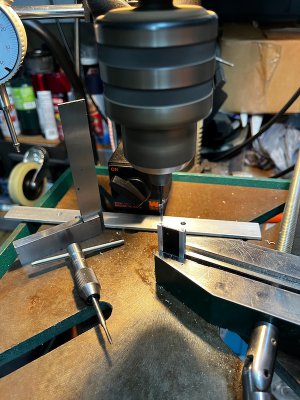
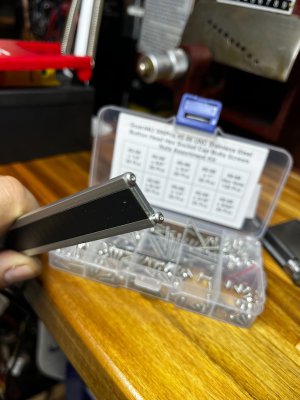
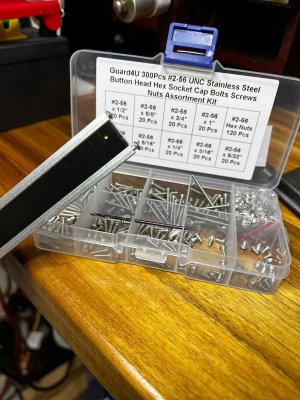
On other news... more progress on the DRO install... drill and tap 2-56 on the end of the scale for the bracket...

IMG_7759.jpeg

IMG_7761.jpeg
IMG_7762.jpeg


On to the compound... These are small holes... I think I will remove the compound to drill it instead of trying to do it in place...
 
Congrats on the 2-56 tapping! Big pucker factor on stuff that small, especially when you feel a little resistance.

Bruce
 
As an aside, I do a great deal of 2-56 tapping, albeit usually in soft metal. For small taps, 4-40 and smaller, I normally use a "pin vise" instead of a tap wrench. The pin vise has several advantages, the first is that it can be chucked in the drill press vise to start true and then reverted to hand use. Then there is the pin vise chuck that doesn't tighten as much as one would like. It will slip if too much torque is applied. Frustrating but a good safety limit. It can be tightened if you think you can get by with just a little more oommph. Or require rethinking the process if you're that paranoid. And, most importantly, it is driven with no extension. Using just your fingers, the available torque is somewhat limited. I rarely break a 2-56 tap, or M2X.4, but have several on hand for when I do.

During the (rare) times I use a small tap in steel, I usually drill the next size larger hole than recommended. It does weaken the hole some small amount, but in most of my work the screw serves to bind two pieces that are not under extreme tension. But I'm building models, not machines. It can make a difference, I just use a larger screw.

.
 
Last edited:
Congrats on the 2-56 tapping! Big pucker factor on stuff that small, especially when you feel a little resistance.

Bruce
Well... I did break one on the second tap... had to order 4 more to make sure I had enough spares for the rest of the threads I need to do... :confused:. I have two more left...

As an aside, I do a great deal of 2-56 tapping, albeit usually in soft metal. For small taps, 4-40 and smaller, I normally use a "pin vise" instead of a tap wrench. The pin vise has several advantages, the first is that it can be chucked in the drill press vise to start true and then reverted to hand use. Then there is the pin vise chuck that doesn't tighten as much as one would like. It will slip if too much torque is applied. Frustrating but a good safety limit. It can be tightened if you think you can get by with just a little more oommph. Or require rethinking the process if you're that paranoid. And, most importantly, it is driven with no extension. Using just your fingers, the available torque is somewhat limited. I rarely break a 2-56 tap, or M2X.4, but have several on hand for when I do.

During the (rare) times I use a small tap in steel, I usually drill the next size larger hole than recommended. It does weaken the hole some small amount, but in most of my work the screw serves to bind two pieces that are not under extreme tension. But I'm building models, not machines. It can make a difference, I just use a larger screw.

.
I was not aware of what a pin vise was... now I know... I will get one next time I order something from Amazon...:encourage:

Starrett Pin Vise

Starrett Pin Vise.jpg
 
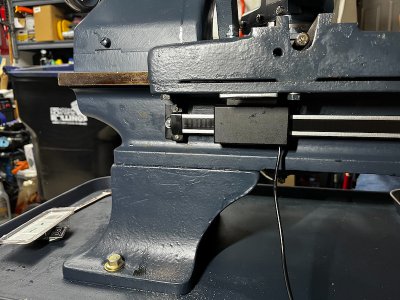
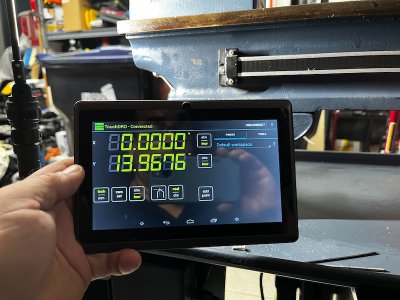
A few more photos of the progress with the DRO install..

One axis done... and I say one because I can't seem to find consensus in my searches as to which on is Z or Y, or X... For the display I am just displaying this one as Y-axis...


IMG_7767.jpeg

IMG_7768.jpeg

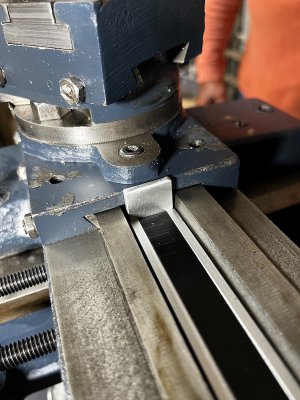
Now working on the pending one... X-axis?? Z??

This is why I needed to make those 2-56 threads...

IMG_7776.jpeg

Now I drill two holes... center punch on the lathe... thread those holes on the lathe with a 2-56 tap... taps should be here tomorrow...

IMG_7778.jpeg
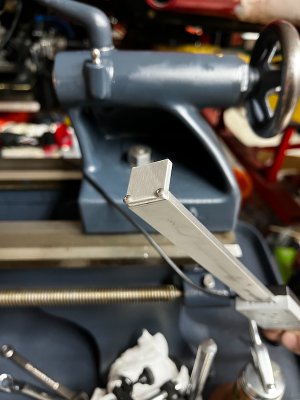
Made a bracket for the reader... already painted to match and holes to mount the reader are done. To secure to the lathe, there was a 3/8 threaded hole already there... tempted to drill and tap a second hole, but will hold off... looks like one bolt is enough to hold the bracket. There is not much force from the sliding back and forth...
IMG_7780.jpeg
IMG_7781.jpeg

And the good thing of all this is that I should be able to use the factory cover... does not seem to be any interference with the DRO... I forgot to take a photo with the cover on...

I still need to cut the scale. Does not need to be as long. I will do that last...
 
The Starrett is a very nice pin vise, I have several. But for a tap wrench, I prefer a type put out by X-acto. Micro-Mark is a little expensive: https://www.micromark.com/mini-hand...MI3ejJkof1-QIVEmpvBB3dNwuBEAAYASAAEgKKoPD_BwE

An alternative like I have found at eBay and have several of:
https://www.ifixit.com/Store/Tools/Pin-Vise/IF145-156?o=1&pk_campaign={US|Shopping|MiscTools}&pk_source=google&pk_medium=cpc&pk_kwd=&gclid=EAIaIQobChMIx9WD94f1-QIVMRTUAR0oDAEvEAQYBiABEgL8OfD_BwE

A much better price, and more usable as pressure down is more easily applied for drilling.

It should be noted that the "lighter" or "cheaper" versions usually have 4 jaw collets. 3 jaw collets are fine for drilling but the 4 jaw works better as a tap wrench.

.
 
Last edited:
Back
Top