My New Lathe / Mill Combo

oskar

Registered
Registered
Joined
Nov 24, 2013
Messages
254
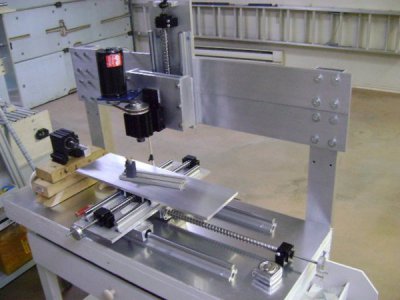
I’m approaching the end of my new Lathe / Mill combo and the attached 2 pictures shows what I have done so far. I have no idea if this is going to be a successful project since I never had a mill before and the Taig mini Lathe I got recently was frustrating too small for any work.

Since I have no experience in machining I’m looking for any comments / ideas regarding the layout.

The Z axis is done and at the picture is at its lowest position. The travel to the top is 8”

The table top is 16”x40”

The X and Y axes are not done and lay on the table top now trying to figure out their best position.

The support of the Lathe headstock which at the picture sits on top of 3 pcs of 2”x4” is not done because I have to finish the X & Y axes first to establish the bed height. I also wonder if there is any advantage to move the Lathe headstock further to the left.

The ends of the X & Y ball screws are long for a purpose. I have order some handles which will fit there but I don’t know the exact width of these handles. After I receive the handles I will trim these ends

Thank you
26A X & Y Layout.JPG

26B X & Y Layout.JPG
 
I like it, very clean- it might need some extra rigidity in a couple spots but that can be fixed
 
It has potential, but rigidity will be your main problem, the two flat beams that support the mill head look like they will flex quite easily, can you increase their rigidity by adding some channel at the back. The headstock will need to be very rigidly attached to bed.

I assume you intend to machine mostly aluminium and or plastic, it should work ok on those, but lack of rigidity will limit depth of cuts, especially in steel. Good concepts keep going you will learn a lot when you start machining.
 
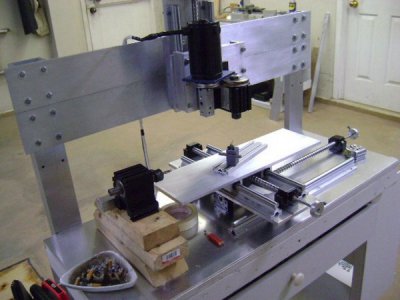
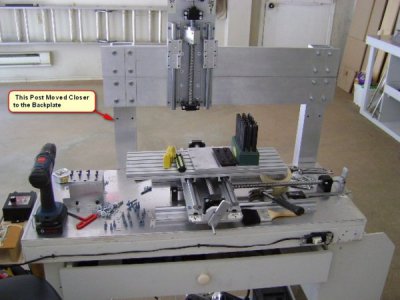
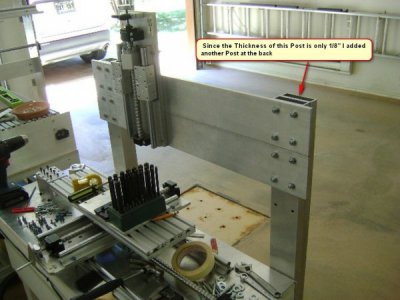
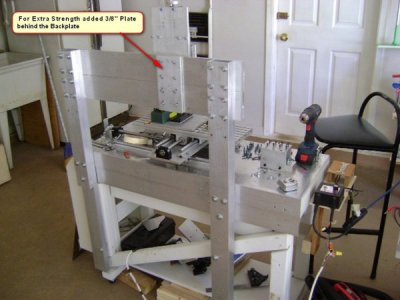
Yes rigidity WAS a problem and after few changes the final design (as per attached) looks very solid. I mill right now a slot in aluminum and taking 1/8” per pass with 3/16” endmill there is no problem.

It’s for a hobby use and I could have bought a new lathe and mill at half the cost of what I have spend so far but it is the thrill of making something on your own. I also like the idea of having both lathe/mill on the same stand.

Still there are improvements to be made and I will do as I go along. Main problem is that I have zero experience in machining so I don’t really know what is good/bad

33 newer frame design.jpg

33b newer frame design.jpg

33c newer frame design.jpg
 
Very cool @oskar !

Nice clean build, this will be a very useful tool that you will know absolutely everything about.

As above, I too believe rigidity will be the key to success. My only two recommendations there would have been i) to add that second rectangular tube rotated 90 degrees to the first one. I have seen that "L" or "T" type structure reduce flex in both directions very well, and ii) to make that added tube full height rather than ending it at the table height.

However, if it's already cutting like you want it to, then this obviously doesn't matter.

I hope you keep this thread updated with your progress.
It is a very interesting build.
Thanks for sharing it!

-brino
 
Nice idea Brino, thanks however if I have problems later on it would be better to scrap these 2 post (each one is 1”x3” by 1/8” thick walls) and get one similar to the post on the left which is 2”x3” by 1/4” thick walls. This post is solid like a rock
 
It's great that the machine is performing as well as you want at this stage. A worthy project, and as you say, you are and will continue to learn much about the approach to machining.

I suspect that when it is finished you will have a lot of good ideas of how to build a bigger and better one. You will also have the means to do any machining needed for that new project. Good luck and continue learning.
 
Some improvements….

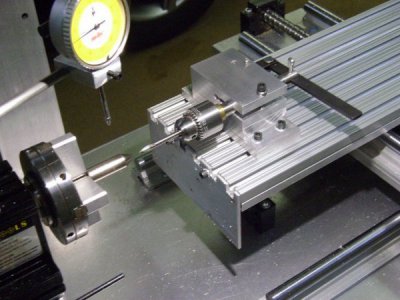
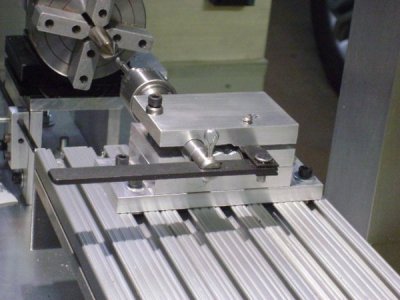
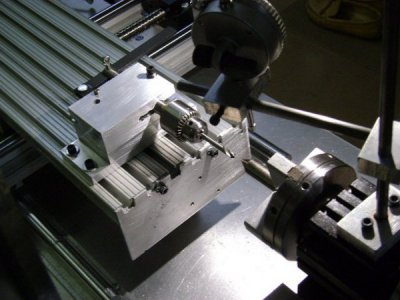
Made a new Tail Stock which works well but time consuming to align every time I want to use it. Perhaps later I will make a jig to make this task easier.

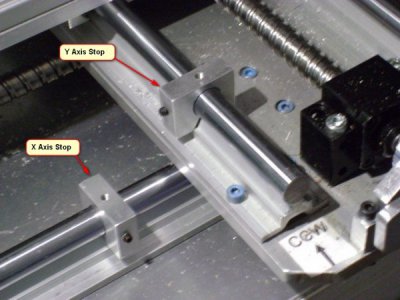
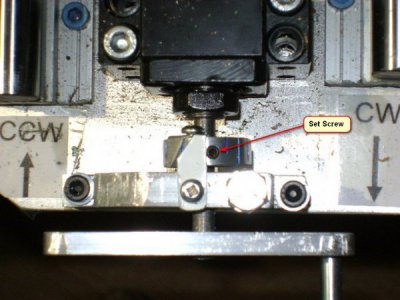
Added 2 stops for the Y and X axes so when I make a cut I know where to stop. That’s has been very helpful so far.

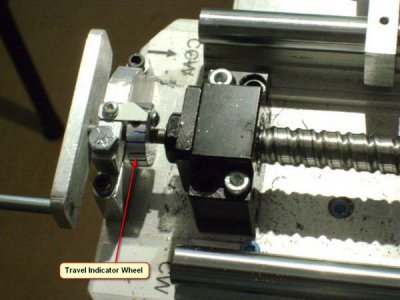
Added the wheels shown on all 3 axes to know where I am. Very helpful so far to measure the depth of cut on the Z axis. Each graduation = 1/8” and normally I go down half of that. Haven’t use it yet in the other axes but later I may need them.

44B My New Tail Stock.JPG

44D My New Tail Stock.JPG

44G My New Tail Stock.JPG

47 Improvements X & Y Axes Stops.JPG

47A Improvements Axes Travel Indicator.JPG

47B Improvements Axes Travel Indicator.JPG
 
Very interesting Oskar how a person, like you who is learning from scratch often comes up with new ideas of how to achieve a result. Unlike those of us who have been formally taught, we are often restricted in our thinking because we have been told certain methods won't or can't work, but you are reinventing the wheel, and coming up with new ideas, that are working. Excellent.
 
Awesome machine! And built to spec to top it off. Like bob said above I like your outside the box thinking.
 
Back
Top