

-
Welcome back Guest! Did you know you can mentor other members here at H-M? If not, please check out our Relaunch of Hobby Machinist Mentoring Program!
You are using an out of date browser. It may not display this or other websites correctly.
You should upgrade or use an alternative browser.
You should upgrade or use an alternative browser.
My own Grizzly DF-1237G setup/restoration thread
- Thread starter TonyBen
- Start date
- Joined
- Apr 17, 2015
- Messages
- 323
They make very hight quality parts as does Wisconsin Trigger. Happy to have them in our state. If you grind it will be parallel, still odd to see that in there
- Joined
- Oct 11, 2016
- Messages
- 3,855
Tony, I'm pretty sure that the 3 jaw setup with the spacer is a weird accomodation done by a hobby machinist. but here's an idea: When you are ready, bore out the adapter (if there are enough threads) to allow the adapter to contact the actual flange on the spindle. Both my chucks mount this way, and it is a very solid technique. I think you lose a little having the spacer there, in terms of the idea that more parts makes less rigidity and more error....
- Joined
- Apr 17, 2015
- Messages
- 323
Dabbler, I totally agree, There is a reason virtually all the high precision lathes lock up against a taper. Next best thing is to have the chuck pull snug against a shoulder.
Man, talk about baptism by fire. I'm definitely learning about lathes the hard way. If it were easy from the start, I probably wouldn't learn so much.
I'll measure the spindle thread length and distance from face to shoulder and take the spacer and chuck to my friend with the surface grinder. He's got a few lathes, mills and a couple of CNC machines but he's terribly busy all the time.
I tried to guilt him into swinging by my house today to at least look at my lathe in person. He was telling me he's got a fourth lathe that's new and never used that he's setting up this week. maybe he can use one of them to extend the threads in the backplate if needed or if possible. He also said he may need to cut some threads out of the backplate to extend the shoulder so that the spacer won't be needed which is what I think Dabbler is saying above.
He was also mentioning turning a 2" piece of steel on a lathe to true it up and then chuck up my 3-jaw chuck to the piece while its installed on his lathe and then facing the back shoulder of the backplate to true it up so that when its installed on my chuck it will already be trued.
You all have been great. Again, thanks.
Tony.
So my friend actually came over yesterday and looked at my equipment. We placed the chucks side x side and the 4-jaw has more relief and I actually was able to screw it all the way on and it hits the spindle shoulder without the spacer. The 3-jaw had about 0.200" less relief. He told me what to do to fix it. He checked the depth to make sure that if I cut deep enough that the spindle won't bottom out inside the 3-jaw and we have ample clearance.
3-jaw on the left, 4-jaw on the right...
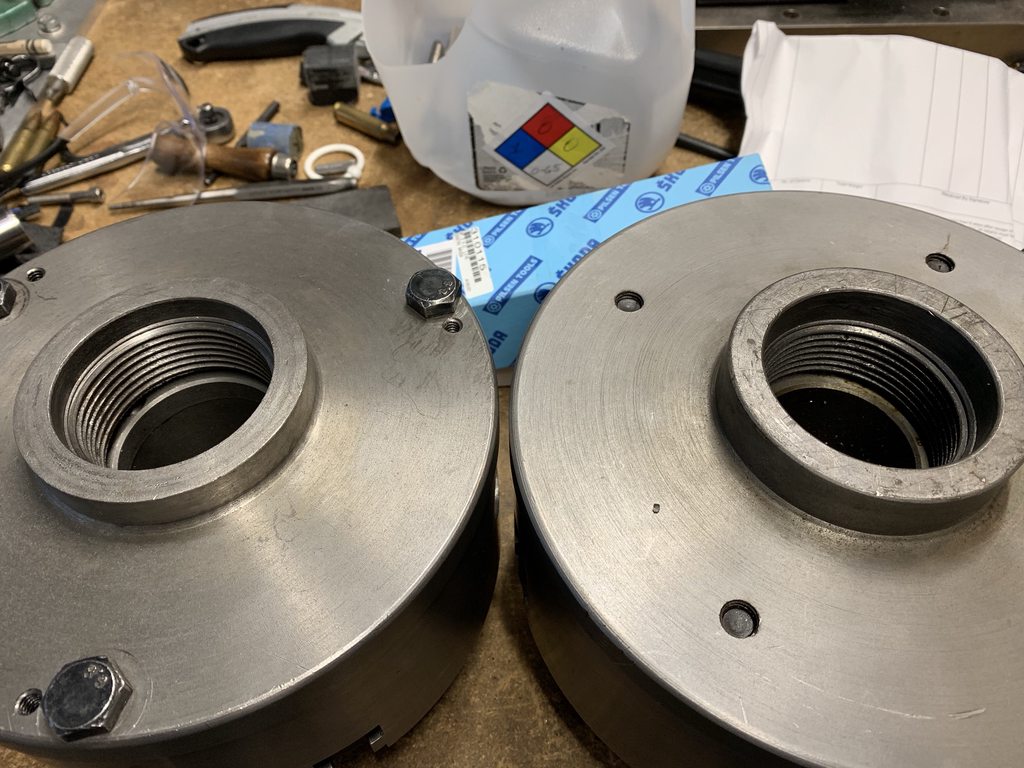
4-jaw...
3-jaw...
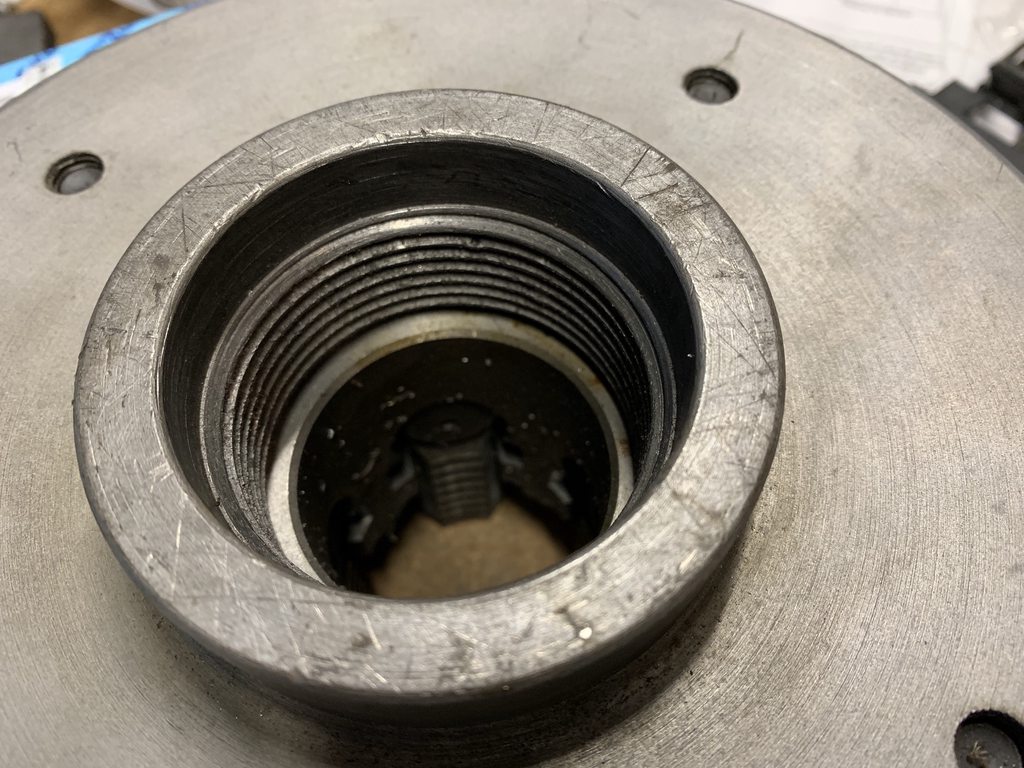
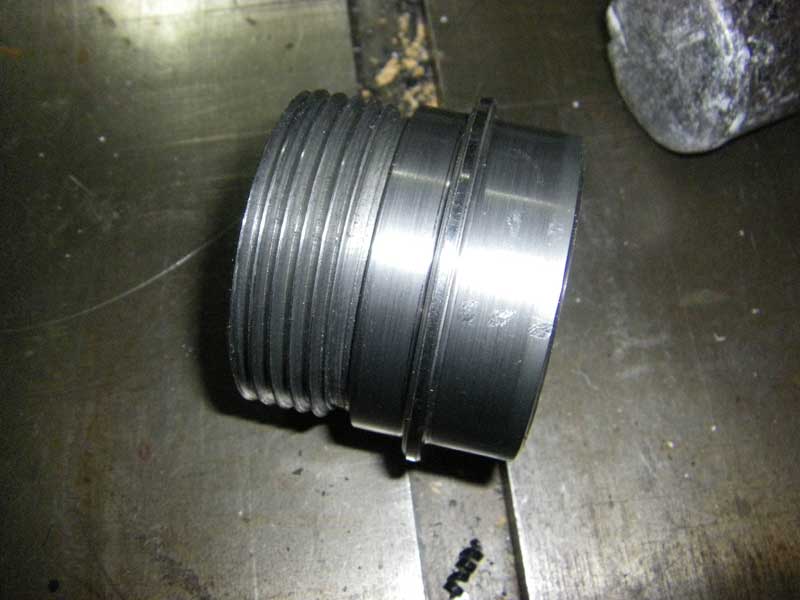
I reversed the jaws on the 4-jaw and chucked up the backplate and used a carbide boring bit to remove a bunch of thread. I stopped just a little short.
I still have to take another 0.040" before it will contact the spindle shoulder. I'll finish that up tonight.
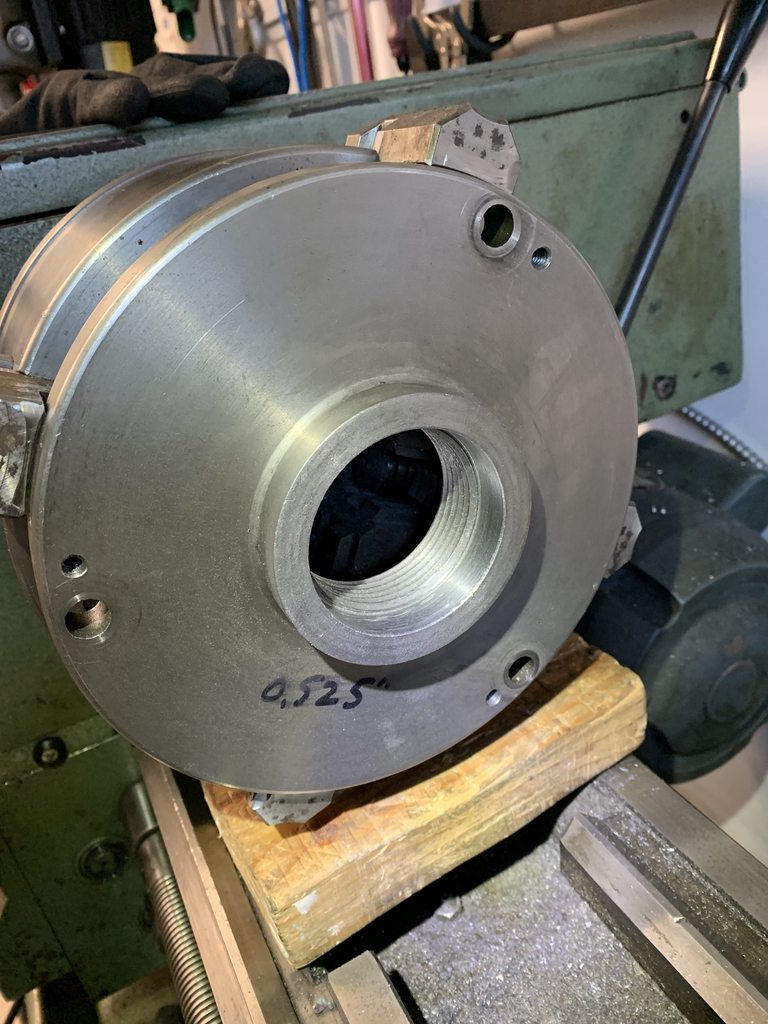
This is the first time I've ever used a boring bit. I used a cheap Chinese carbide boring bit I bought 2 weeks ago. I was getting a bit of chatter and it really squeals. I was using Mic-O-Cut cutting fluid. Maybe I was just going too slow. I haven't cut any of my high speed steel blanks yet to make a HSS boring bit.
Tony.
3-jaw on the left, 4-jaw on the right...
4-jaw...
3-jaw...
I reversed the jaws on the 4-jaw and chucked up the backplate and used a carbide boring bit to remove a bunch of thread. I stopped just a little short.
I still have to take another 0.040" before it will contact the spindle shoulder. I'll finish that up tonight.
This is the first time I've ever used a boring bit. I used a cheap Chinese carbide boring bit I bought 2 weeks ago. I was getting a bit of chatter and it really squeals. I was using Mic-O-Cut cutting fluid. Maybe I was just going too slow. I haven't cut any of my high speed steel blanks yet to make a HSS boring bit.
Tony.
Last edited:
- Joined
- Oct 11, 2016
- Messages
- 3,855
When boring cast iron, it is best to not use any cutting fluid. It was squealing because your RPMs are too high, and your bar is made of Swiss cheese. I'd try about 360 RPM (or slower), and take .010 cuts. Also the geometry of the carbide can make chatter worse. The target should be a slip fit - .001 or less larger than the diameter of the non threaded part of the spindle.
Thanks. I was using the Chinese version of the short fat bit shown on the front row, far right.

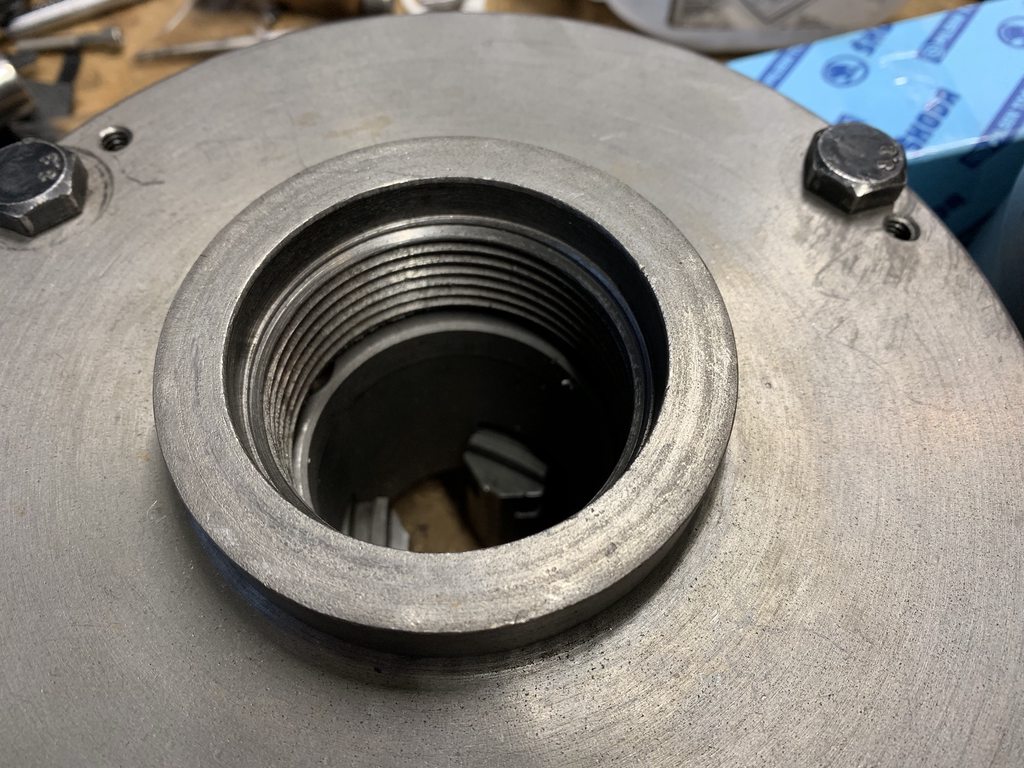
I basically just skimmed the surface and kept it going. Actually, at first, what I took off was smaller in diameter than the original freebore. After I got my desired depth, I blended it in with the original inside diameter.
Tony.
I basically just skimmed the surface and kept it going. Actually, at first, what I took off was smaller in diameter than the original freebore. After I got my desired depth, I blended it in with the original inside diameter.
Tony.
- Joined
- Jan 28, 2011
- Messages
- 3,480
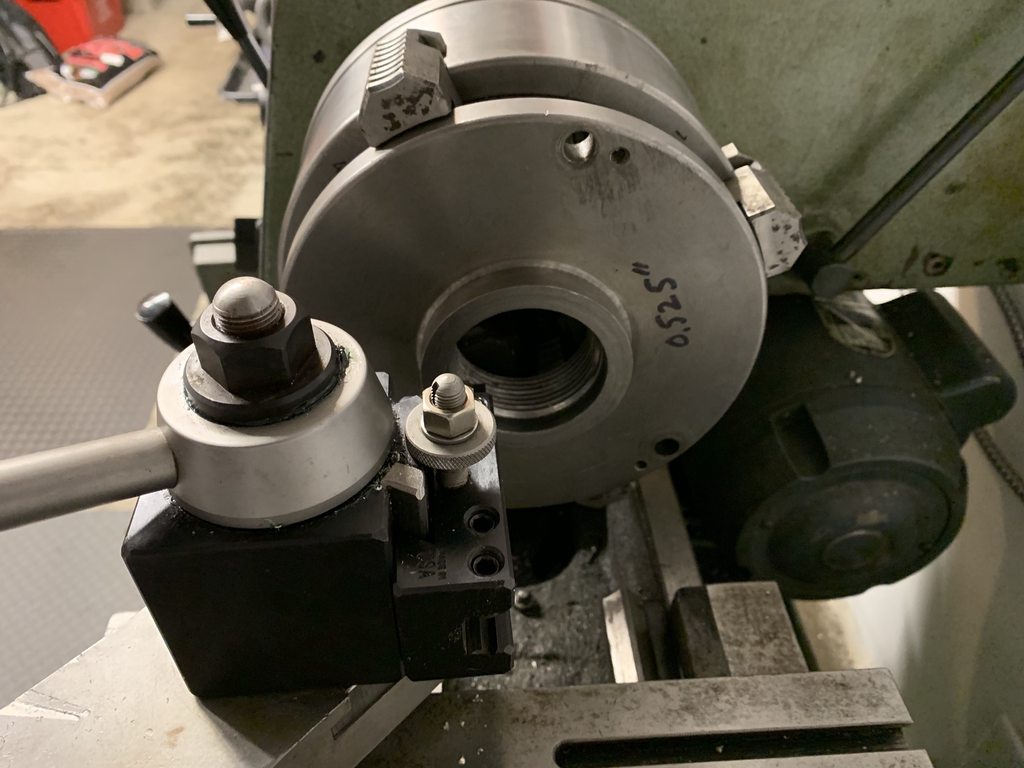
You now have to reface the mounting surface for the chuck. By machining the back the front is no longer perpendicular to the spindle. There are quite a few posting here on machining the plate. I posted one a few years ago on making two backing plates.
 www.hobby-machinist.com
Making a couple of threaded spindle backing plates for my lathe
When I sold my Atlas 10F24, I held on to my Bison 5” 3J, as it was fairly new. Naturally I needed to make a new backing plate to mount it onto the new lathe. The old plate was 1 1/2” X 8 while the new spindle is 2 1/4” X 8, so I needed new metal to do this. I recently purchased 2 backing plates...
www.hobby-machinist.com