My round ram M-head Bridgeport refurbish project

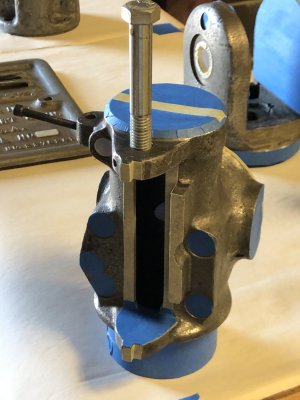
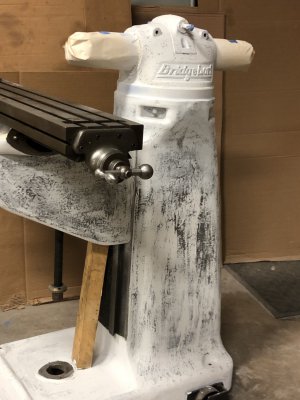
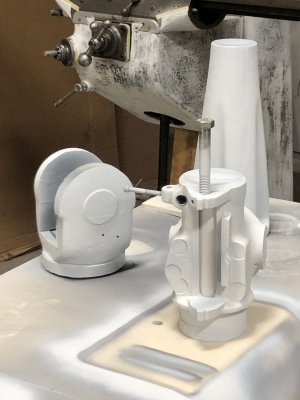
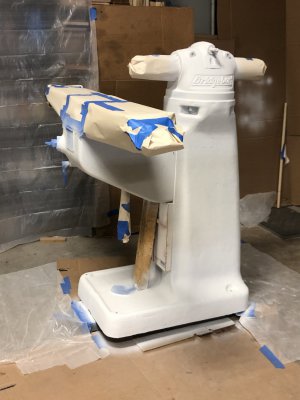
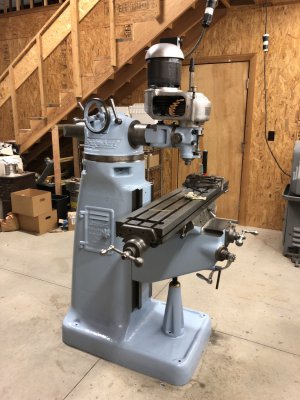
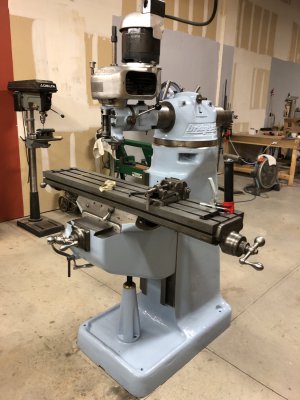
Next is prep and primer painting the machine. I'm using Rustoleum white clean metal primer. My plan is to brush on a fairly heavy coat of primer first then sand it down until the high spots of the casting start to show through. Then to finish masking everything and spray another coat of primer. I did not sand the small castings, but only scuffed them for adhesion. The column, turret, and knee I sanded quit a bit to expose the high spots, then sprayed a complete coat of primer on everything again. It is not all that smooth but I don't think I will spend any more time to make it better. This is that stage of a project where I am just ready to get it done.
 

Attachments

  • 57E26E3D-0327-4B2C-B145-16549CF5B79C_1_201_a.jpeg
    57E26E3D-0327-4B2C-B145-16549CF5B79C_1_201_a.jpeg
    198.8 KB · Views: 9
  • 8859ED49-377C-41FD-A0B3-9FE0E25ADCF5.jpeg
    8859ED49-377C-41FD-A0B3-9FE0E25ADCF5.jpeg
    241.1 KB · Views: 8
  • AC775EC0-E32B-4D1E-BD8B-FE7C76E2B9EA.jpeg
    AC775EC0-E32B-4D1E-BD8B-FE7C76E2B9EA.jpeg
    184 KB · Views: 9
  • E36C6951-D4CA-4E38-9155-0661108C0FDC.jpeg
    E36C6951-D4CA-4E38-9155-0661108C0FDC.jpeg
    187.9 KB · Views: 9
Fresh bearings arrived so I worked on assembling the quill today to let the primer cure for a day or two. Pressed the lower pair on the spindle first then pressed the spindle with bearings into the quill. Finally press the top pair of bearings into the quill and thread the lock nut onto the spindle to keep it all together.
 

Attachments

  • 8D032FDC-E329-45BF-B027-769A76C9D687.jpeg
    8D032FDC-E329-45BF-B027-769A76C9D687.jpeg
    172.7 KB · Views: 8
  • 2030F96F-0E2C-4E80-9359-1D90CF84E668.jpeg
    2030F96F-0E2C-4E80-9359-1D90CF84E668.jpeg
    168.4 KB · Views: 8
The pulley bearings have a nut that needs a special tool to tighten and remove. It might be done with a punch but it is buried up inside the pulley and is hard to reach. I made this crude tool to remove and tighten and it worked well. 10-32 screws are just the right size to engage the slots in the nut.
 

Attachments

  • 1AECC43A-A6DC-423C-B581-08C95DB04375.jpeg
    1AECC43A-A6DC-423C-B581-08C95DB04375.jpeg
    266.9 KB · Views: 3
I got the first coat of color on the castings today. It turned out a little lighter than I hoped but I like it better than either the regular machine gray or the green original color. The weather tomorrow might not be good for painting so the final coat may wait a day or two. Once I pull the masking off I still have to brush the area where the board is holding the knee up and the bottom side of the saddle. Also the ends of the ram will be painted either black or machine color.

Mark
 

Attachments

  • D0EFF839-353E-4DC2-A6E5-4F7A3EECDA3A.jpeg
    D0EFF839-353E-4DC2-A6E5-4F7A3EECDA3A.jpeg
    191 KB · Views: 7
While I waited for better weather for painting I assembled the head. The quill feed is together and works real smooth. Then another delay. When I checked the long T-bolts that hold the head to the ram I saw that the threads were stretched from over tightening. So I ordered more bolts since I sure did not want to take it apart again to replace a failed bolt. The original size 3/8 thread are available but I bought High strength 10mm grade 10 bolts to be sure they will last a long time. I machined the bolt heads to form a T-bolt configuration that fits into the circular T-slot in the ram.
 

Attachments

  • 1DE7E8E1-F16C-4370-AC8E-D572DF241CA5.jpeg
    1DE7E8E1-F16C-4370-AC8E-D572DF241CA5.jpeg
    274.1 KB · Views: 5
  • DEB3F6DA-9B0F-4B13-AC09-6C211A0DC7AD.mov
    12.2 MB
  • 047F6B20-849D-4645-892A-254F9E340C8F.jpeg
    047F6B20-849D-4645-892A-254F9E340C8F.jpeg
    186.8 KB · Views: 5
The final coat of paint went well and I was able to start assembling the machine. I finished machining the new bolts today using a friend's Bridgeport and put everything together. It looks good and runs quiet and smooth. I have not cut any metal yet but will soon. The repaired spindle splines are kind of ugly but they have a good fit and I am anxious to see how it sounds when cutting or drilling. I know the dovetails are worn some but I will use the machine as it is and see if it can make accurate parts. So far I am hopeful. Thanks for following along this adventure.

Mark
 

Attachments

  • 994D0DDC-5779-4D7F-81F7-BC7E558D8721.jpeg
    994D0DDC-5779-4D7F-81F7-BC7E558D8721.jpeg
    240 KB · Views: 9
  • 59CE4F85-C87B-4F01-B6A3-E9BCBDE2D06E.jpeg
    59CE4F85-C87B-4F01-B6A3-E9BCBDE2D06E.jpeg
    292.7 KB · Views: 9
  • 87C59D6E-E523-4FE3-9277-0866A83B5513.jpeg
    87C59D6E-E523-4FE3-9277-0866A83B5513.jpeg
    291.5 KB · Views: 8
  • B39552DA-2F83-467C-A5D8-F0E72F1F534F.jpeg
    B39552DA-2F83-467C-A5D8-F0E72F1F534F.jpeg
    235.9 KB · Views: 8
Back
Top