

- Joined
- Jan 20, 2016
- Messages
- 602
With all of these stay at home orders and some modified working schedules (and a few other financial things going my way), I found myself in a position to be able to upgrade my lathe. I have had a PM-1030v for nearly 4 years now and for the past 6 months or so, I have been considering stepping up to something a bit bigger and a bit more powerful. After going back and forth several times, I was determined to get the PM-1236 (Not T). After finding out that the "Standard" package isn't in stock and won't be in stock for a while, and the "Standard" stand isn't either, the difference between that and the 1236T was so small it was worth the extra cash to go Taiwanese.
I placed the order and a little over a week later, there was a big ol crate in my driveway holding a new lathe, a stand, and a QCTP. I got it mounted up on the stand with an engine hoist (Man that was scary!) and got it wired in. First impressions were pretty good, but not fantastic. Overall I am very happy with the machine, but I think there are definitely a few things that could be improved on.
First, the things I really like! In no particular order.
1. The handles are fantastic. They are smooth, easy to read, have inch and metric measurements, and are a significantly better design than the ones on my 1030v.
2. The power switch being on the carriage is excellent. No more reaching over the chuck to hit the power button.
3. A quick change gear box is awesome! Having like 30 feed rates to choose from vs 3 is incredible. If I need to feed just a little faster to break a chip, I can do that. On the 1030v, I can either double the feed rate (If I am not already maxed out) or break out the change gears.
4. That D1-4 cam lock spindle is so much easier and so much faster than what I am used to. No wrenches and no rotating back plates to deal with.
5. The single speed motor with gears to change speeds. This is a much better design than a variable speed motor. It is insane how much torque it has at the low end and how much power it has on the high end.
Some things I didn't love, but aren't a huge deal.
1. The work light doesn't seem like it is really part of the machine as much as it is just thrown in with the shipment. It didn't come with mounting hardware (Came with a bracket, no screws, washers, or nuts), there isn't a hole into the power box for it, and the mounting holes aren't pre drilled. There also weren't any mounting instructions included. Mounting it required drilling a few holes, grabbing some suitable screws, and screwing it in place. I still need to get some hardware and drill a hole to pass the power cord into the power box. It isn't the end of the world by any means, but it would be nice if it was at least slightly more integrated into the machine package.
2. The included 3 jaw chuck is really bad. It is advertised as an "Economy" chuck so my expectations were quite low, but it was substantially worse than the 6" 3 jaw chinese chuck I got for my old lathe for around $120 shipped. That cheap chinese one replaced the included one almost immediately. Some of the hardware was loose, some was tight, it was gritty and rough, and it was so out of balance that the machine would shake starting at only 335 RPM. I took it apart hoping a little cleaning and stoning would help, but the build quality was just so bad it wasn't worth the time.
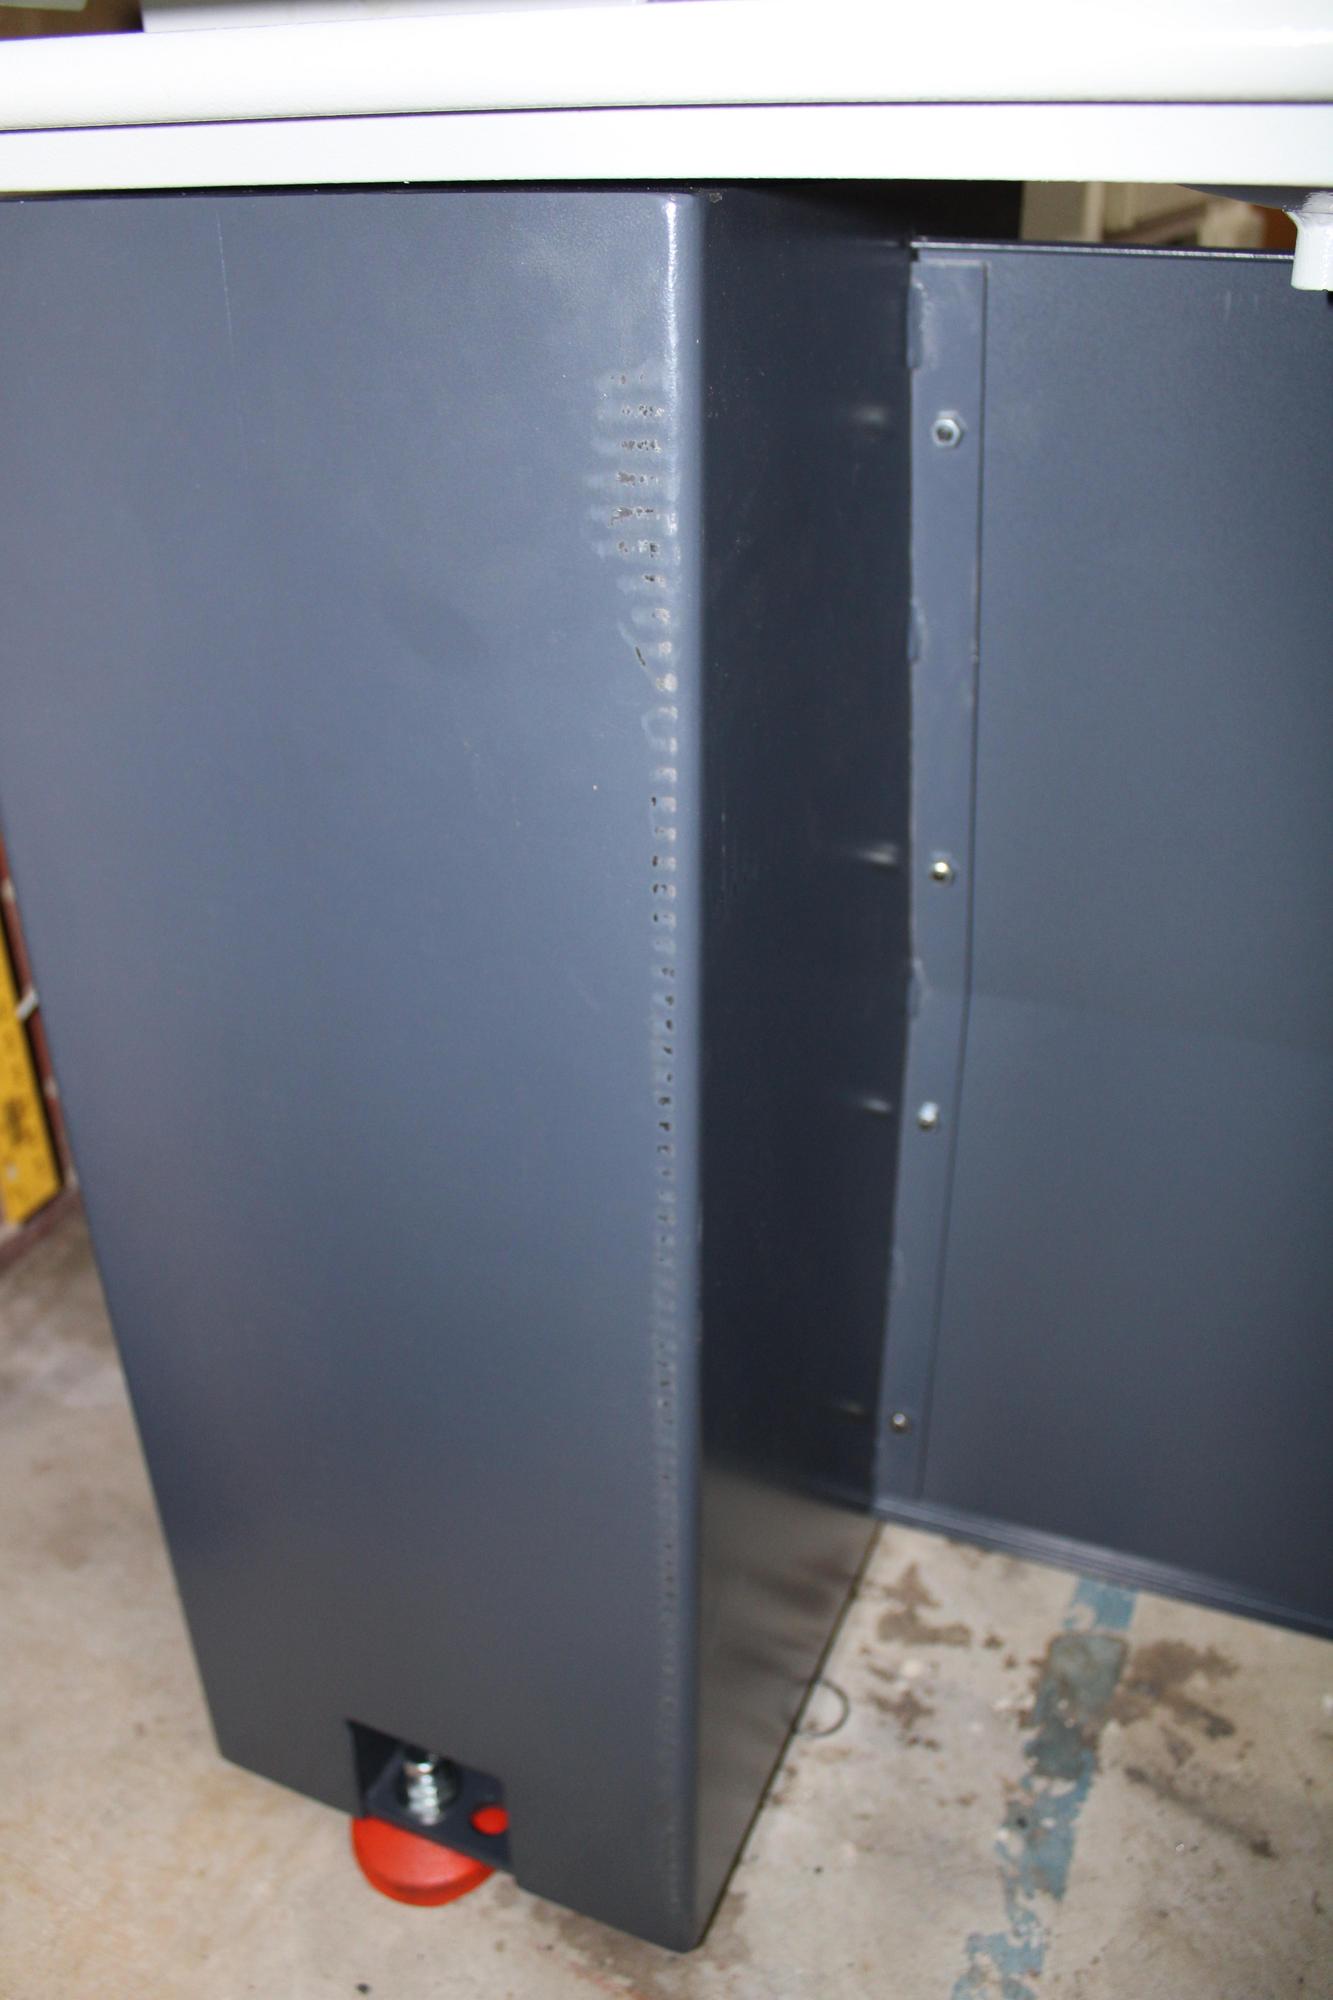
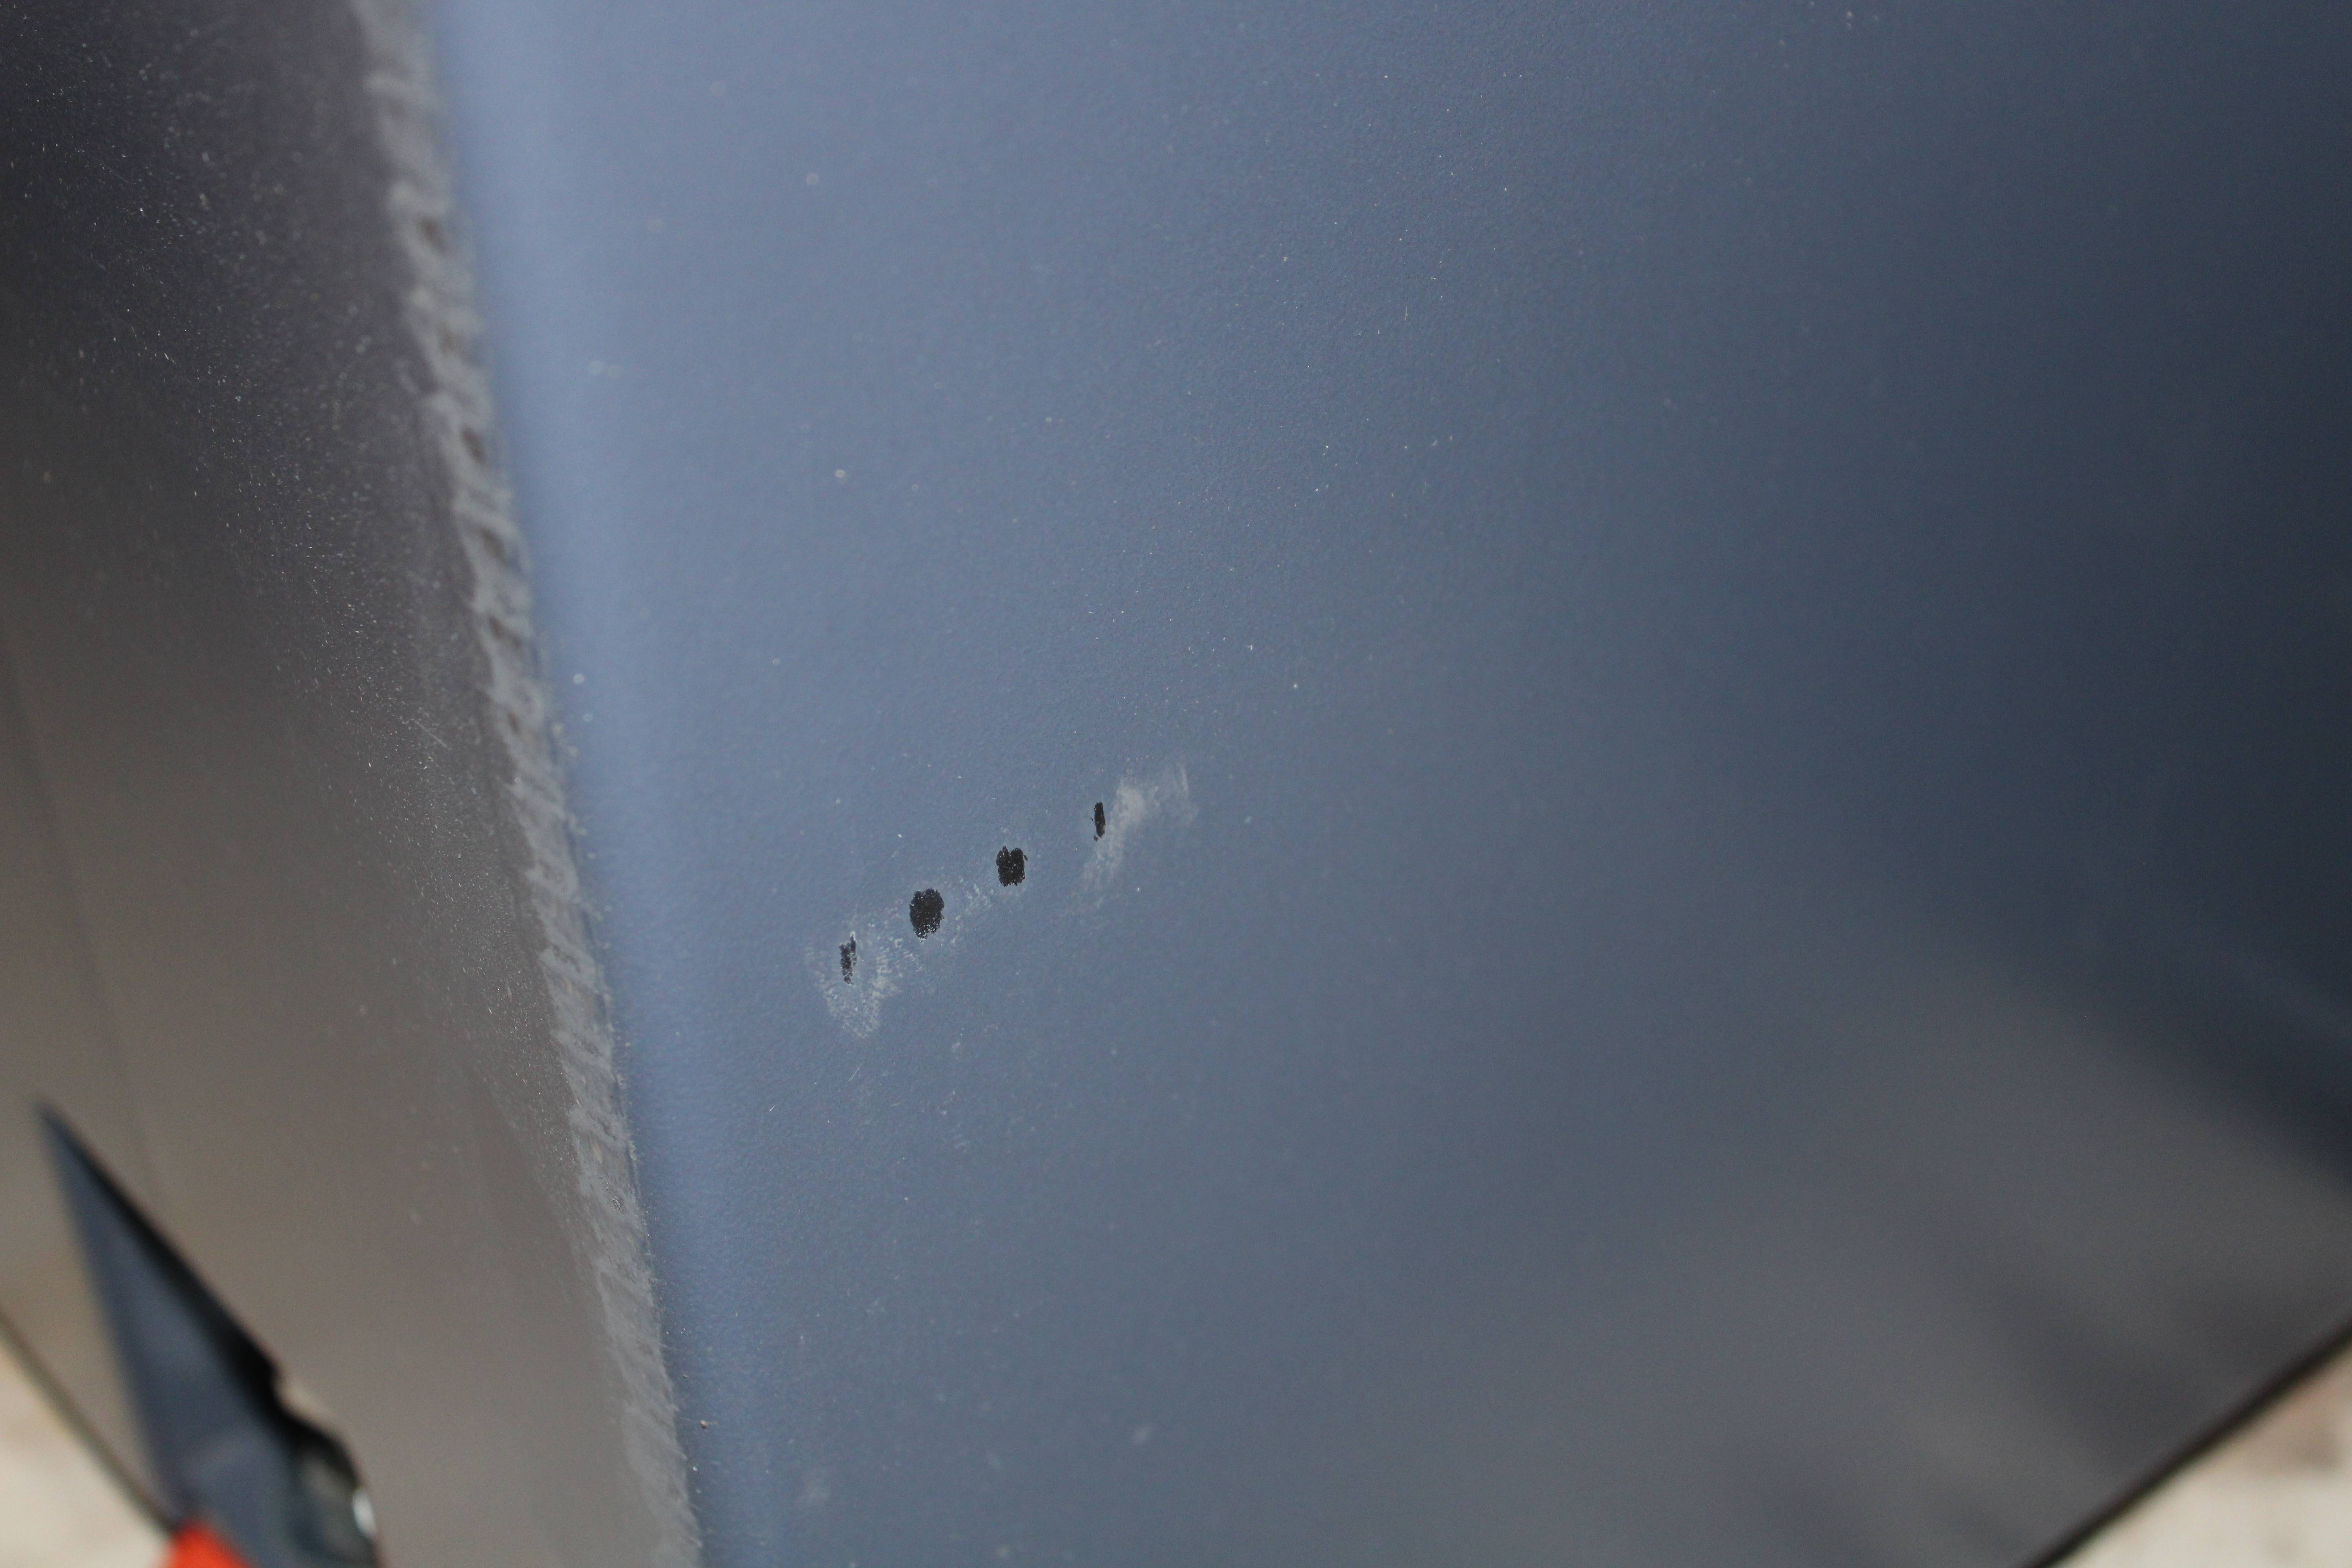
3. It looks like the stand paint wasn't dry before they put it into the box. So the doors and the back of the stand look just terrible. The rest of the paint looks fantastic, but it will be hard to ignore the messed up paint when you step back to admire it. It isn't functional, so again, not a big deal.
4. The fit of the handles for changing gears isn't particularly good. There are a few combinations that cause one of them to wobble a ton when the machine runs. Moving them is a bit challenging because the handles bind immediately when you apply force to move it side to side. You need to sort of drop them all the way down, hold them with both hands to try to position it correctly, then pull the spring back while trying not to move it left or right at all (As soon as you do, it will bind and you can't get it aligned to change the gears), then lift it up to the hole and work the spindle with your other hand to get the gears to align. Maybe it just needs to be broken in a bit, but at the moment, they are pretty miserable to change (But not anywhere near as bad as dealing with change gears on the 1030v).
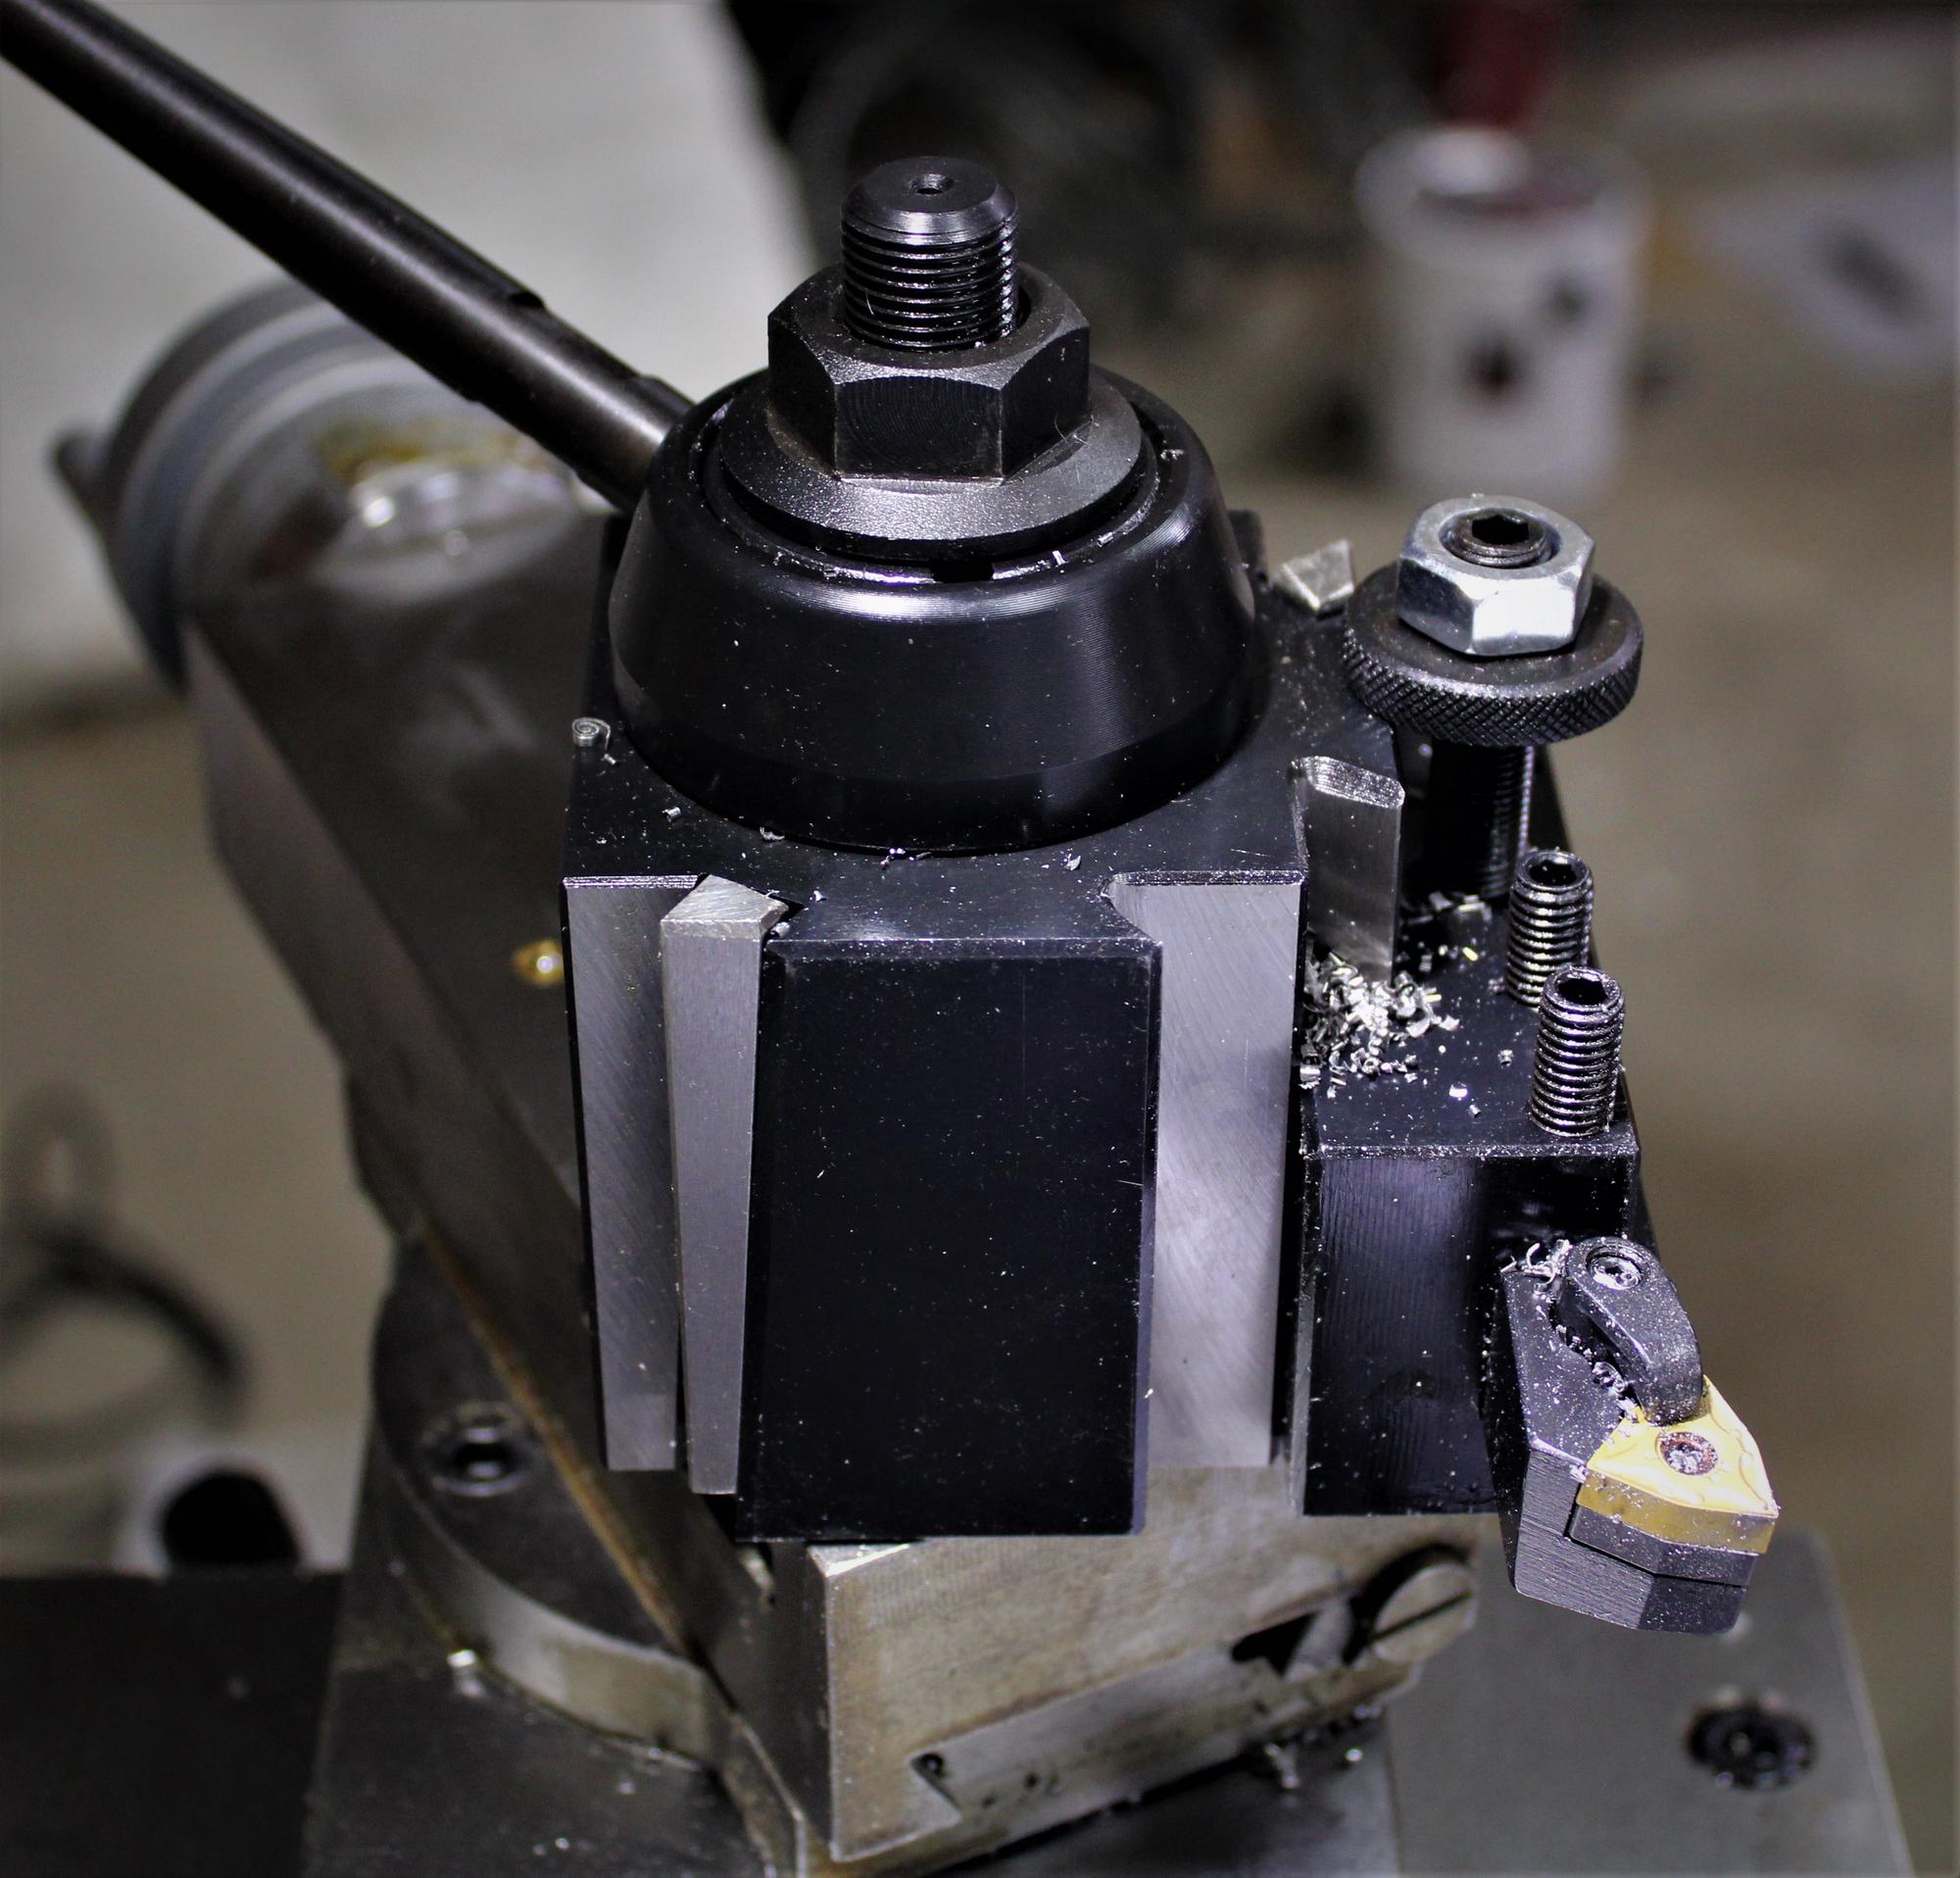
5. I don't love the fit of the quick change tool post. When you unscrew it to rotate it (No wrench for that included btw, you'll need a 25mm wrench to tighten it), it moves freely back and forth in the compound slot. Then when you tighten it down, it does not sit still in the slightest. Trying to tighten it while aligning a threading tool was really frustrating. As soon as you apply torque, it just wants to rotate and slide around. Then when it is tightened down, I have had it move several times while trying a few heavier cuts (nothing outrageous, I have done more on the 1030v). I think it needs something like what the standard tool post was using in order to hold it in place (See picture below).
6. The little nubs on the ends of most of the handles are cheap plastic. I am thinking a few aluminum ones will be in order because I really don't like how they feel. They work, but they make manipulating the controls feel a little bit like a toy...
All in all, it seems like the important stuff, they got right. Some of the smaller details were overlooked, either deliberately to keep the price low, or just carelessly. The spindle is not as smooth as I would like, but I am not positive if that is because it has gears instead of just the belt drive. I would say it is a solid step up in quality compared to my chinese machine, but there is definitely room for improvement. At some point, I will need to break down the quick change gear box because something has to be wrong for it to be so difficult to operate. It should not bind moving back and forth with one hand.
Wow that is quite the wall of text! If you are still with me, here are some of my plans for this machine in the near future:
1. DRO. This has already been ordered from PM and will hopefully be here soon.
2. Tool rack. I would like to make something to hold the tools on the splash guard toward the tailstock side. It will hold the cutting tools, the centers, the drill chuck, chuck keys, and a few other miscellaneous items you need when operating a lathe.
3. Flood coolant. The stand already has the grate, so really why wouldn't you add a little tank and pump to keep those cutting tools chilly?
4. New hardware for mounting and securing the QCTP, similar to what the stock tool post uses.
Some pictures!
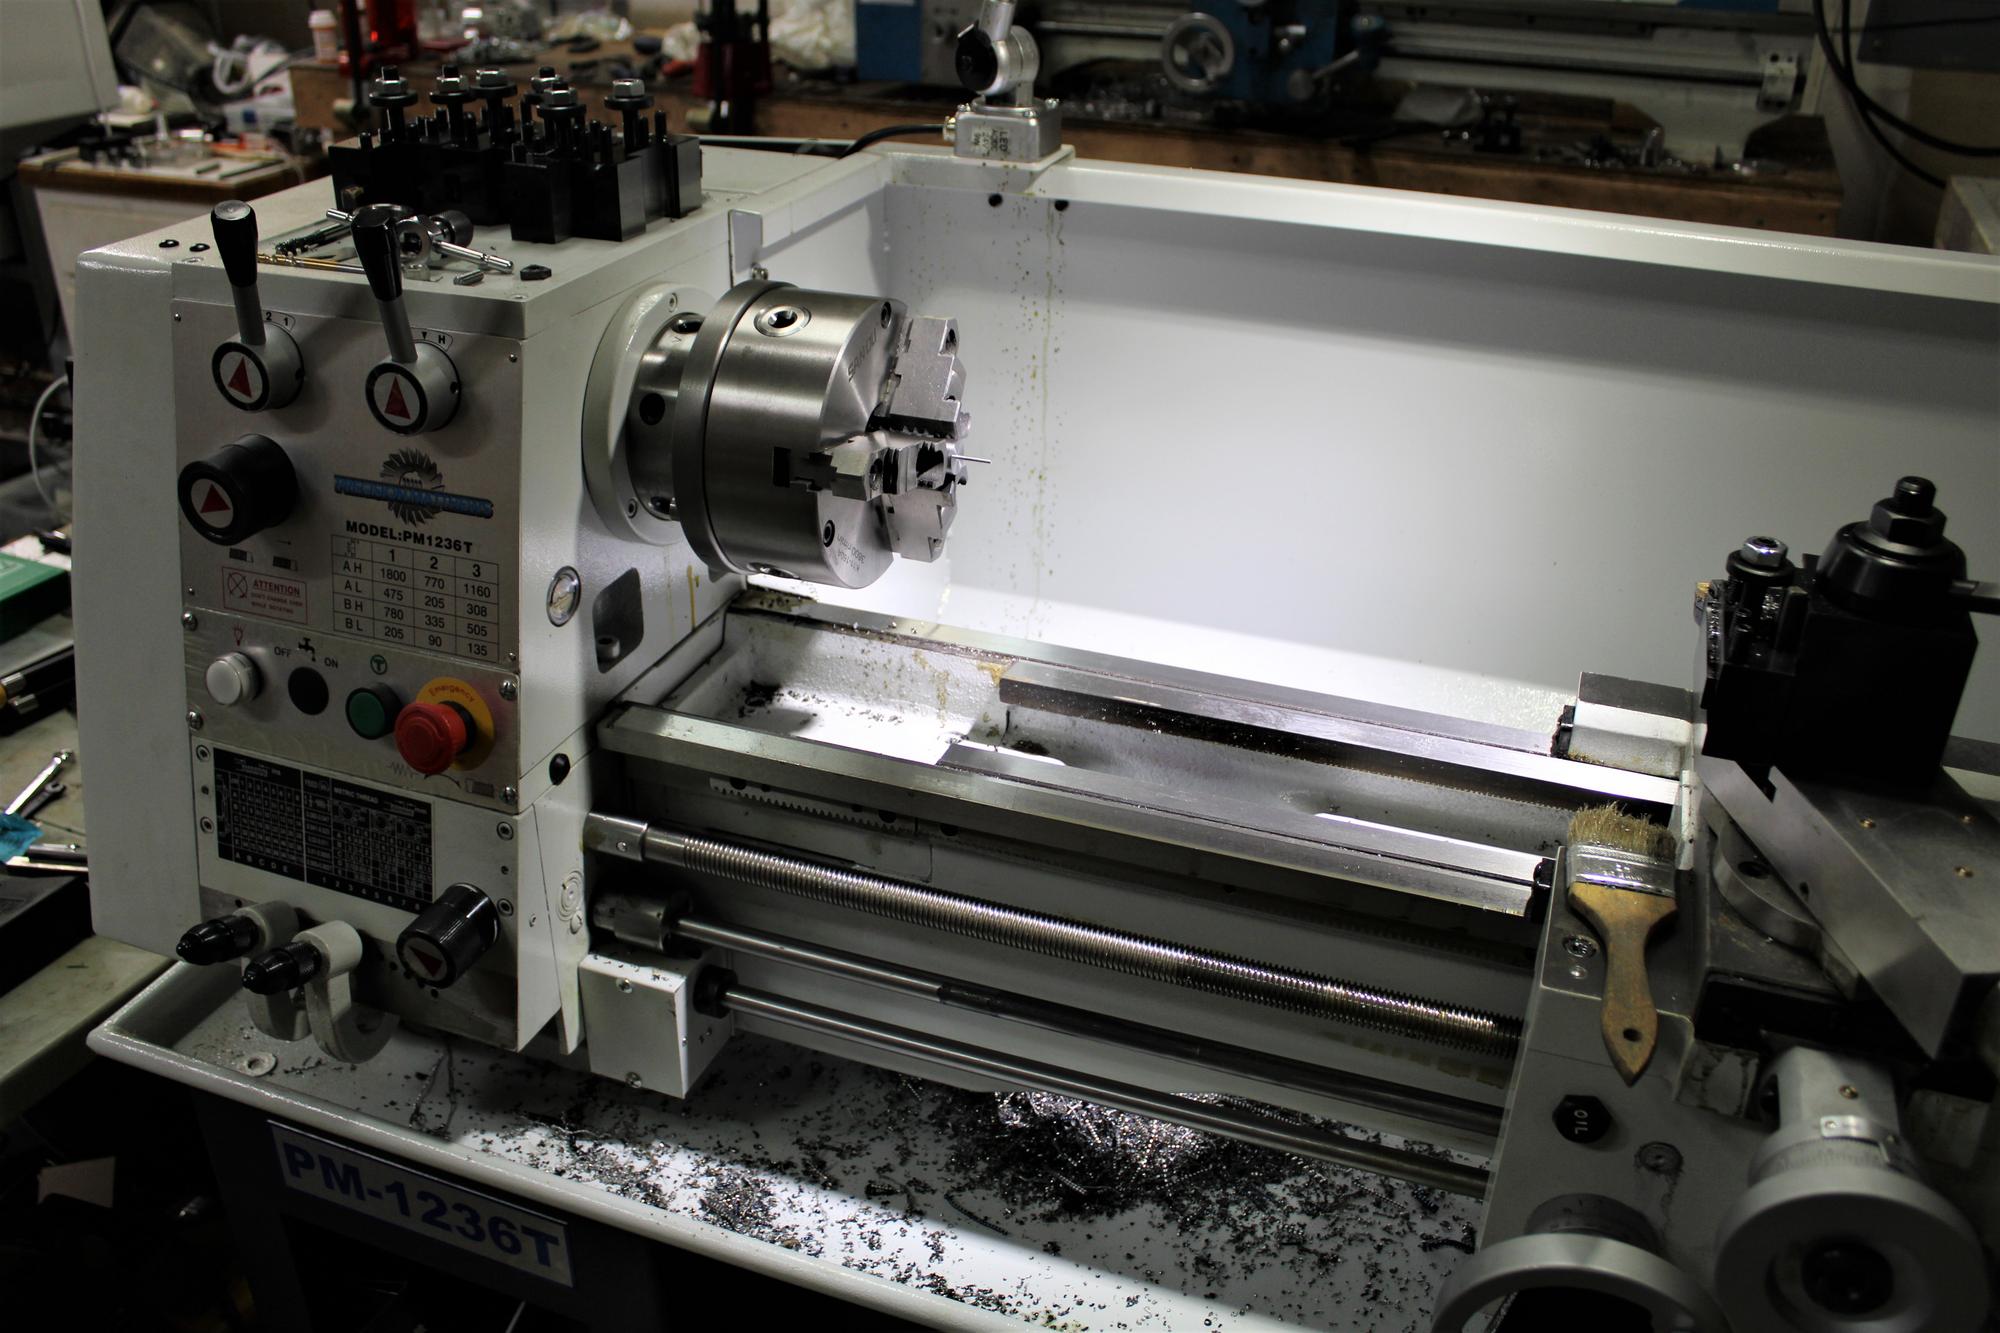
The new machine in all its glory!
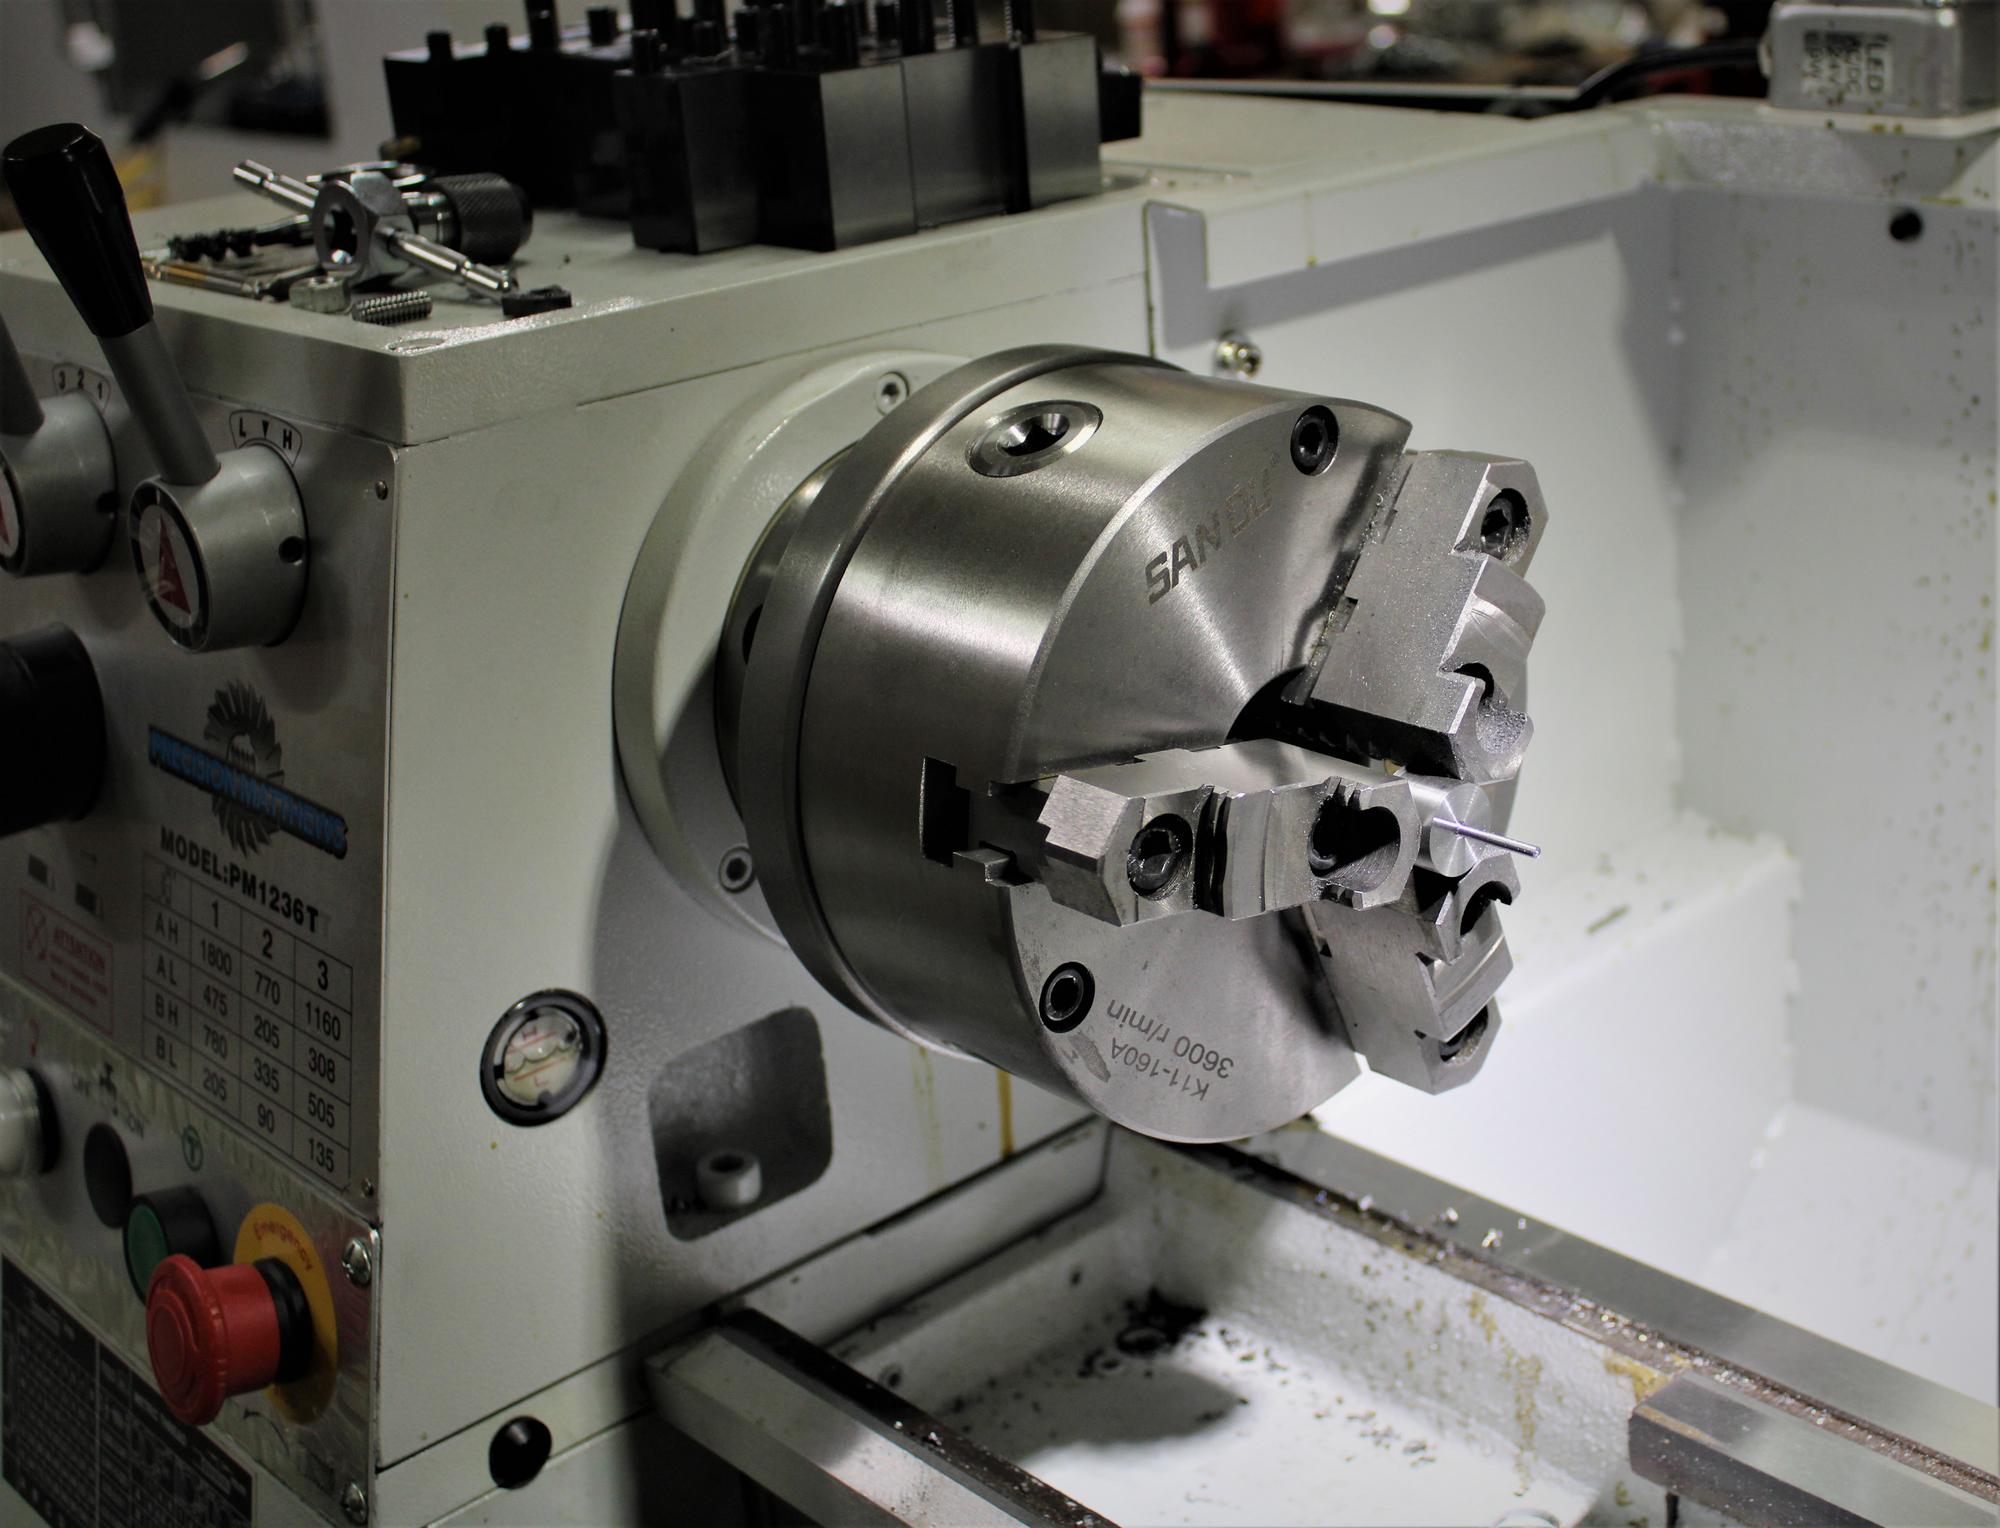
A look at the chuck (This one was mine, not the one that came with the machine), I like to pretend I am a photographer.
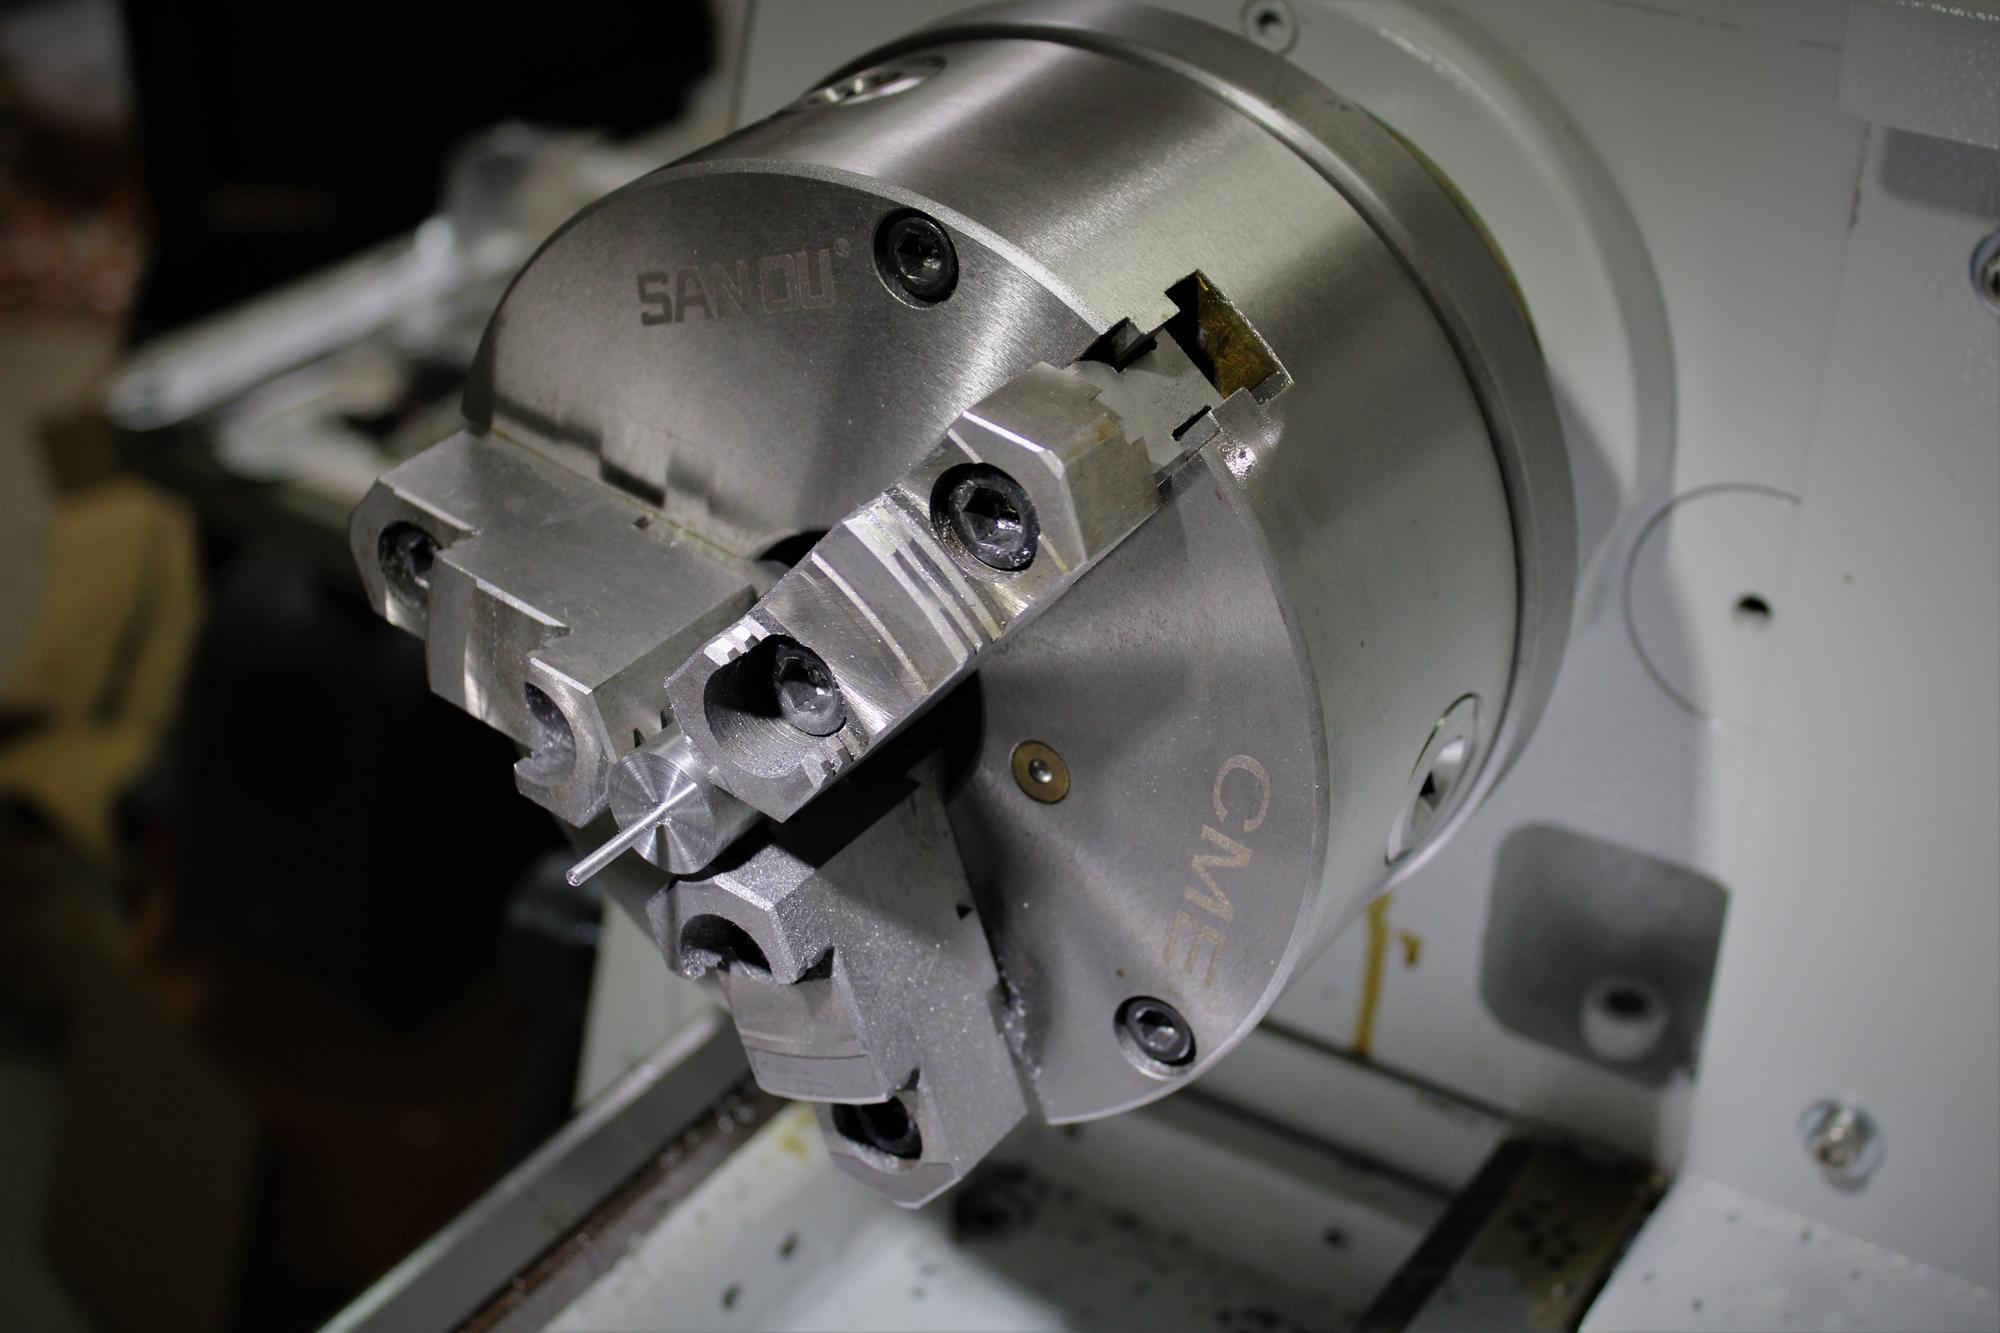
'Nother
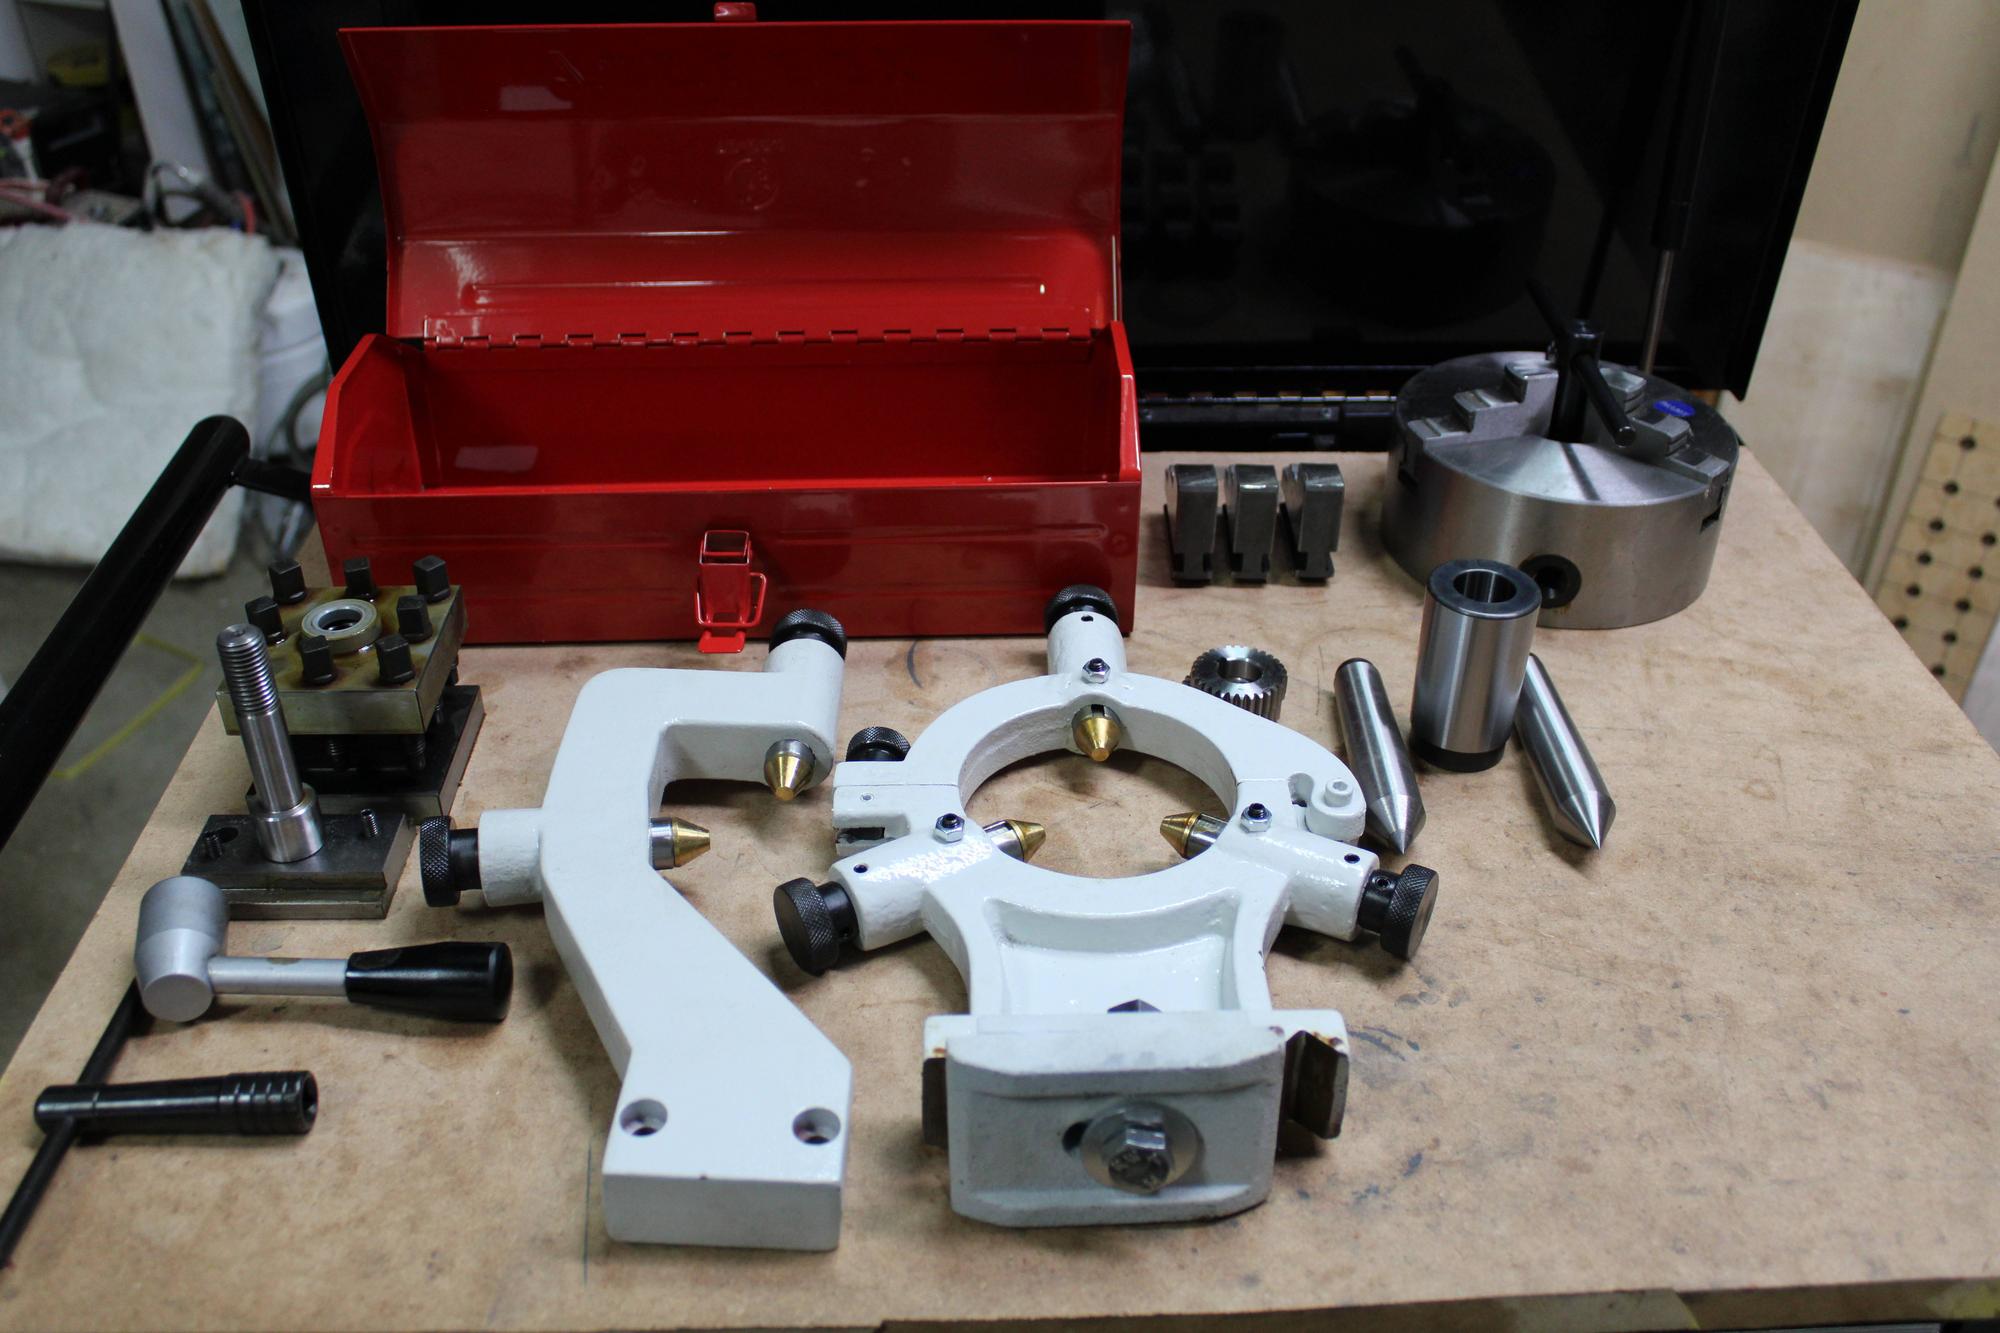
Here is a look at just about everything that came with the machine. Not a ton compared to the 1030v. QCTP, 4 Jaw Chuck were not included.
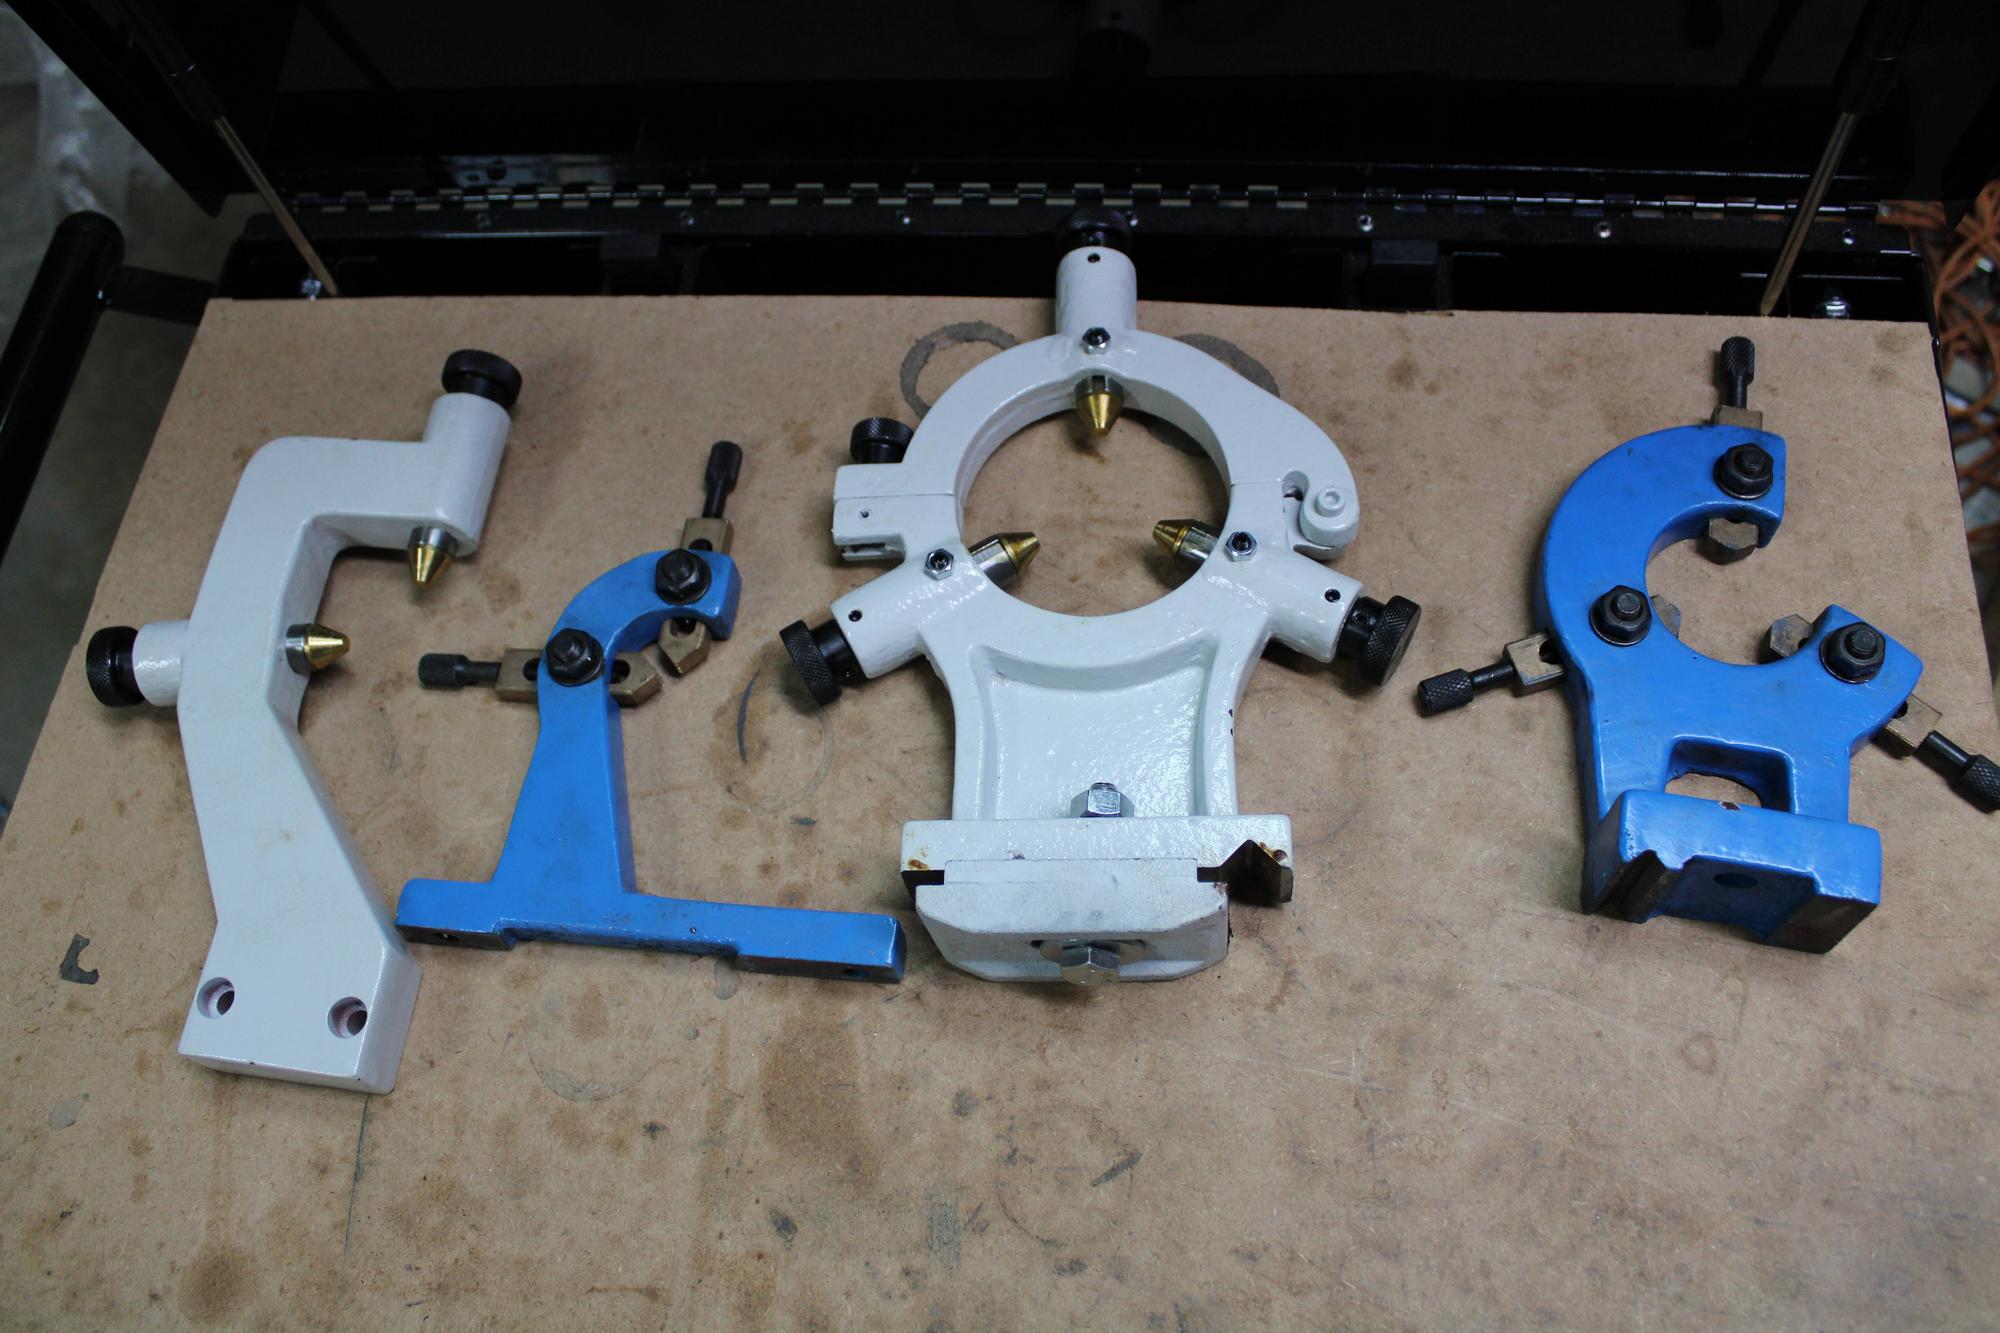
Comparison of the steady and follow rests compared to the 1030v ones. Much better quality, much heavier, much bigger. No comparison here really.
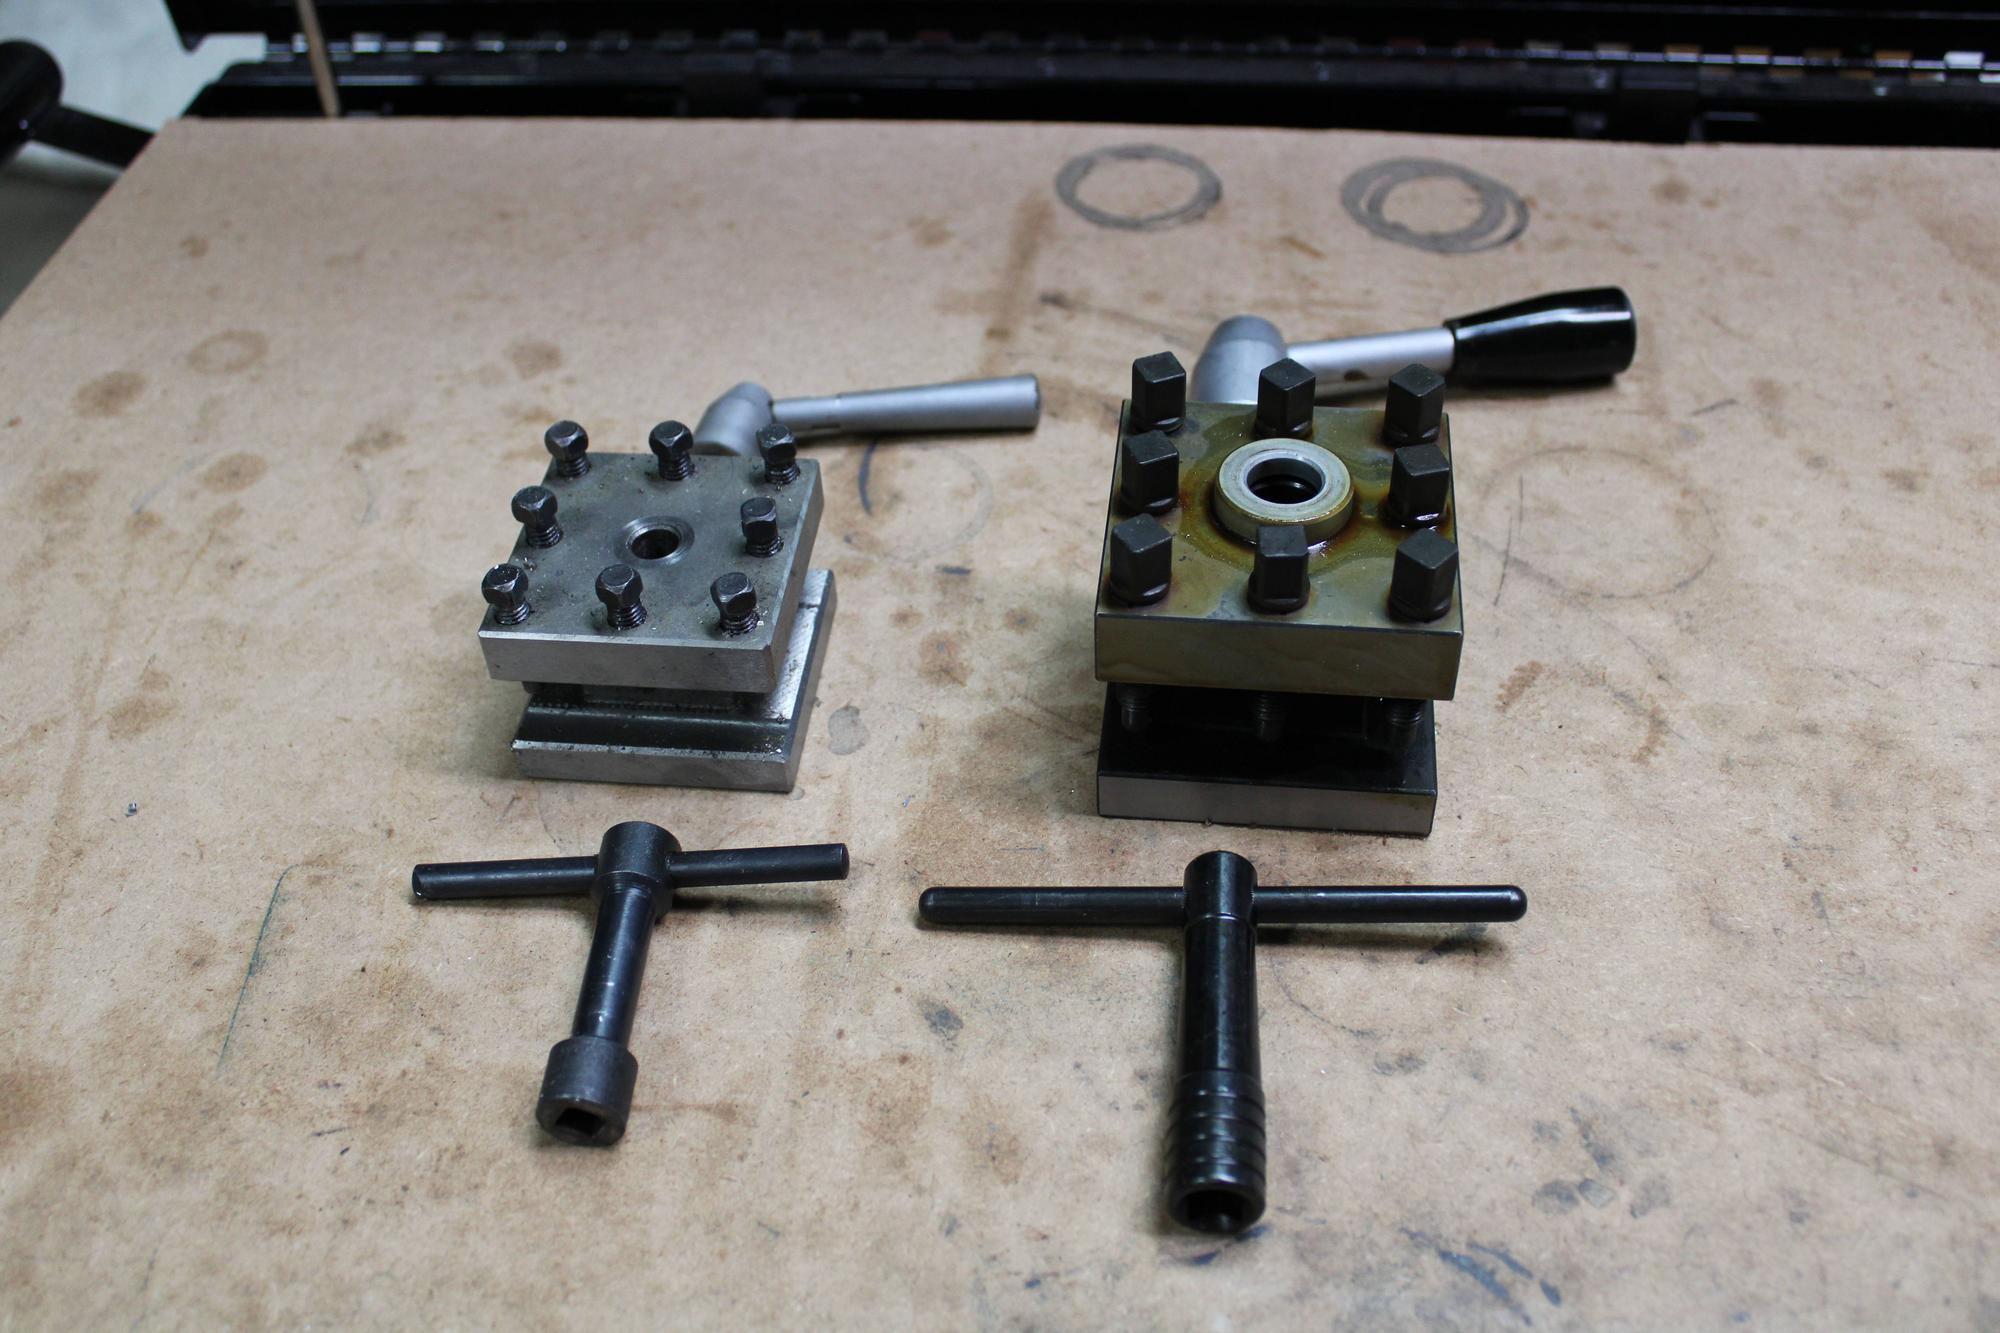
Quick comparison of the standard tool post to the 1030v. It is really hard to get an idea of the size differences when looking online. The 1236T is a good bit beefier.
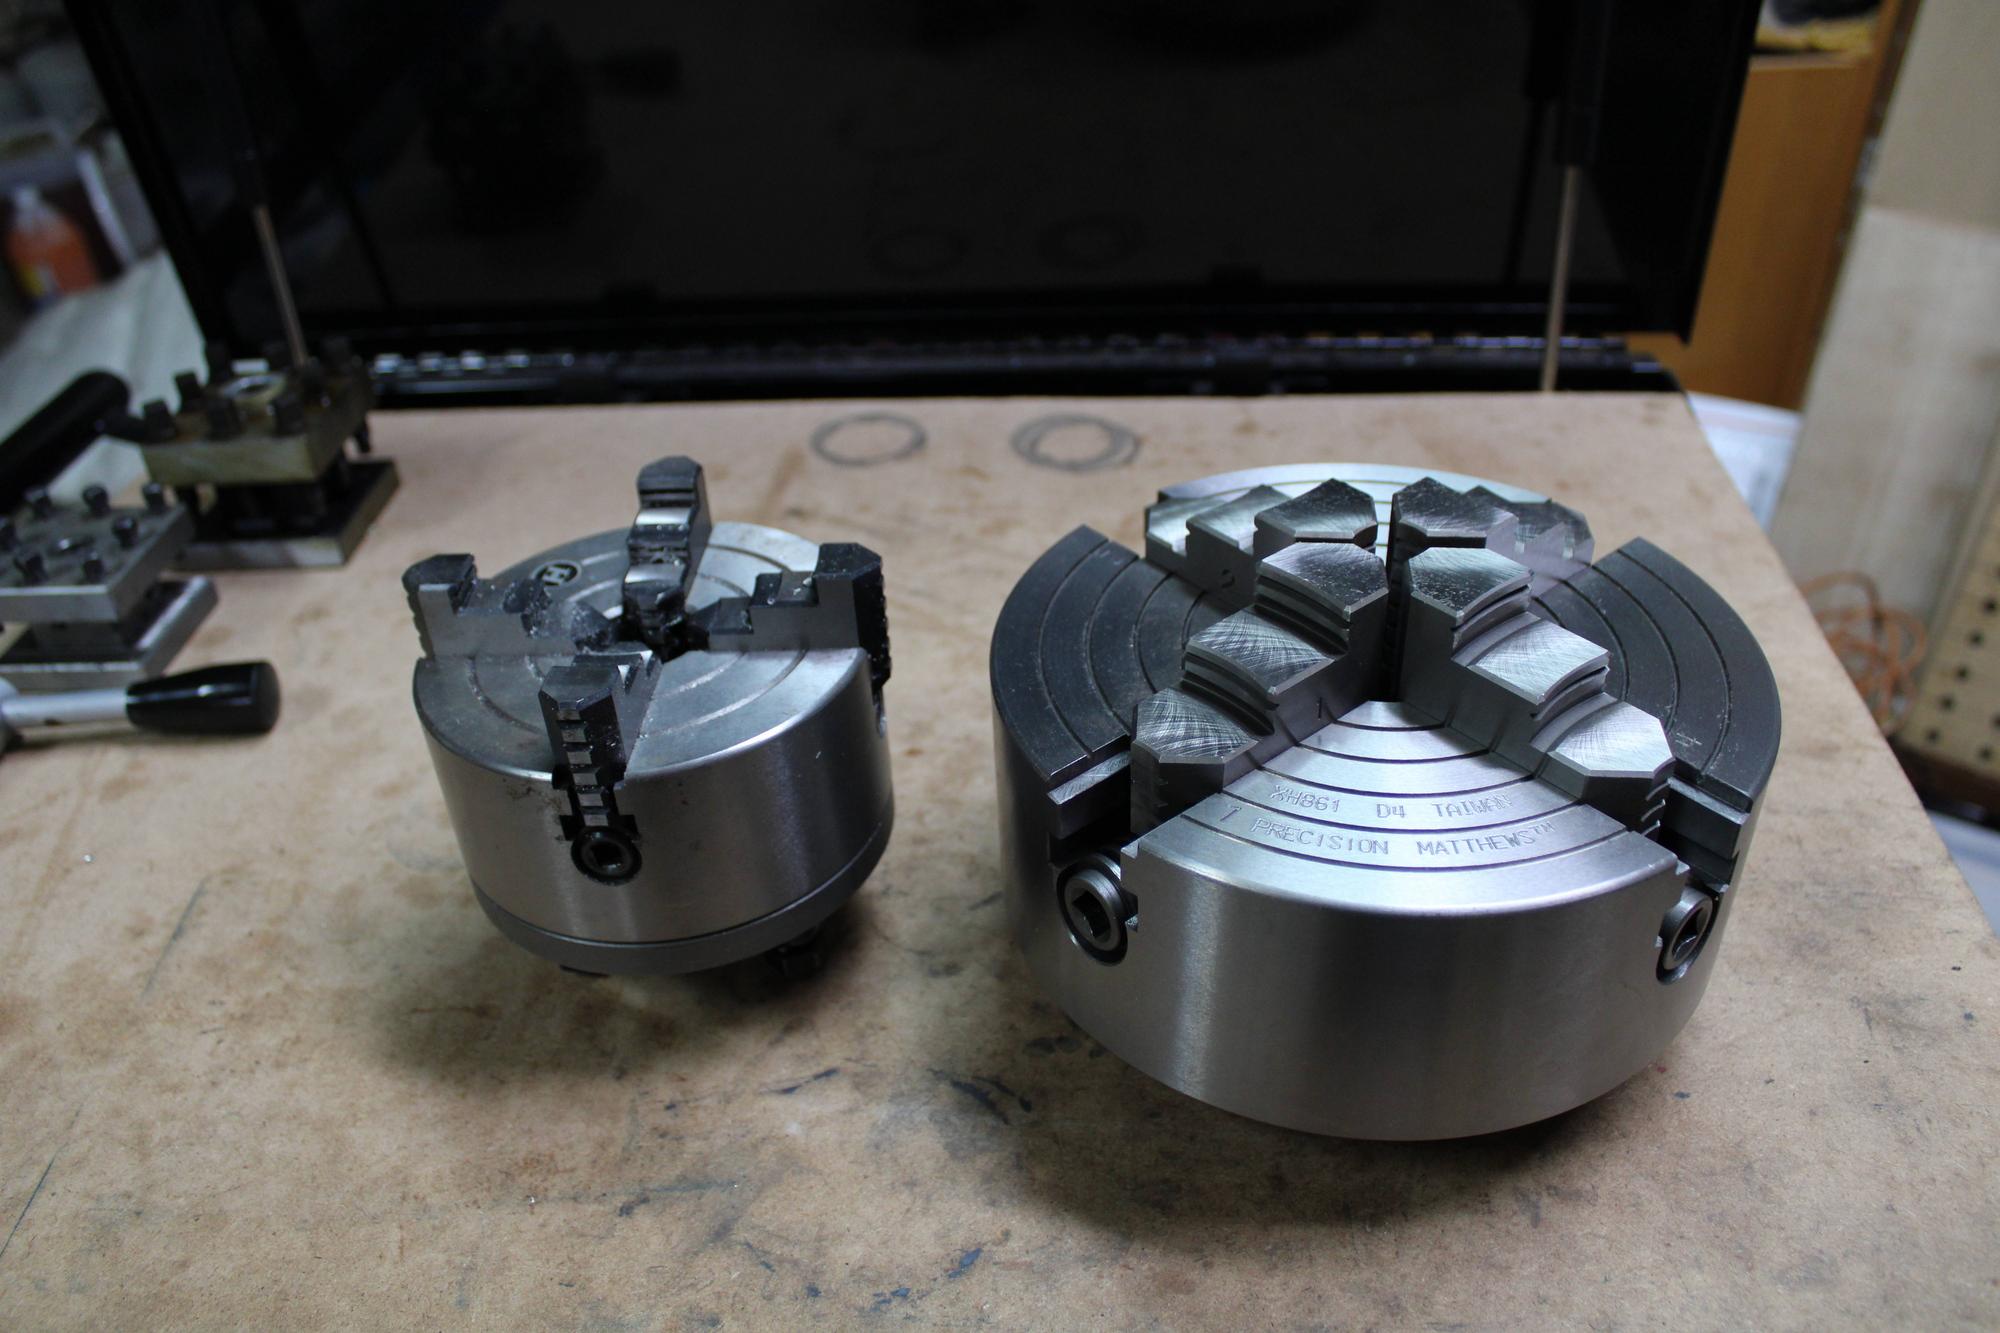
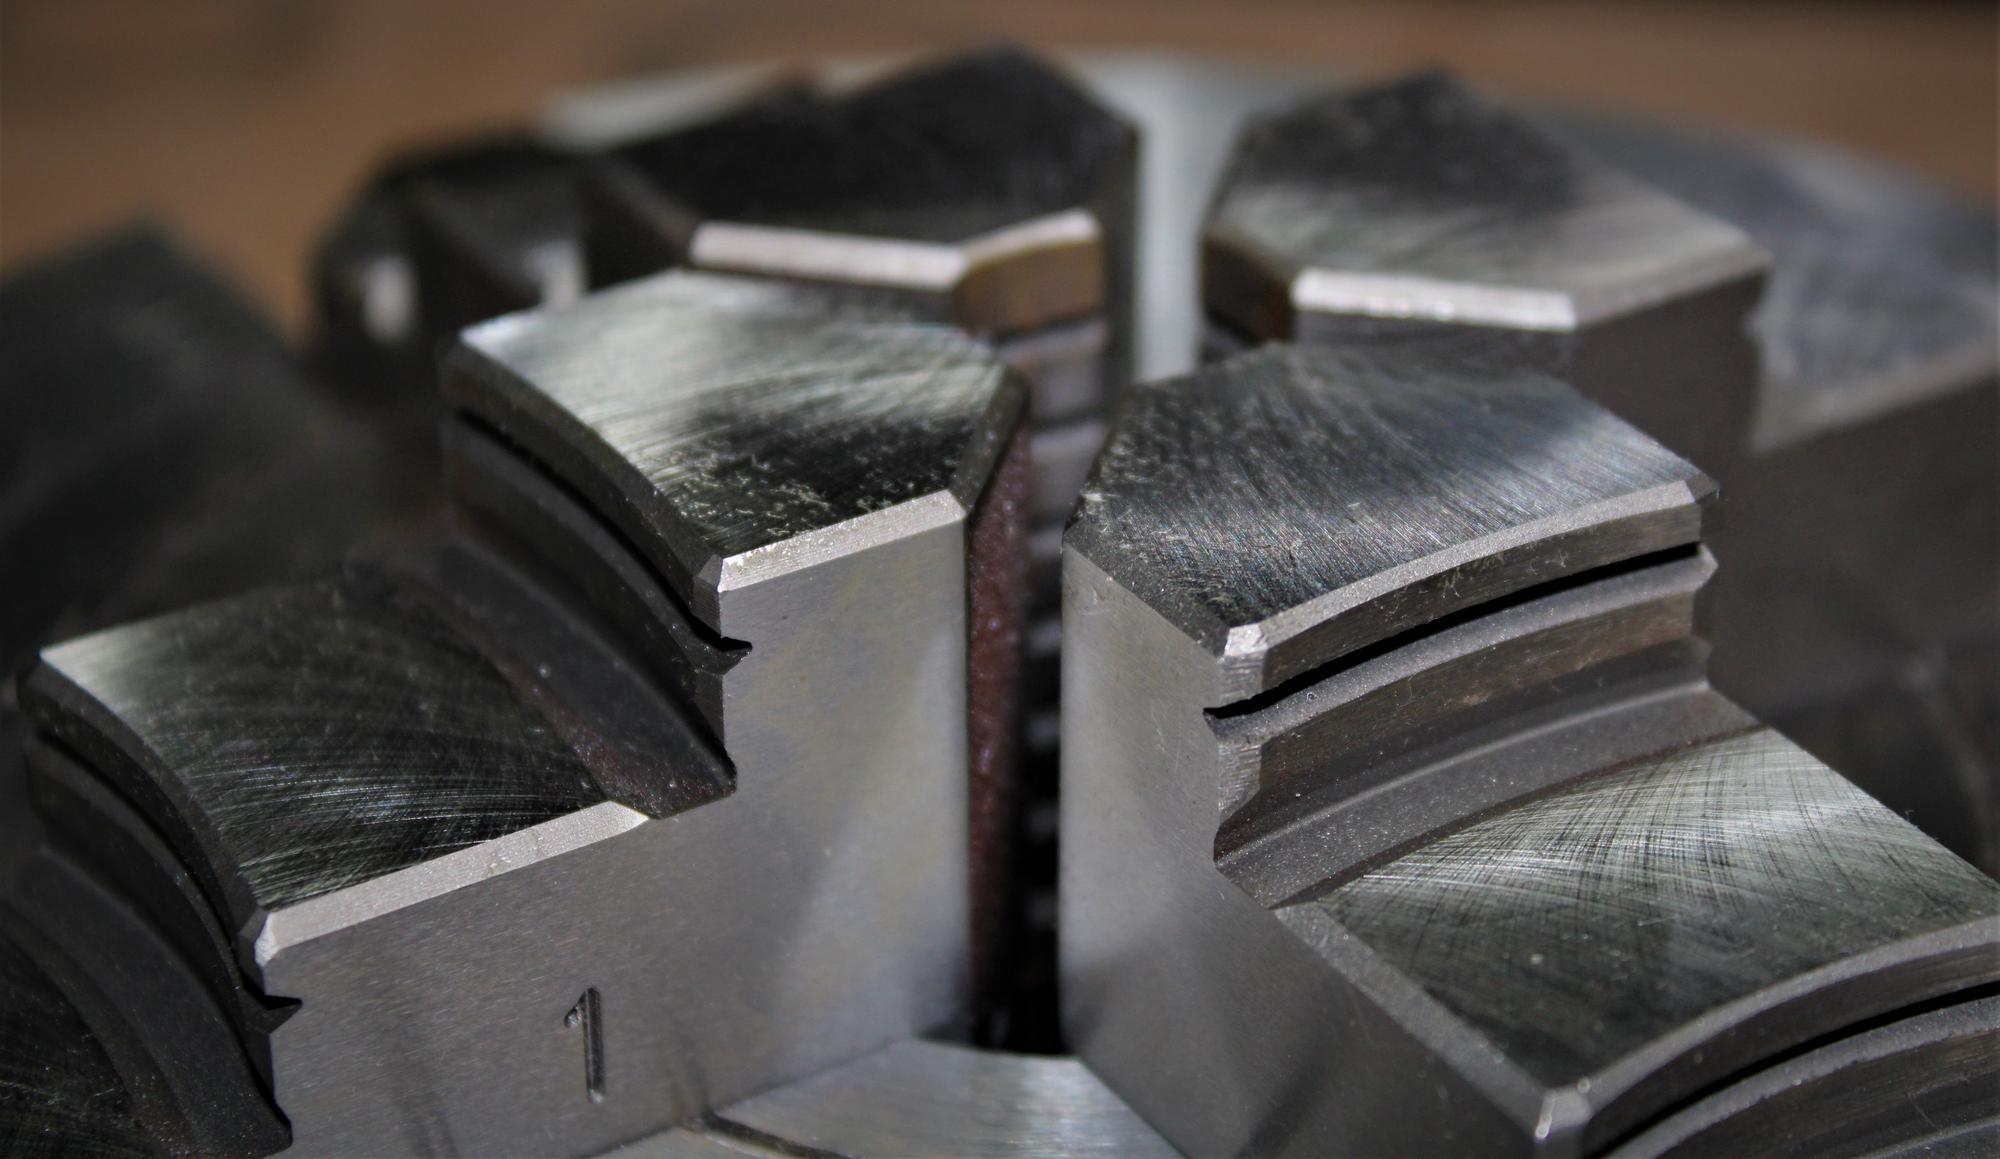
Here is the 8 inch 4 jaw. Note that this is not standard, it was roughly $400 extra. It is so nice though! It is super tight, so hopefully once I use it a bit, it will be a perfect fit.

Here is the 5" that comes with the 1030v compared to the 8". Look at that shine!
I wonder if I could sell these pictures back to Precision Matthews (Or trade for tools 'n such) for their marketing. Its so perdy.
The quick change tool post.
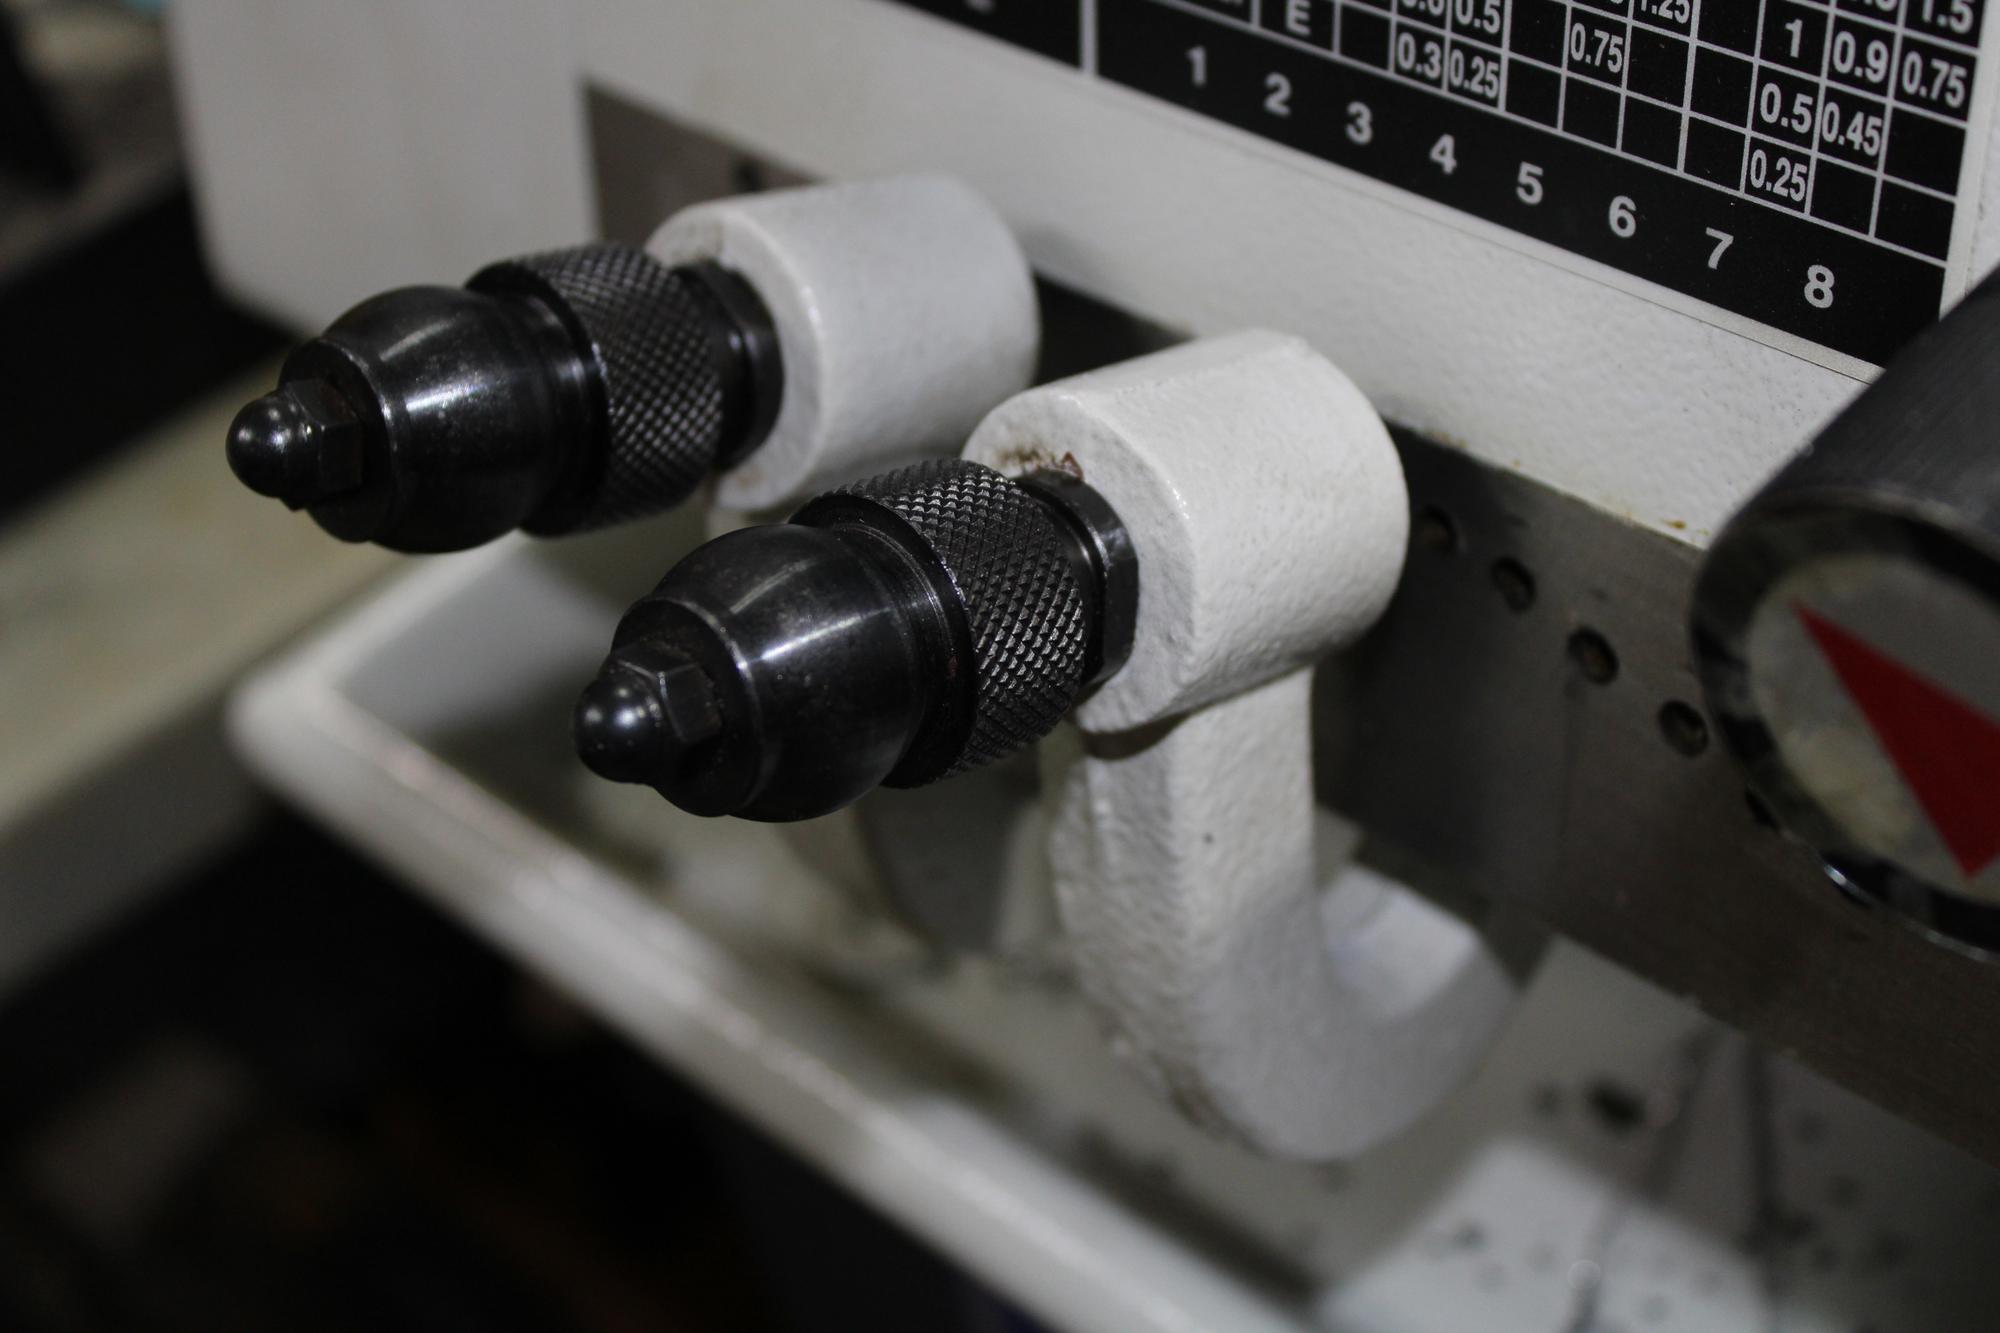
The handles for changing gears.
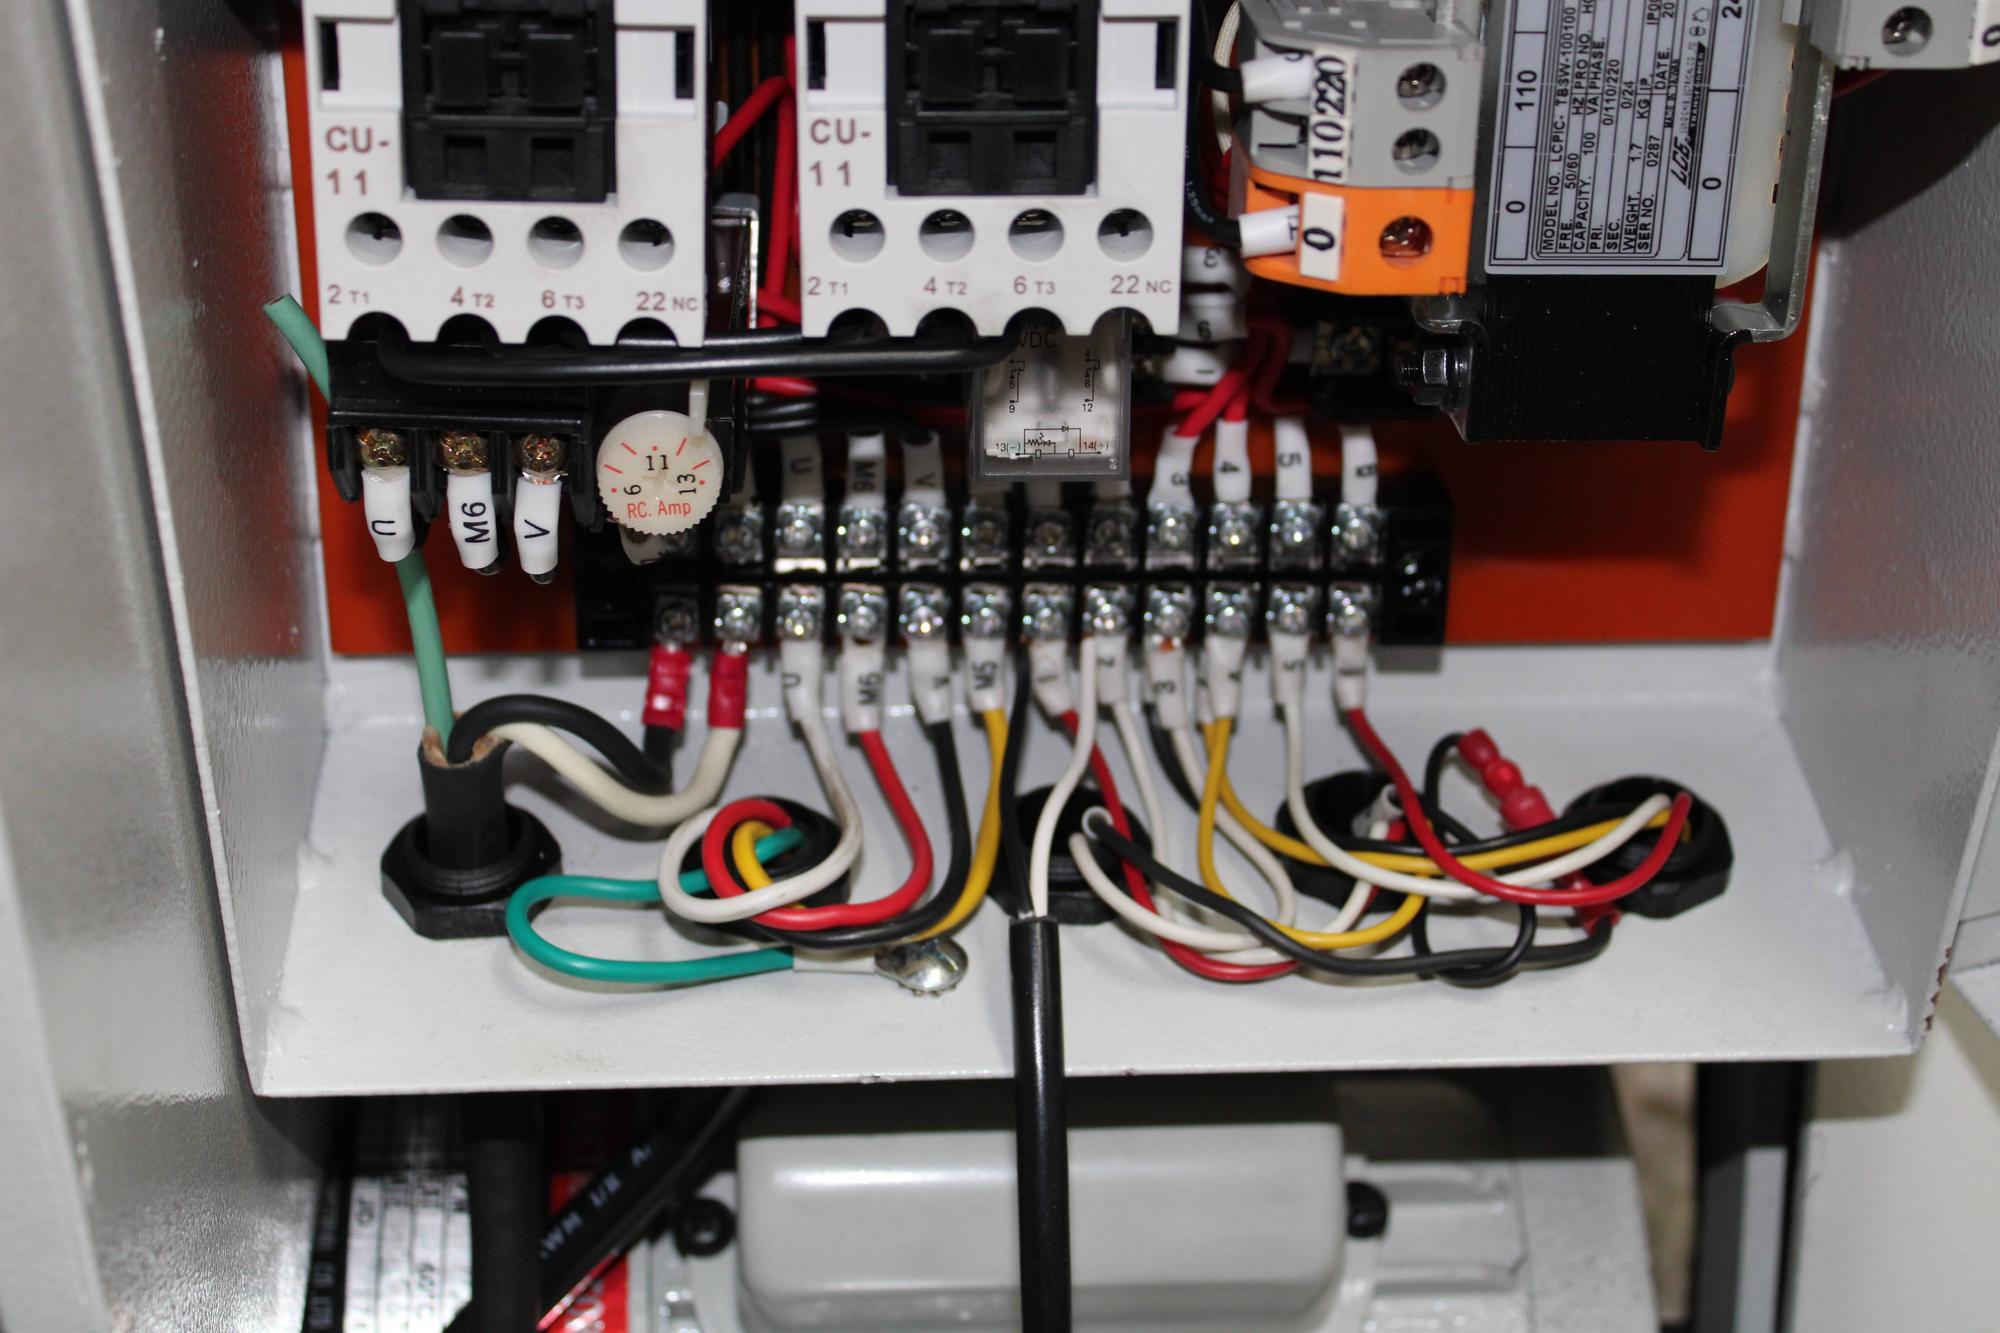
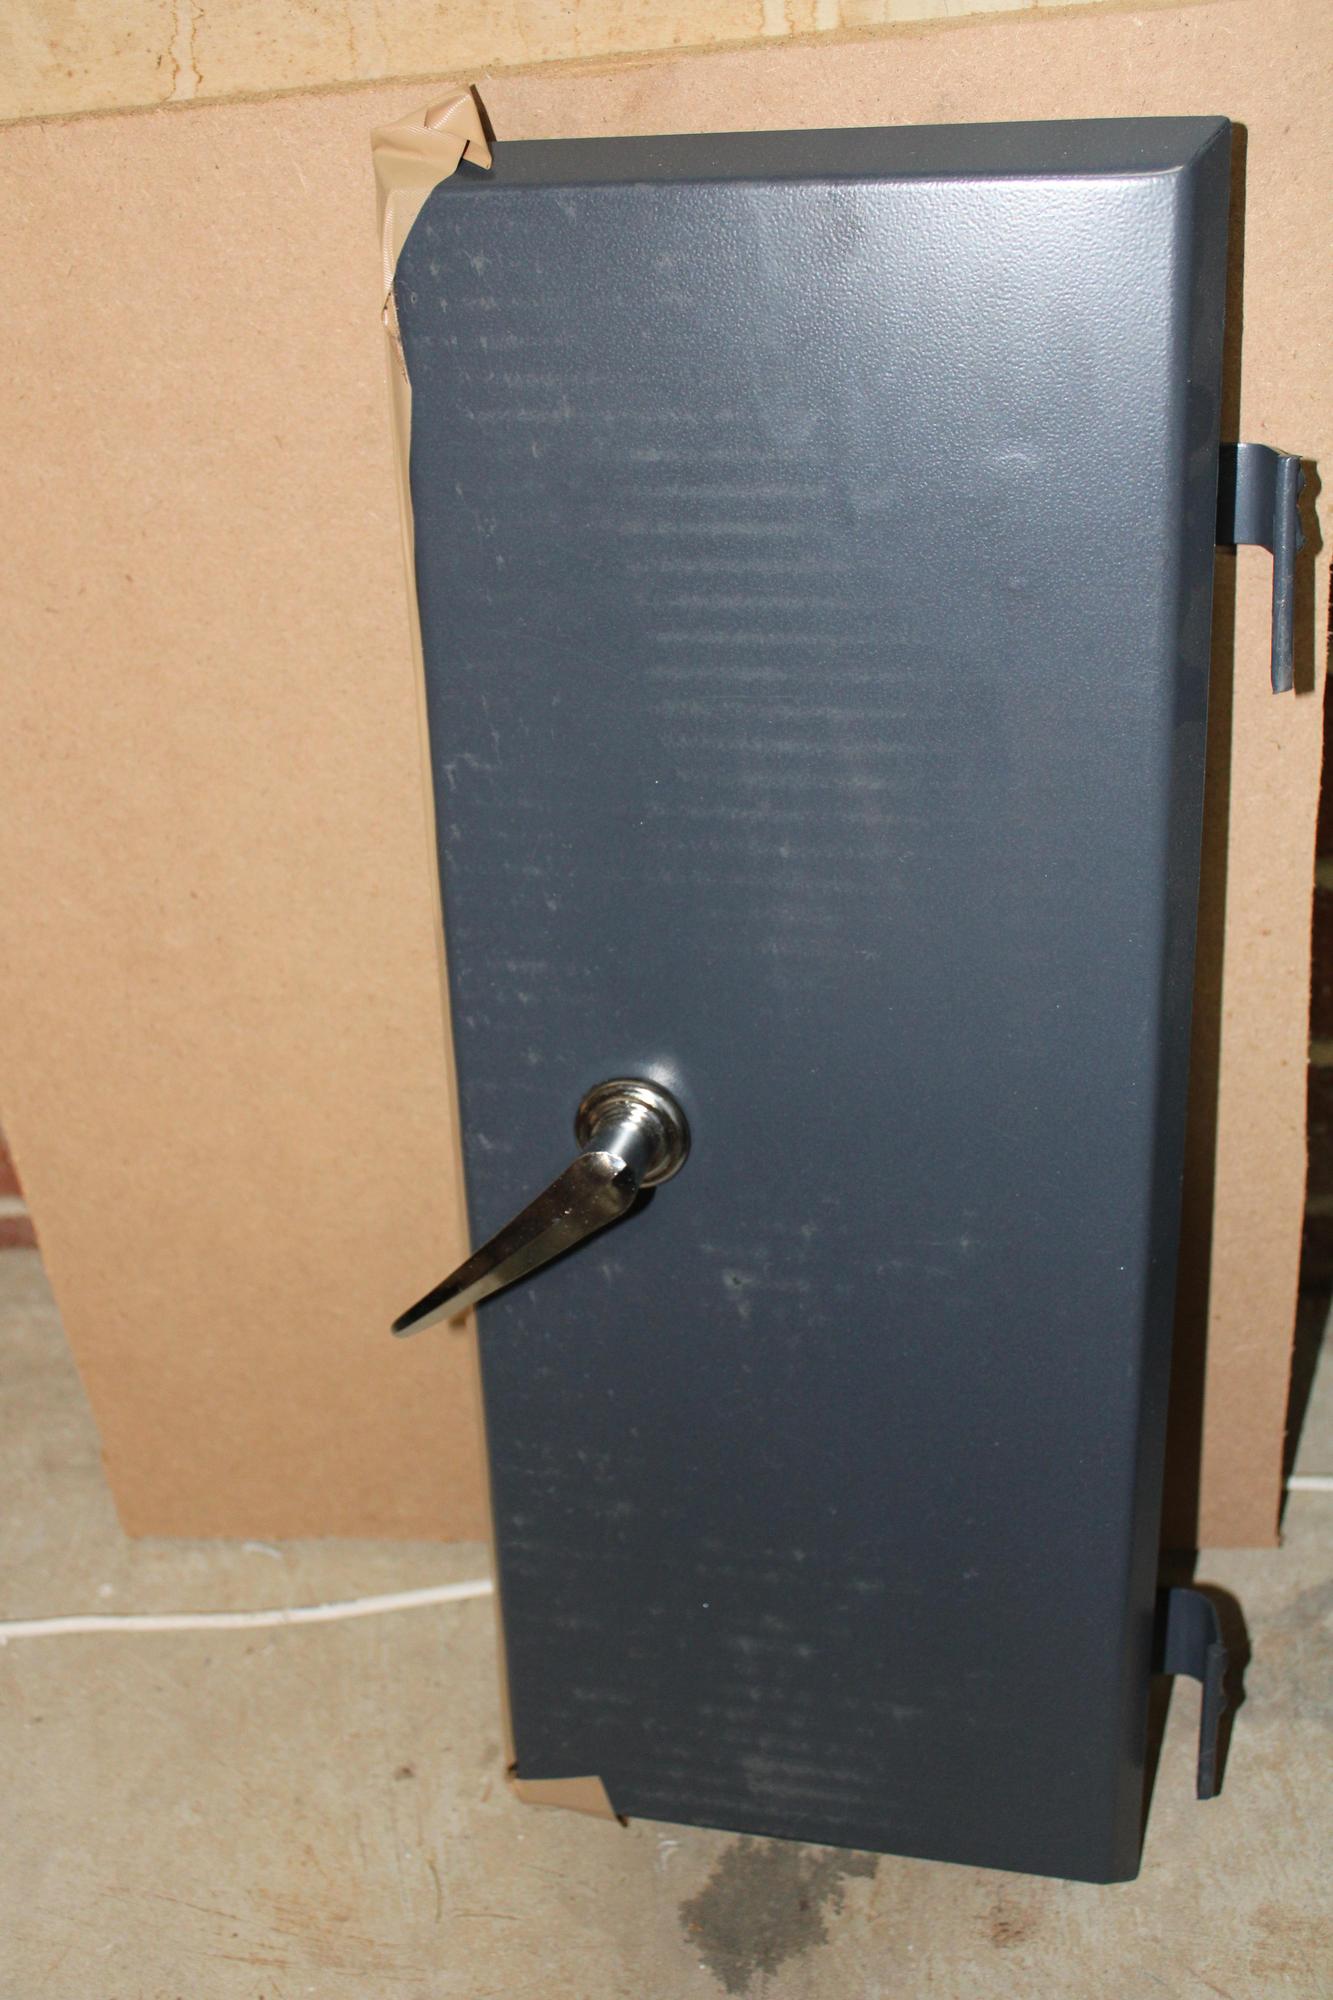
Now some of the not so good stuff. First, the work light. Just didn't feel right man. And the electrical box doesn't close!
Some of the bad paint. I am not sure how much the door will bug me. I am sure I won't notice, but it takes away from the general presentation of the machine a little bit.
Also, first part!
I placed the order and a little over a week later, there was a big ol crate in my driveway holding a new lathe, a stand, and a QCTP. I got it mounted up on the stand with an engine hoist (Man that was scary!) and got it wired in. First impressions were pretty good, but not fantastic. Overall I am very happy with the machine, but I think there are definitely a few things that could be improved on.
First, the things I really like! In no particular order.
1. The handles are fantastic. They are smooth, easy to read, have inch and metric measurements, and are a significantly better design than the ones on my 1030v.
2. The power switch being on the carriage is excellent. No more reaching over the chuck to hit the power button.
3. A quick change gear box is awesome! Having like 30 feed rates to choose from vs 3 is incredible. If I need to feed just a little faster to break a chip, I can do that. On the 1030v, I can either double the feed rate (If I am not already maxed out) or break out the change gears.
4. That D1-4 cam lock spindle is so much easier and so much faster than what I am used to. No wrenches and no rotating back plates to deal with.
5. The single speed motor with gears to change speeds. This is a much better design than a variable speed motor. It is insane how much torque it has at the low end and how much power it has on the high end.
Some things I didn't love, but aren't a huge deal.
1. The work light doesn't seem like it is really part of the machine as much as it is just thrown in with the shipment. It didn't come with mounting hardware (Came with a bracket, no screws, washers, or nuts), there isn't a hole into the power box for it, and the mounting holes aren't pre drilled. There also weren't any mounting instructions included. Mounting it required drilling a few holes, grabbing some suitable screws, and screwing it in place. I still need to get some hardware and drill a hole to pass the power cord into the power box. It isn't the end of the world by any means, but it would be nice if it was at least slightly more integrated into the machine package.
2. The included 3 jaw chuck is really bad. It is advertised as an "Economy" chuck so my expectations were quite low, but it was substantially worse than the 6" 3 jaw chinese chuck I got for my old lathe for around $120 shipped. That cheap chinese one replaced the included one almost immediately. Some of the hardware was loose, some was tight, it was gritty and rough, and it was so out of balance that the machine would shake starting at only 335 RPM. I took it apart hoping a little cleaning and stoning would help, but the build quality was just so bad it wasn't worth the time.
3. It looks like the stand paint wasn't dry before they put it into the box. So the doors and the back of the stand look just terrible. The rest of the paint looks fantastic, but it will be hard to ignore the messed up paint when you step back to admire it. It isn't functional, so again, not a big deal.
4. The fit of the handles for changing gears isn't particularly good. There are a few combinations that cause one of them to wobble a ton when the machine runs. Moving them is a bit challenging because the handles bind immediately when you apply force to move it side to side. You need to sort of drop them all the way down, hold them with both hands to try to position it correctly, then pull the spring back while trying not to move it left or right at all (As soon as you do, it will bind and you can't get it aligned to change the gears), then lift it up to the hole and work the spindle with your other hand to get the gears to align. Maybe it just needs to be broken in a bit, but at the moment, they are pretty miserable to change (But not anywhere near as bad as dealing with change gears on the 1030v).
5. I don't love the fit of the quick change tool post. When you unscrew it to rotate it (No wrench for that included btw, you'll need a 25mm wrench to tighten it), it moves freely back and forth in the compound slot. Then when you tighten it down, it does not sit still in the slightest. Trying to tighten it while aligning a threading tool was really frustrating. As soon as you apply torque, it just wants to rotate and slide around. Then when it is tightened down, I have had it move several times while trying a few heavier cuts (nothing outrageous, I have done more on the 1030v). I think it needs something like what the standard tool post was using in order to hold it in place (See picture below).
6. The little nubs on the ends of most of the handles are cheap plastic. I am thinking a few aluminum ones will be in order because I really don't like how they feel. They work, but they make manipulating the controls feel a little bit like a toy...
All in all, it seems like the important stuff, they got right. Some of the smaller details were overlooked, either deliberately to keep the price low, or just carelessly. The spindle is not as smooth as I would like, but I am not positive if that is because it has gears instead of just the belt drive. I would say it is a solid step up in quality compared to my chinese machine, but there is definitely room for improvement. At some point, I will need to break down the quick change gear box because something has to be wrong for it to be so difficult to operate. It should not bind moving back and forth with one hand.
Wow that is quite the wall of text! If you are still with me, here are some of my plans for this machine in the near future:
1. DRO. This has already been ordered from PM and will hopefully be here soon.
2. Tool rack. I would like to make something to hold the tools on the splash guard toward the tailstock side. It will hold the cutting tools, the centers, the drill chuck, chuck keys, and a few other miscellaneous items you need when operating a lathe.
3. Flood coolant. The stand already has the grate, so really why wouldn't you add a little tank and pump to keep those cutting tools chilly?
4. New hardware for mounting and securing the QCTP, similar to what the stock tool post uses.
Some pictures!
The new machine in all its glory!
A look at the chuck (This one was mine, not the one that came with the machine), I like to pretend I am a photographer.
'Nother
Here is a look at just about everything that came with the machine. Not a ton compared to the 1030v. QCTP, 4 Jaw Chuck were not included.
Comparison of the steady and follow rests compared to the 1030v ones. Much better quality, much heavier, much bigger. No comparison here really.
Quick comparison of the standard tool post to the 1030v. It is really hard to get an idea of the size differences when looking online. The 1236T is a good bit beefier.
Here is the 8 inch 4 jaw. Note that this is not standard, it was roughly $400 extra. It is so nice though! It is super tight, so hopefully once I use it a bit, it will be a perfect fit.
Here is the 5" that comes with the 1030v compared to the 8". Look at that shine!
I wonder if I could sell these pictures back to Precision Matthews (Or trade for tools 'n such) for their marketing. Its so perdy.
The quick change tool post.
The handles for changing gears.
Now some of the not so good stuff. First, the work light. Just didn't feel right man. And the electrical box doesn't close!
Some of the bad paint. I am not sure how much the door will bug me. I am sure I won't notice, but it takes away from the general presentation of the machine a little bit.
Also, first part!
")