New project for pidjones - a Triumph this time

Spray on copper coat works very well on head gaskets
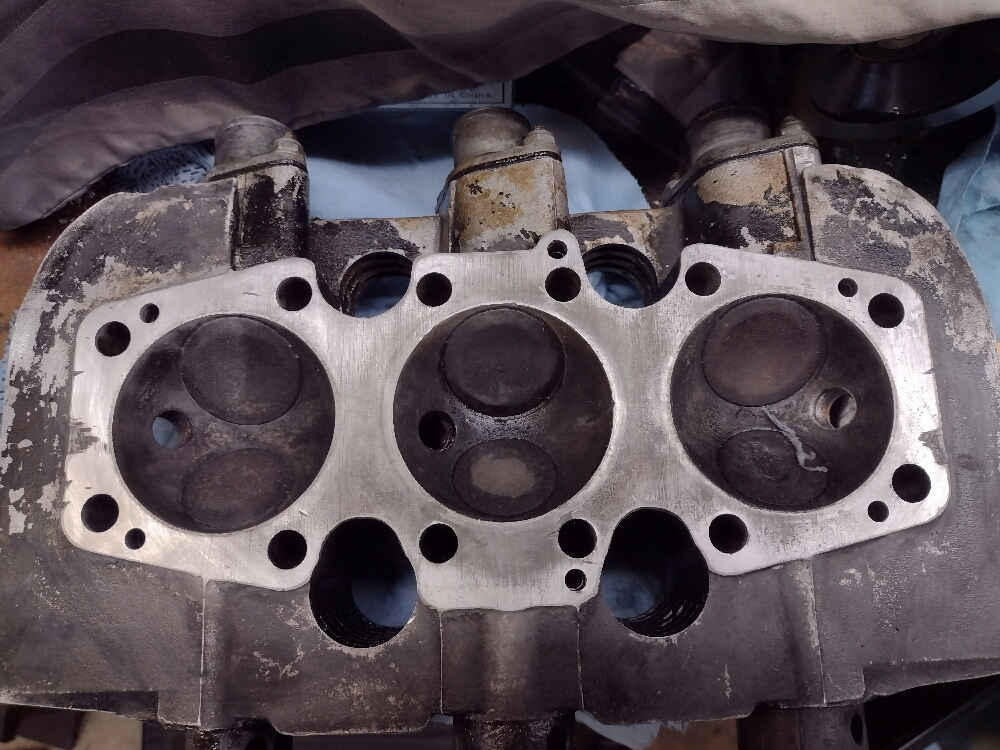
Ah, but this has a copper head gasket anyway. And it must be magic. Flipped the head over to clean and check it out and almost threw up. What, how, why, who? (Photo taken after wet lapping the flange on 400 grit glued to plate glass.) Someone deserves some severe karma from this. And, this was found after installing helicoil in case for stripped base stud and making a mandrel to properly tap in the cylinder-to-head dowels.
8b6ac22cd35155e66bc70d7dbab85364.jpg

But. It had pretty good compression!
 
A good cleaning is apparently in order!
The copper coat spray should be lightly applied to both sides of the gasket and allowed to dry overnight. When you're ready to assemble hit the gasket with it again, let it tack up a bit before you assemble it.
Dis-assembly is not a big pain. No leaks.
And yeah; I'm posting what you already know.
 
Did you notice the damage on both sides of the head surface? ~.010" deep tapering to .004. Looks like someone drove a screwdriver in on each side to get it off the cylinders. I don't think it is from this bike (or cylinders), as there are no corresponding marks on the jugs. I know copper coat works well - I've used it and have a can on hand. Mainly for steel fire ring composite gaskets on the old GoldWings. Compression sealing doesn't seem to be my problem, it is sealing the oil passages (the six small dowel holes). For that, I plan to use a thin coat around the oil passages with Hondabond and letting it set well before assembly. Compression sealing really should be handled by the copper gasket (which I annealed this afternoon). Still a lot of cleaning on various pieces before reassembly, plus waiting for a ring compressor.
 
Knew something had been pried there. A good wrench always looks for a way to separate stubborn parts without going caveman on the parts. But then, you don't always have a way presented to you.
 
I have a couple cheap Harbor Freight pry bars (had them for about four decades) that fit perfectly for easy separation. Wooden wedges would have worked too. But, with no corresponding marks on the jugs, I suspect either jugs or heads (or both) are not original. Not the only ham-fisted damage on it. Also had many gaskets replaced with Hi-temp RTV that squeezed out into the oil system, cylinder base bolt stripped completely from the case and just stuffed back in. One of the fork caps cross-threaded in. Head studs half-inserted because the Helicoiled holes in the jugs were never cleared of swarf. plug hole stripped to half-way down (luckily a deep-reach plug). And, the engine had about a quart of water under the oil in the sump. But it ran! And, it will run again when I finish.
 
How far down are you going with the engine? Going to split the cases?
 
How far down are you going with the engine? Going to split the cases?
I wouldn't have gone this far were it not for the huge oil leaks. The cases don't show any leaks, and the engine sounds surprisingly good bearing-wise. The primary has been off to correct RTV joints, clean the oil pump, flush the oil lines, and install new correct gaskets. Sump has been off and scrubbed out plus a USB endoscope used to check for RTV bits elsewhere. I was happy when the jugs came off to see that everything that is then revealed inside looks good and rod bearings feel good.

Being a three cylinder, this has a three-part crankcase.
 
Good; sounds like once you get all that addressed you're good to go. Looking forward to the finished product.
 
Looks like you might have some valve seat recession going on with the exhaust valve on the left in the pic. There are definitely some people who should not be allowed to work on any kind of machinery. Mike
 
Getting ready to put the jugs back on. Decided to use the pull center piston method. While preparing for that, discovered the oil control ring on #1 frozen about 1/2 way around. Carefully removed the piston from the rod and used a small cut-off nail with pliers to push through one of the holes and get it loose. Took all rings off of it and cleaned them and the grooves, then reassembled. #2 came out cleanly and the big end bearing looks great.

Took so long getting this far that I called it a day. Tomorrow is church-related tasks. Maybe Wednesday?
 
Back
Top