-
Welcome back Guest! Did you know you can mentor other members here at H-M? If not, please check out our Relaunch of Hobby Machinist Mentoring Program!
You are using an out of date browser. It may not display this or other websites correctly.
You should upgrade or use an alternative browser.
You should upgrade or use an alternative browser.
New project, I'm in over my head.....
- Thread starter bpimm
- Start date
We got some more testing done, went pretty good... except for our own stupidity... Got out to the water and didn't have a single tool to work on it with. pack it up head back to get the tools then back out to the water to start over... After all that things went better, did some adjusting on the power down angle, the angle of steering where the power is cut to keep from tipping the Kayak excessively, opened up the steering angle where full power is available, also increased the power level at full turn to where it will just spin in place, should be nice for maneuvering in tight places. We,re still going to open up the full power steering window more, I also need to scrap the servo saver on the steering as it is very vague at the center, I think the mass of the motor unit is to much for the spring loading of the unit so I'm going to change it out for a solid arm and that should tighten up the steering. Unfortunately we didn't get any video of it on the water this time but I have a few pics of the control setup in the Kayak.
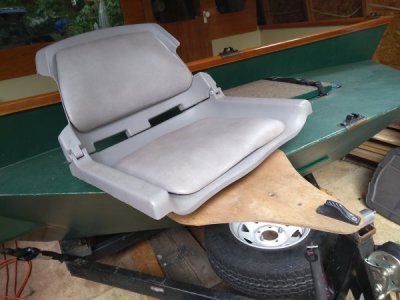
This is the seat and mounting bracket, the cleat on the front is for the adjustable foot rest.
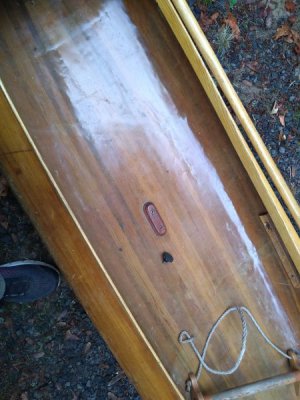
and the boss in the kayak to mount it to.
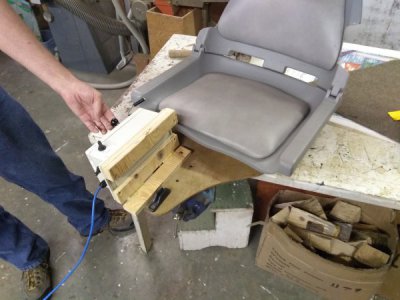
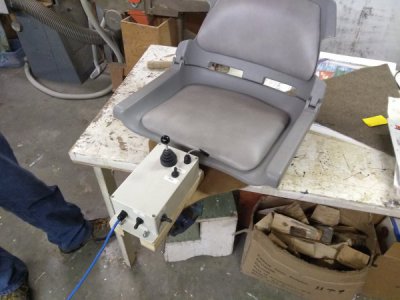
The controls are mounted on a hinge for access to the mounting bolt and the foot rest cleat. Mounting system is just mocked up with plywood now that may change but it's good enough for now.
and in the kayak
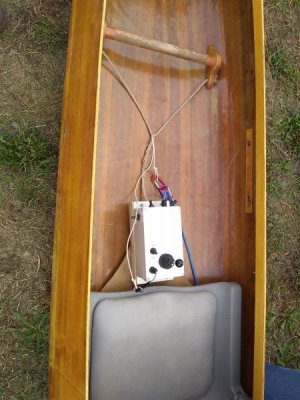
Were going to add another boss in the kayak so the seat can move forward up to a foot, when it's under power the back of the kayak is pretty deep in the water so we want to shift the weight forward and see if that helps. this kayak was designed for a second little person in the front, grand kids but the youngest is turning 22 this month so the likelihood of them being in the front is pretty slim lol.
Things left, adding the skeg, shortening the shaft once we get the seat moved and the weight balance set.
More programming of the control system, adding a steering angle indicator to the controls and adding a steering center button to bring the motor back to strait ahead.
Hopefully next time we take it out my son with the good camera can shoot some video.
Maybe the mods can move this thread to the projects area, I think it may have out grown the beginner forum.
Brian
This is the seat and mounting bracket, the cleat on the front is for the adjustable foot rest.

and the boss in the kayak to mount it to.

The controls are mounted on a hinge for access to the mounting bolt and the foot rest cleat. Mounting system is just mocked up with plywood now that may change but it's good enough for now.


and in the kayak

Were going to add another boss in the kayak so the seat can move forward up to a foot, when it's under power the back of the kayak is pretty deep in the water so we want to shift the weight forward and see if that helps. this kayak was designed for a second little person in the front, grand kids but the youngest is turning 22 this month so the likelihood of them being in the front is pretty slim lol.
Things left, adding the skeg, shortening the shaft once we get the seat moved and the weight balance set.
More programming of the control system, adding a steering angle indicator to the controls and adding a steering center button to bring the motor back to strait ahead.
Hopefully next time we take it out my son with the good camera can shoot some video.
Maybe the mods can move this thread to the projects area, I think it may have out grown the beginner forum.
Brian
After the last test session we decided to make a few changes, the steering was sloppy, decided to scrap the servo saver for a solid servo arm, I think the mass of the motor was just to much for the spring loaded arm. I ordered a solid arm with a clamp bolt setup so it will be solid. When it came I discovered that it was a lot thinner than the srevo saver so I had to mill down the servo tray and the servo stand to get it down where it will engage the steering pin.
this is the servo saver
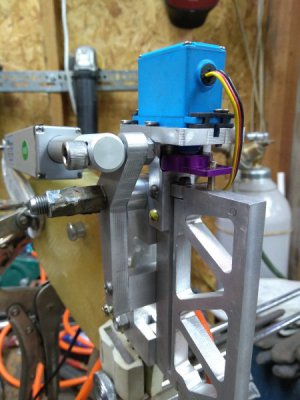
and the new servo arm
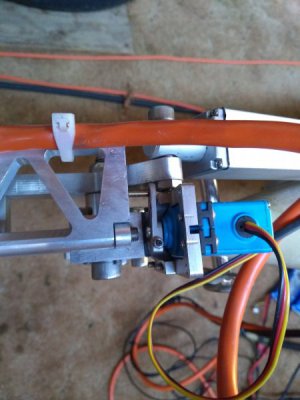
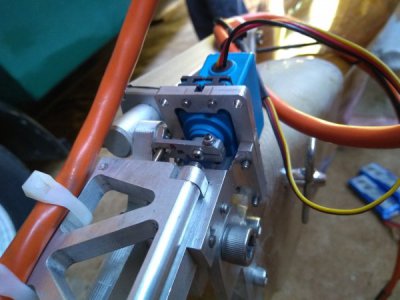
The other thing we found with this round of testing is we had the motor current limit set a 25A as well as the battery current limit which limited us to 6A out of the battery but even at 6A battery current and 25A motor current the 2 run speed test, 2 runs to average because of current and wind, it averaged 4.5 MPH on the GPS which is actually plenty fast. We also moved the seat forward about 8" which seemed to help the weight distribution, the back of the kayak is riding much higher now. I'll put links to the cell phone video we shot, not as good as my sons camera but it works.
My brother made some programming changes as well, the servo didn't have enough power to hold the steering centered when the motor was in the raised position so he changed things around so when you hit the switch to raise the motor it shuts off the motor drive, turns the motor full left then disables the servo and raises the motor. When you hit the down switch it lovers the motor then enables the servo and turns the motor to strait ahead, this should lessen the strain on the servo. He also added a return to strait push button so when you are turning and approach the heading you want it's one button push to return to strait which helps because there is no steering angle indicator so you don't know where the motor is pointing.
I think I'll get going on the Skeg to protect the prop, and Gary is going to work on some form of trim to fine set the strait ahead position and that should pretty much finish up the project.
Video links
showing the lift command turning the motor off, turning left and raising
maneuverability test
this is the servo saver

and the new servo arm


The other thing we found with this round of testing is we had the motor current limit set a 25A as well as the battery current limit which limited us to 6A out of the battery but even at 6A battery current and 25A motor current the 2 run speed test, 2 runs to average because of current and wind, it averaged 4.5 MPH on the GPS which is actually plenty fast. We also moved the seat forward about 8" which seemed to help the weight distribution, the back of the kayak is riding much higher now. I'll put links to the cell phone video we shot, not as good as my sons camera but it works.
My brother made some programming changes as well, the servo didn't have enough power to hold the steering centered when the motor was in the raised position so he changed things around so when you hit the switch to raise the motor it shuts off the motor drive, turns the motor full left then disables the servo and raises the motor. When you hit the down switch it lovers the motor then enables the servo and turns the motor to strait ahead, this should lessen the strain on the servo. He also added a return to strait push button so when you are turning and approach the heading you want it's one button push to return to strait which helps because there is no steering angle indicator so you don't know where the motor is pointing.
I think I'll get going on the Skeg to protect the prop, and Gary is going to work on some form of trim to fine set the strait ahead position and that should pretty much finish up the project.
Video links
showing the lift command turning the motor off, turning left and raising
maneuverability test

