New to forum, new to me Rong Fu 30

I was referring to the nuts welded to the bottom of the stand. I am giving up on messing with that as I just don't think the stand is stable enough to move around. I've looked a little at dro and I think the glass kits have come down in price but there seems to be some quality concerns with them. I'll probably go with an igaging kit as well. As much as I like to play around this stuff I don't think I will be using it enough to justify anything too fancy.
I bet I will be doing more drilling then milling but who knows.
 
I think we are in the same boat. I seldom do anything longer than 6" and maybe 4"wide. Most of what I did for a while was drilling holes for pattern fits and the DRO fixed all my problems with that. It doesn't matter how much play in the leadscrews the DRO tells exactly where the XY&Z are. It has been very good at keeping me within .001. And it gets back to 0 perfectly.

I sometimes think about a bigger mill, but in reality it would be overkill even though I've had it for 3-4yrs now. The projects I do a Bridgeport would be wasted. So while I get the projects done and gain experience while getting the necessary tooling I'll continue on with the old RF-30 until I outstrip its capacity. And like you mentioned even though many bag on it this mill will be easy to turn. Even for me who can't seem to turn anything. And the beauty is it uses all R8 so it will transfer to a lot of other machines.
 
Welcome to the forum. Sounds like you are a newbie just like me. You will find really knowledgeable people on here who will provide advise and help with any problems that you might run into. Don't be afraid to ask any questions.

I have an RF31 clone which is one step up from your RF30. For chip control I put a piece of aluminum foil on the table on each side of the vise and also between the column and the back of the table. Works pretty good to control the chips and makes cleanup really easy.

One issue that you will run into is losing alignment if you have to raise the head to change tooling. You will find all kinds of contraptions that people have come up with to remedy this problem. I have found a simpler solution. Whenever I do a project on my mill/drill the first thing that I do is figure out all of the tooling that I will be using and do a dry run changing out the tooling. I then set the head high enough to make all of the tooling changes without having to raise the head. Since I have started doing this I have not had to raise the head to change tooling.

Share your projects with us and take lots of pictures. We love pictures.
 
Thanks! yeah, I have read quite a few threads on these and this comes up in every single one.
A little planning, making an index mark or taking a reading with an indicator all seem to do pretty well when needed.
It is strange though, that the manufacturers have never attempted to improve the product in this area.
A simple keyway on the column could at least get you real close.

I wonder if I could scribe a straight line up the column to use as an index point.
 
Last edited:
I thought about scribing a line on the column until it was pointed out to me that even a very thin line is still way too wide to bring you back to where you were. One of the simplest solutions I came across was to use a dial indicator mounted on a magnetic base where the DI would read back to zero as you brought the head up against the DI. No fancy gadgets. No lights bouncing off walls and mirrors. Put the DI against the head and set the dial to zero. Move the head and change your tooling. Then move the head back against the DI until it reads zero. Seems pretty simple to me.
 
Seems simple until you have to unexpectedly change heights with like a boring head or face cutter. Getting back to zero is a snap with the cheap DRO if you don't change Z. I tried the magnetic laser pointer shooting to the opposite wall to a plumb bob line and it worked suriprisingly well. Within .001. Was just a cheap HF mag laser level stuck to the side of the head. I'd invested in a pretty complete set of collets, screw length drills etc to avoid height changes and it worked until I got stuck.
 
I spent some time today putting the mill back together, cleaning and fresh oil.
Everything looks pretty nice, just a few dimples on the table and some missing paint.
The pulleys, motor and column look practically new so I don't think this has been used much.
The nameplate and depth gauge still have the plastic protective coating on them.
The pulley guard is almost perfect as well.

Strangely two of the handle set screws are missing but at least one of them is there so I can try and match up a couple more.
I should finally have some pics tomorrow when I get the head back on.

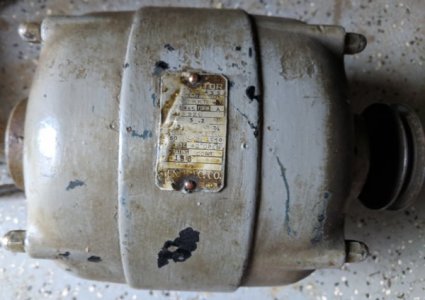
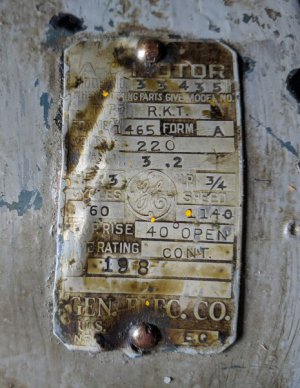
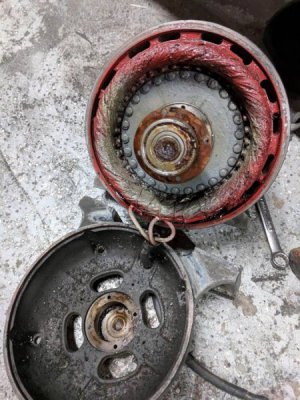
I've done some more measuring and I am fairly sure my old 3 phase will bolt right up (or at least close) but I want to run it with the stock motor first to see the difference. The old motor is only 3/4 hp but it is just as big and heavy as this 2 hp Rong Fu. Anyway, I've been running it on my Delta 17 and it has yet to even slow down so we shall see.

Just occurred to me that @ 1140 rpm this motor is probably pretty darn close in real hp compared to a chinese 1750 rpm motor.
 

Attachments

  • IMG_20180822_093223 (1).jpg
    IMG_20180822_093223 (1).jpg
    42.9 KB · Views: 81
  • IMG_20180822_093232 (1).jpg
    IMG_20180822_093232 (1).jpg
    71.6 KB · Views: 69
  • 00O0O_g40izvnB8eN_1200x900.jpg
    00O0O_g40izvnB8eN_1200x900.jpg
    79.1 KB · Views: 80
Last edited:
Wow, with the cover off that head looks soooo much smaller.
Quick question about mounting the head on the column.
It seems the main issue is trying to get the damn crank lined up with the bracket... can you not just remove the crank, lower the head on and then replace the crank gear box? Mine has already been removed once (bondo showing and paint cracked) so it's not a big deal.

Again, why did they bondo and paint all the joints?

I've got a super heavy duty ratchet strap wrapped around the head and I plan to just hook that up to the hoist to lift. Maybe add a chain through the head as a safety measure. If it is way off balance I can use a light duty strap to level it out.

Yes, you can remove the crank and gear and install the head on the column. You still have to align the rack with the slot in the head but it will slip on. Then install the crank/gear.

The bondo is cosmetic only. Then they used the cheapest, crappiest paint they could find. Don't put masking tape on the paint; even Blue painter's tape will peel the paint right off.
 
Wouldn't be just as easy to pull the rack off, install the head leaving it held up by your lift and then feed the rack down through the head until you get to the gear then crank it down into place? Dunno, just asking. I've not had the head off mine yet. But I did lift it off the table in order to cut the service hole in the table and used that hole through the top of the head between the mast and the quill and it balanced perfectly by adjusting the table in or out.
 
Back
Top