- Joined
- Aug 1, 2016
- Messages
- 25
Noticed there seemed to be some excessive play on the rear headstock bearing once I put some material in the chuck and had some lever action going. So I read up on the South Bend H4 bulletin on measuring and adjusting bearing play:
http://www.wswells.com/data/howto/H-4.pdf
Well someone has definitely been in there before messing with the shims. I followed the procedure called out in the literature.
Front / chuck side bearing was almost in-spec. 2-2.5 thou of play up/down.
Rear / change gear side was way out. 17 thou up/down.
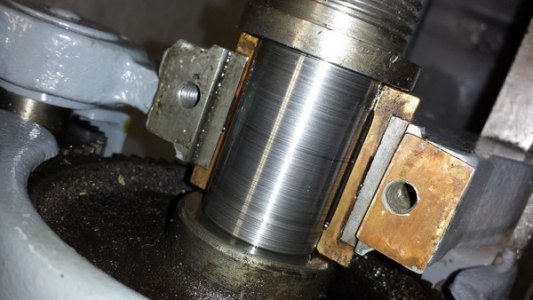
Took the rear bearing cap off. Only one shim present, on the rear/rear position. Looked like a scrap of aluminum. 65 thou thick.
Front bearing cap had two shims. Front/rear shim was same aluminum shim, 65 thou as rear. Front/front shim was maybe copper, 24 thou thick.
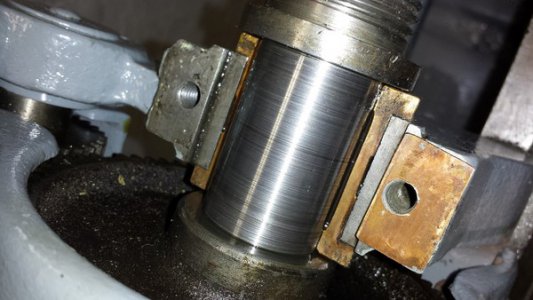
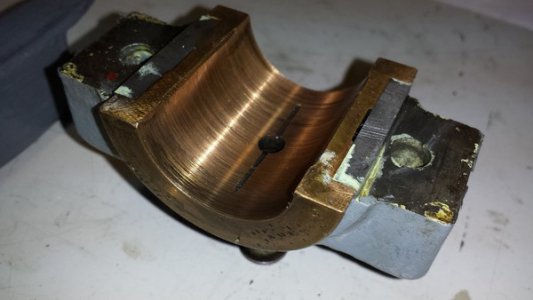
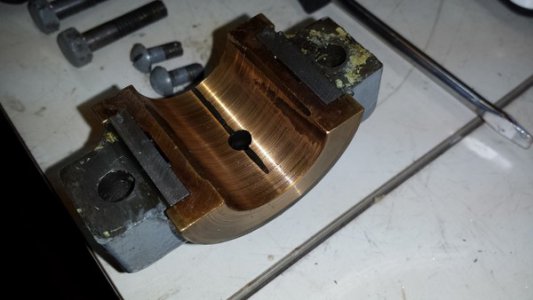
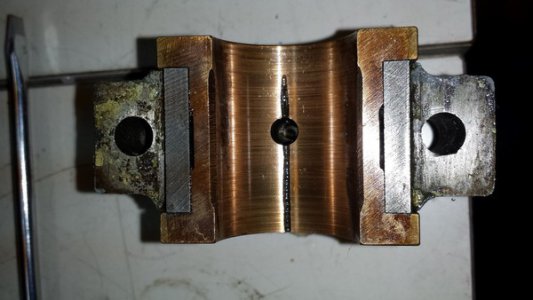
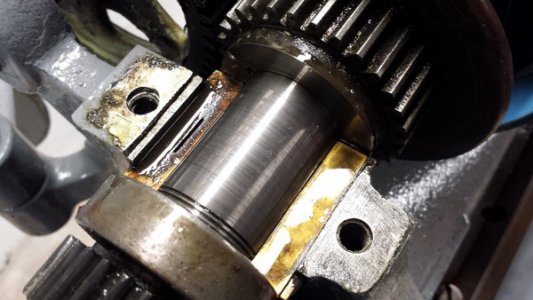
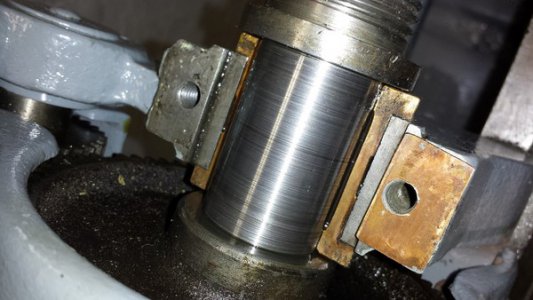
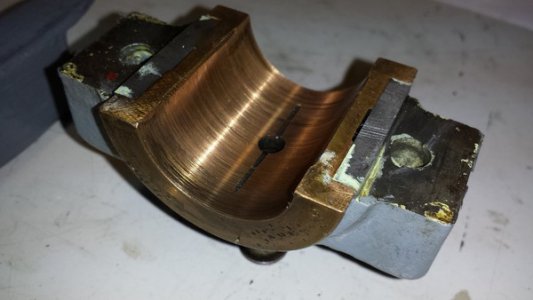
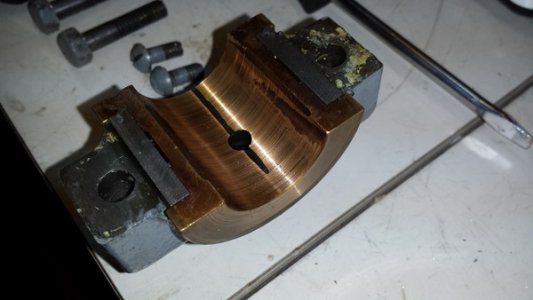
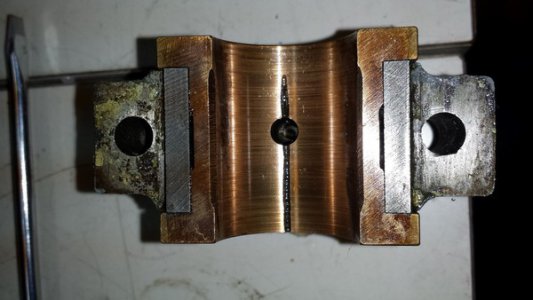
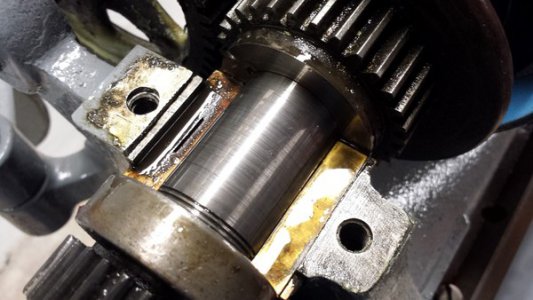
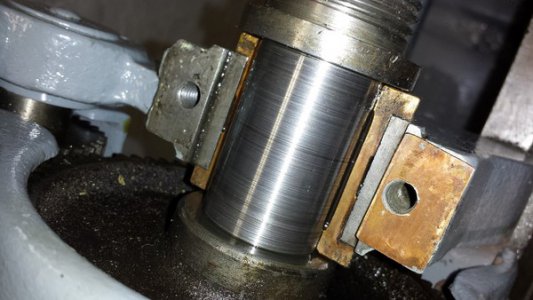
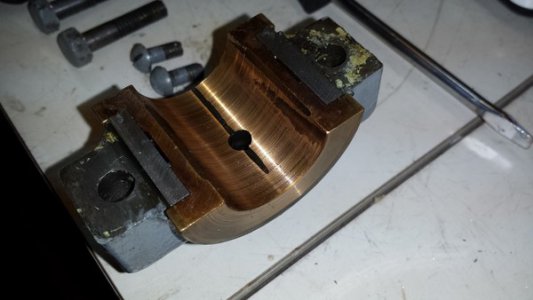
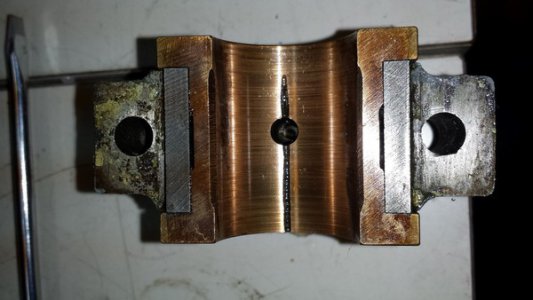
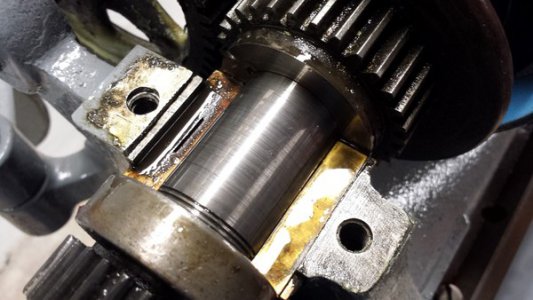
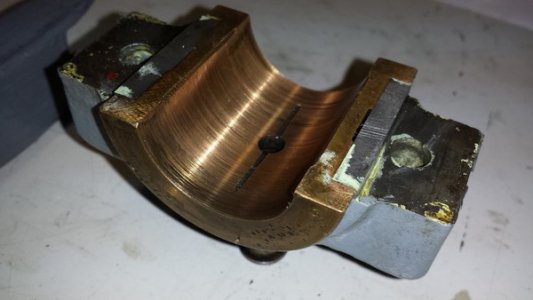
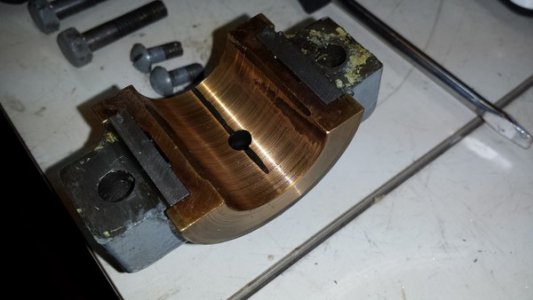
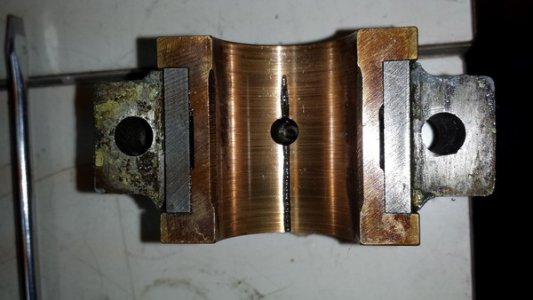
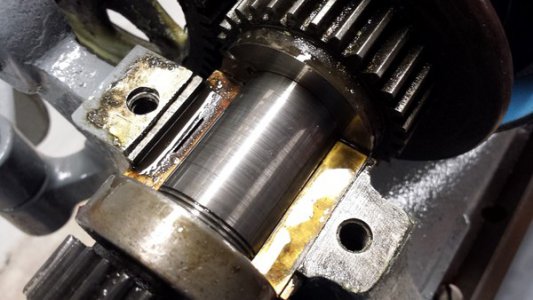
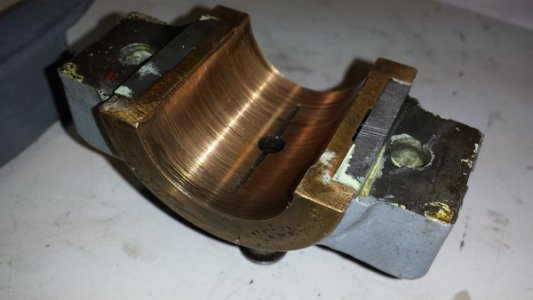
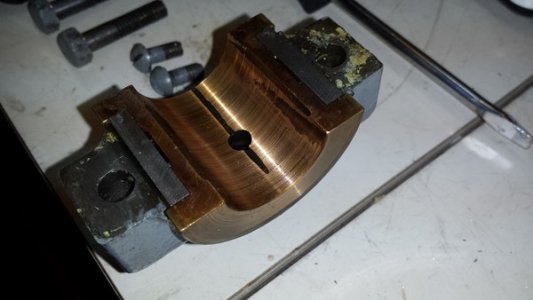
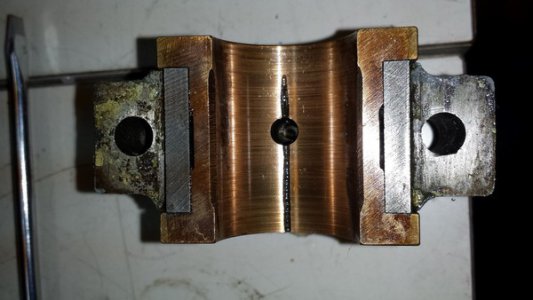
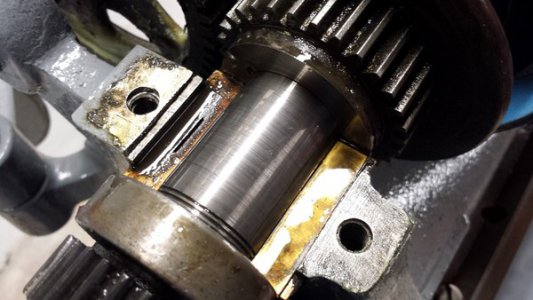
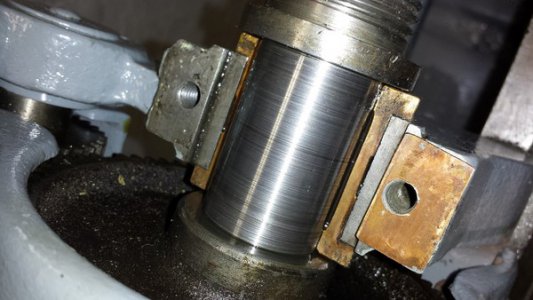
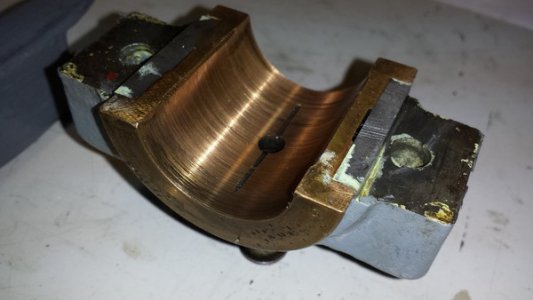
Rear bearing cap actually looked better I think than the front. There are some dark spots shown in the photos on either side, but nothing that catches a fingernail. Not sure about the spindle itself, seems to be some scoring on it but again nothing catches the fingernail.
Rear cap:
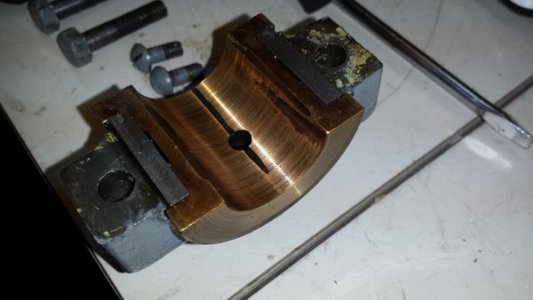
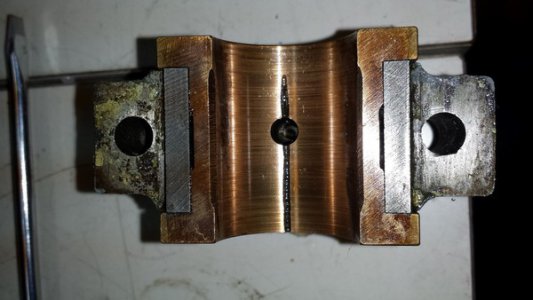
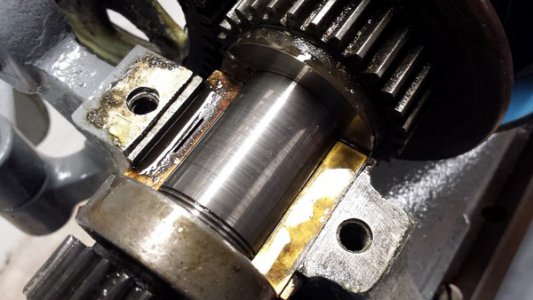
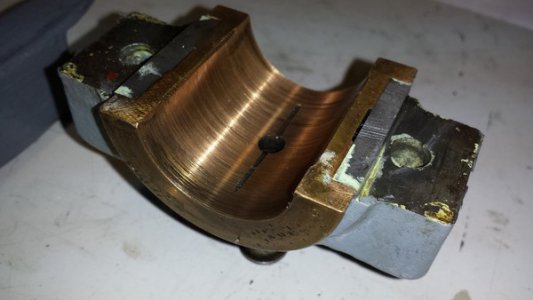
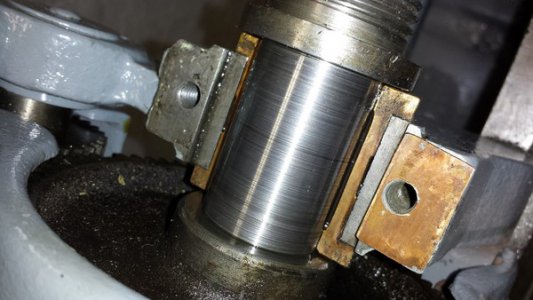
The front bearing cap has some deeper gouges near the front where the threads of the spindle are near, probably takes a lot of the abuse of the loading of the lathe. Can barely catch a fingernail on these, but otherwise this was a tighter bearing cap.
One concern is that the caps have not been sitting level, I would think that the shims ought to be the same height front and rear.
The front seems like if I could just lap the aluminum shim down a thou or two that would get it back into spec.
The rear seems like I should start over with new shims and evenly distribute front/rear starting with some new laminated shims then test and adjust from there?
I've ordered an assortment of carbon steel shim stock up to 0.032" in varied thicknesses to play with.
Lastly I found some interesting information about the chuck. Independent three jaw chucks are pretty uncommon. The chuck is a Skinner No 605 and I found patent dates of 1891 on it. I found a reference in a 1911 catalog which calls it a combination chuck - a universal AND independent. There is a tiny knob/stud on the back I didn't know what it did. You can move it apparently to engage or disengage the universal scroll mechanism. It seems that chuck is even older than the lathe by a good bit possibly!
http://www.wswells.com/data/howto/H-4.pdf
Well someone has definitely been in there before messing with the shims. I followed the procedure called out in the literature.
Front / chuck side bearing was almost in-spec. 2-2.5 thou of play up/down.
Rear / change gear side was way out. 17 thou up/down.
Took the rear bearing cap off. Only one shim present, on the rear/rear position. Looked like a scrap of aluminum. 65 thou thick.
Front bearing cap had two shims. Front/rear shim was same aluminum shim, 65 thou as rear. Front/front shim was maybe copper, 24 thou thick.
Rear bearing cap actually looked better I think than the front. There are some dark spots shown in the photos on either side, but nothing that catches a fingernail. Not sure about the spindle itself, seems to be some scoring on it but again nothing catches the fingernail.
Rear cap:


The front bearing cap has some deeper gouges near the front where the threads of the spindle are near, probably takes a lot of the abuse of the loading of the lathe. Can barely catch a fingernail on these, but otherwise this was a tighter bearing cap.


One concern is that the caps have not been sitting level, I would think that the shims ought to be the same height front and rear.
The front seems like if I could just lap the aluminum shim down a thou or two that would get it back into spec.
The rear seems like I should start over with new shims and evenly distribute front/rear starting with some new laminated shims then test and adjust from there?
I've ordered an assortment of carbon steel shim stock up to 0.032" in varied thicknesses to play with.
Lastly I found some interesting information about the chuck. Independent three jaw chucks are pretty uncommon. The chuck is a Skinner No 605 and I found patent dates of 1891 on it. I found a reference in a 1911 catalog which calls it a combination chuck - a universal AND independent. There is a tiny knob/stud on the back I didn't know what it did. You can move it apparently to engage or disengage the universal scroll mechanism. It seems that chuck is even older than the lathe by a good bit possibly!


