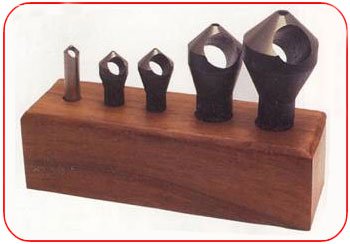
Oversized Countersink blunder

Kaylee Frye

Registered
Registered
Joined
Oct 28, 2016
Messages
11
Hi all,

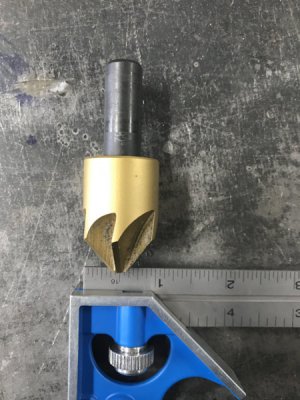
So I'm not a machinist, and hoping you might have some insight for me. I am having a lot of trouble with my brand new 1" countersink. It doesn't seem to catch the metal well enough to cut unless I start the countersink with my trusty 3/4" one. And even still when it starts cutting it's extremely hard to keep the exact right pressure without it halting. I'm drilling at a very low rpm through 1/2" mild steel.

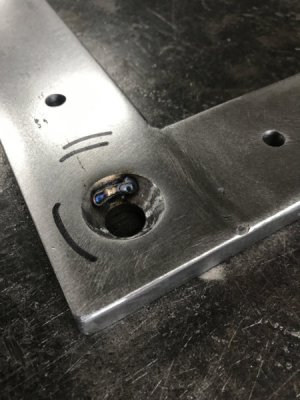
On top of that, in my most recent project, all my holes were countersunk crooked, which was very annoying to fix so that the legs on the bench I'm making would screw in square to the bench frame. I ended up checking the squareness of the bed, and it was barely off, I'm really surprised the resulting errors were so dramatic.

Feeling kinda dumb, and hoping there's something really obvious to my plight. Sorry if my photo files are gigantic.
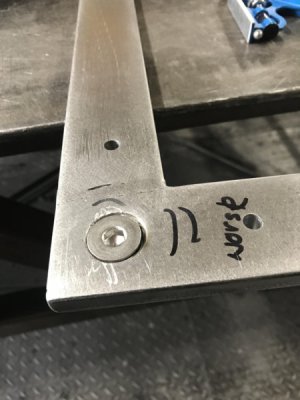
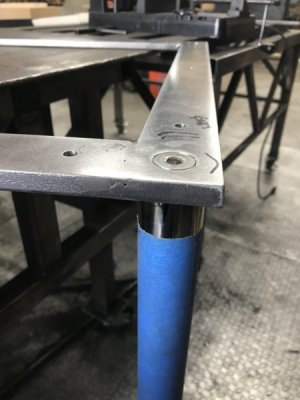
Countersink issue 1.jpg

countersink issue 2.jpg

Countersink repair.jpg

Countersink size.jpg

Drill press 2.jpg

Drill Press.jpg
 
Hi Kaylee, the welds are probably part of the problem-after welding the pieces should be annealed by heating and cooling before machining. Also are you clamping the pieces to the table or doing it freehand?
Need to use some oil or cutting fluid too on steel
Mark
 
Hi Kaylee,

A few thoughts......

With long table legs like that a small error in the angle could certainly show.

Are you drilling thru with a regular drill bit first?
None of the counter sinks I have are "centre cutting", that is, they are not meant for starting a hole.

For drill press table angles:

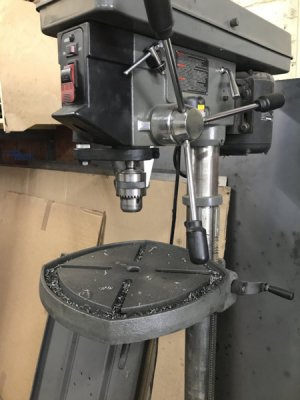
I also know that my drill press table tilts low at the front edge just under its own weight if the column split-clamp is not locked.
Adding a heavy vise or work piece makes it worse. The fix is simple; just tighten the column lock.

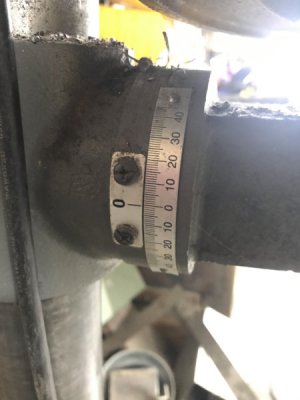
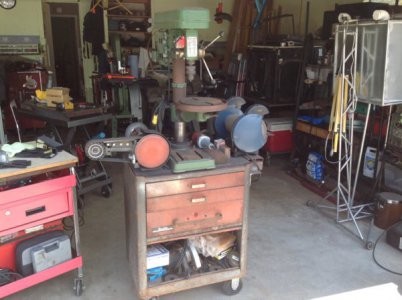
You show the left-right table tilt set to zero on the scale, but have you checked it?
You can use a dial indicator on a short arm in the chuck if you have one. If not, you can get it pretty close just using a wire bent like a crank. Put one end in the chuck and tighten, then sweep the spindle around by hand to see the gap between the lower end of the wire and the table. Check at least four points left, right, back, front. The further out you measure from the centre of the table, the easier it is to see any discrepancy.

If sweeping over the table t-slots is a problem (especially with a dial indicator getting caught) lay a known flat plate over the table first, then you have an unobstructed flat surface. Depending on the accuracy required even a piece of MDF might be enough.

The butt weld near that hole may have affected the metal enough to make it locally harder.
As an experiment, get a scrap piece of the same material (without welds) and try a series of test holes.
I bet once you figure out a setup and sequence that works reliably, you will fly thru the rest.

Good Luck, and please let us know how you make out.

-brino
 
Hi all,

So I'm not a machinist, and hoping you might have some insight for me. I am having a lot of trouble with my brand new 1" countersink..... I'm drilling at a very low rpm through 1/2" mild steel.

On top of that, in my most recent project, all my holes were countersunk crooked,

If the countersink doesn't look right, possibly it's the wrong angle? 82 degrees, 90 degrees, and several others
are available, and it matters which you're using. The rule in making chips, is to make 'em coarse if possible,
so a variant cutter with fewer flutes might be good (some countersinks have only one edge).

Consider (for inch flathead screws) 82 degrees and a piloted design, if you want it to look pretty.
Like, this one (not exactly what you want: metric screws are 100 degrees)
<https://erwin.volkswagen.de/worksho...en.de/workshop/englisch/pinfo/48506200000.htm>
but it's a three-flute piloted design that gives good appearance. For a price.
 
Countersink are nasty tools.

Ruined a walnut die in Jr High thinking countersink dots...

That style bit is going to cut wild and not good finish unless you can control depth of cut and position.

Try making a bushing guide out of hard wood that the countersink just fits that can be clamped to hold the cutter on center.

Wax to keep from burning and use slowest speed you have with good pressure.

Set limiter on spindle for depth of cut and put lots of weight on the feed so it can take good bite but stop at right place.

Brass or aluminum better guide if you have it

Sent from my SAMSUNG-SGH-I337Z using Tapatalk
 
I just wanna say thanks all for the tips, I'm always so impressed with the array of feedback, thank you. It's all quite new info to me, so I'll be digesting it all and don't have an immediate response.

But I would like to add, that I always drill my holes before welding if I can help it. And the weld pictured in the countersink above was to adjust the countersink so that the bolt would sit square. And I do use a regular drill bit first, in this case I started with a 1/4" hole, then enlarged it to 1/2" then tried using the 1" countersink, which was quite the struggle and I had to go back and forth between the 3/4" countersink (which worked fine) and the 1". I will definitely take a closer look at setting up the squareness of my drill press

As far as all the types of countersinks and angles and flutes :faint: I don't know what to think! Thanks again all, for the thoughts
 
Greetings, i had the same problem until i switched to a single flute countersink. My drill-press is a cheapo and i had to c.s. a alot of holes in 3/8" cold rolled, i had a 3 flute and chatter was bad.
 
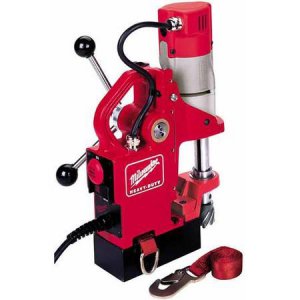
When I was doing lots of fab one of th trickiest parts was precision drilling on large parts. How to hold them without inducing error. We had a mag base drill but it was insanely heavy and we couldn't always weasel into the right spot. What worked the best was an old heavy duty bench style drill press on a cart with the press table adjusted to the height of the fab table. This way you could roll it into place and pull the frame over onto the DP table and clamp the DP table and the fab table. The only time this got messed up was with big drill bits because of their length would make me run out of adjustment. But I cured that with a set of screw machine length drill bits which are way shorter than you usual length "jobber" length bits. This also works great on my mill/drill so I don't have to lift the head. This is why we never had or needed a stationary drill press like you are using. How many times have you ever needed more space than what a good heavy duty benchtop drill press can drill? Granted it's hard to find a good heavy duty benchtop press but my ancient HF DP and one exactly like it was all we used to make whole packing houses of machinery. Just my 2c.

image.jpg

image.jpg
 
If the countersink doesn't look right, possibly it's the wrong angle? 82 degrees, 90 degrees, and several others

Good point @whitmore, I didn't even think of that one!

As far as all the types of countersinks and angles and flutes :faint: I don't know what to think!

If you're having trouble picturing the difference that the counter-sink angle makes here's a diagram to help:
http://www.leevalley.com/en/wood/page.aspx?p=44708&cat=1,180,42240,42281

(Note that I am not recommending those bits for your purpose, they are not big enough!)

I just wanna say thanks all for the tips, I'm always so impressed with the array of feedback, thank you.

Agreed, great thread and great question!
Obviously a process that many people have struggled with.
We sure do have a varied, experienced and helpful group here.

-brino
 
Back
Top