A while back , I needed some parallel clamps or as I know them, Tool maker's clamps. After seeing the prices to buy them, I decided to make some. The total cost was less than $20 which was less than the price of buying one and I now have four.
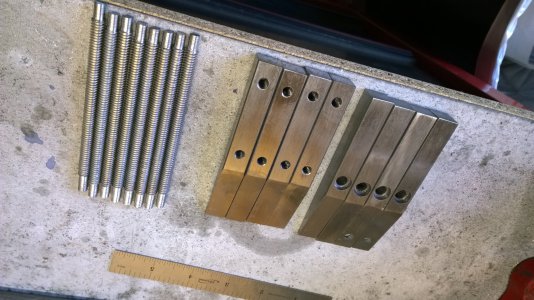
They started with a 3 foot length of 1/2" square steel bar, cut into pieces. I didn't have a mill yet so these were made entirely with a band saw, drill press and lathe. With some creative clamping , I cut the angles on the clamp arms on the band saw and polished them on the belt sander. 1/4 inch all thread was used to make the screws. hear is a picture of the cut parts.

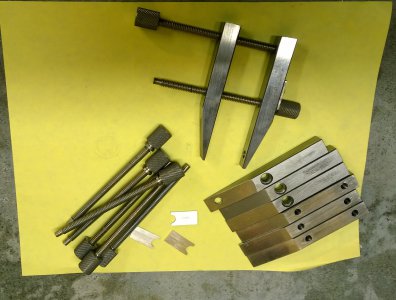
Next I made knurled knobs for the screws and pinned them to the screws. I made some locks to hold the one screw in the clamp bar from 1/16" thick x 1/2" wide aluminum bar. then it was just assemble.

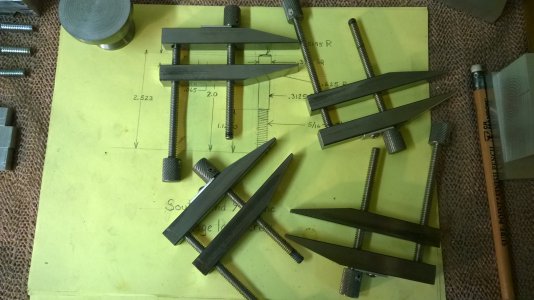
After assembly, I have four very well made toolmaker's clamps for less than the price of one imported one and it only took a couple hours to make them.

This was a simple project that is very useful. I have used these clamps many times in the last couple months since I made them. They are 4" long with a clamp throat depth of 2" and a clamping thickness range of 4". This same design can be made any size needed. The pictures could be better. these are polished to an almost mirror finish and very shiny. ( I like shiny). I get a lot of compliments on them and people ask where I bought them and they are surprised when I say , "I made them"
Thanks for looking,
Mark


They started with a 3 foot length of 1/2" square steel bar, cut into pieces. I didn't have a mill yet so these were made entirely with a band saw, drill press and lathe. With some creative clamping , I cut the angles on the clamp arms on the band saw and polished them on the belt sander. 1/4 inch all thread was used to make the screws. hear is a picture of the cut parts.

Next I made knurled knobs for the screws and pinned them to the screws. I made some locks to hold the one screw in the clamp bar from 1/16" thick x 1/2" wide aluminum bar. then it was just assemble.

After assembly, I have four very well made toolmaker's clamps for less than the price of one imported one and it only took a couple hours to make them.

This was a simple project that is very useful. I have used these clamps many times in the last couple months since I made them. They are 4" long with a clamp throat depth of 2" and a clamping thickness range of 4". This same design can be made any size needed. The pictures could be better. these are polished to an almost mirror finish and very shiny. ( I like shiny). I get a lot of compliments on them and people ask where I bought them and they are surprised when I say , "I made them"
Thanks for looking,
Mark


