- Joined
- Dec 18, 2013
- Messages
- 2,012
Finally wrapped up this project phew! Here's the second half in pictures...
Here I have about 1" of travel left at the tailstock end. Note I have the read head pointed toward the tailstock vs the instruction video which points it towards the right, I felt this was a better orientation.
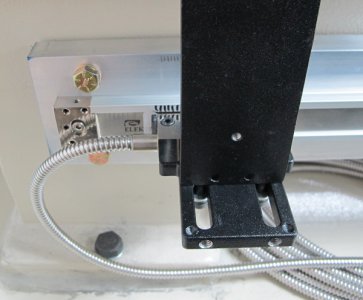
Here's the headstock end I have about .625 inches of travel left, this is with the scale cut to 37". Note that black Sharpy line upper/right that's where the backsplash fits there's not a lot of room at this end. That said the backsplash actually sticks out towards the tailstock, the carriage hits the backsplash so there's about 2" of travel towards the headstock you can't use with the backsplash installed. In the event I one day fashion a different stand and backsplash I'm good to go here with the full travel allocated for e.g. carriage bumping right up against the headstock housing.
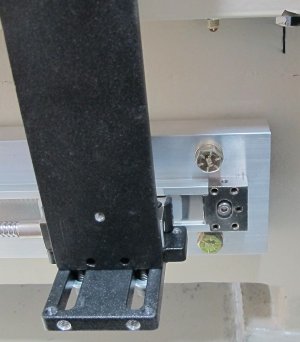
Here's a shot of the cross slide, as I mentioned in part 1 I flipped the mounting block back around to locate the two tapped T bracket holes towards the left, this gave me more (.625 inches) travel left on the scale at the headstock end.
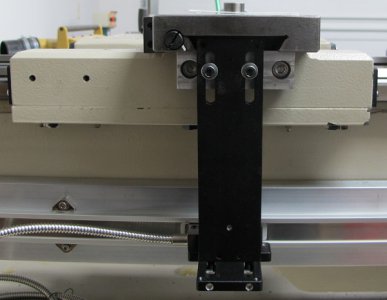
I'd rather be lucky than good the chip guard fit perfectly!
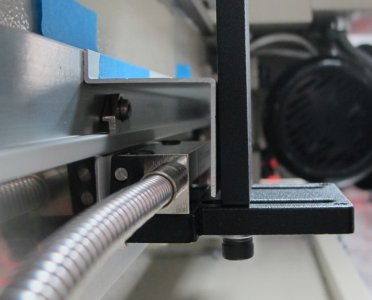
Here's a wide angle shot, I drilled and tapped 3 holes in my 3 x .75 x 38 inch aluminum bar for the chip guard.
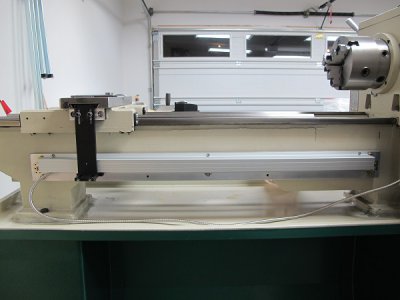
Here's a close up.
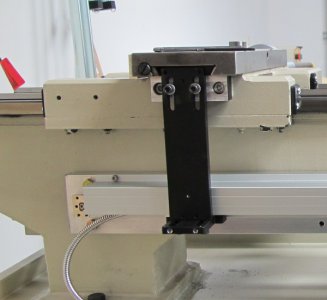
Back to the cross slide install I had about 3/4 inch of travel left with the cross slide fully retracted towards the operator.
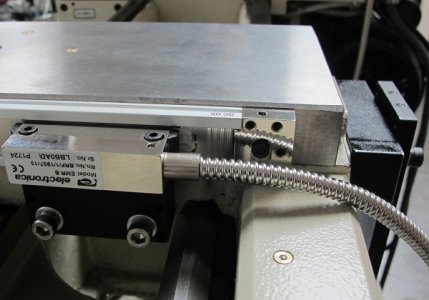
Here it is fully extended, there's only about 3/16 inch of travel left on the scale.
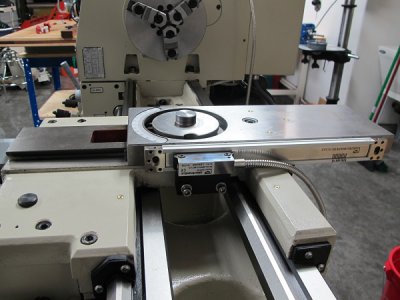
Final shot with the brass chip guard I fashioned.
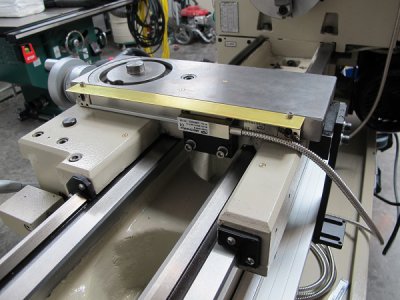
Here I'm finally routing the cables, I later cut the zip ties securing the light and let it float free as before.
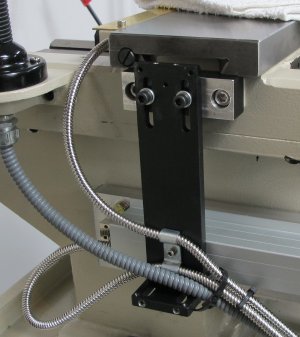
I tested three different paths for the cables, under the motor, over the back and around the electrical box, ended up going with the third in front of the electrical box. The instructions say keep it away from high inductive loads plus I didn't like it near the motor for other reasons.
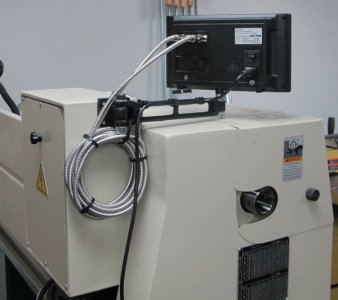
Here's a close up. Not I mounted it to the side of the electrical box, the video shows mounting it to the front but that is not possible there are electrical components there. Also the kit gives you the bolts for mounting this but not the nuts and washers. I used a couple 1/4-20 bolts I had on hand. There's about 2' of extra cable for the X axis and about 4' of extra cable for the Z axis so I had to wind it up and secure it with some zip ties.
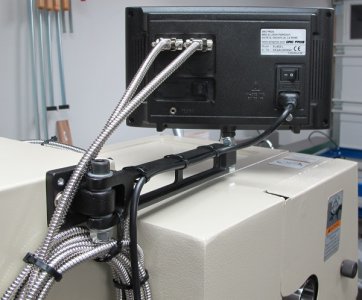
Here's a couple shots of the front, I like it!
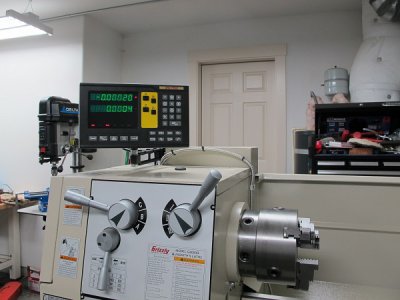
They give you a threaded rod for mounting the display, I chucked it and replaced it with a shorter bolt. The threaded rod was about 1" longer and the display was teetering up in the air too high on that thing. This also gave me more bottom clearance between the arm and the headstock housing, the kit has that thick locking nut on the bottom of the threaded rod which is also why the arm mounting block is positioned slightly higher than the top of the electrical box. ALSO you need a jam nut to secure the display to the threaded rod or in my case the bolt. Otherwise the display just unscrews itself instead of the whole thing pivoting on the nylon washers. I suppose I could have used some Locktight but a jam nut is better. I found once installed I probably won't be pivoting the display anyway. Installed the way I did it here the whole thing will swing completely out of my way should I need to remove the top of the headstock housing or anything else on the lathe. I completed the setup procedures and it seems to be working just fine!
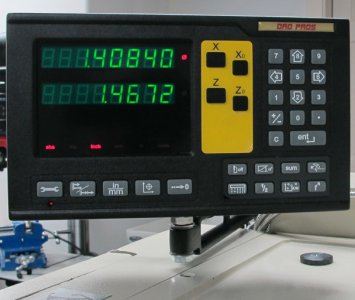
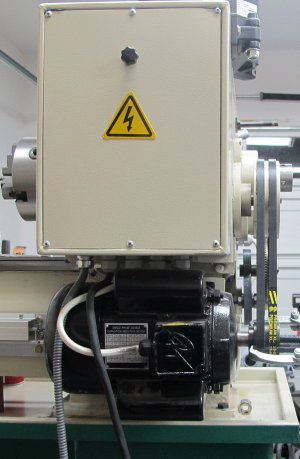
Last but not least while I had the backsplash off I decided to fix a quality issue. See how nice and level the motor is now, it was seriously crooked from the factory plus the pulleys were out of alignment to boot. I leveled the motor and had to use my puller to move the pulley out about .150. By the way the pulley wobbles (face palm) really a precision gunsmith lathe how do you get the motor pulley wrong? Also note the new Napa Auto Parts belts, these have a variable sized cog wide, medium, narrow pattern not that I really cared I just thought I would slap a couple new belts on while I was aligning everything.
That's all folks, I'm off to play with a bunch of indexable tools that arrived while I was working on this DRO.


Here I have about 1" of travel left at the tailstock end. Note I have the read head pointed toward the tailstock vs the instruction video which points it towards the right, I felt this was a better orientation.

Here's the headstock end I have about .625 inches of travel left, this is with the scale cut to 37". Note that black Sharpy line upper/right that's where the backsplash fits there's not a lot of room at this end. That said the backsplash actually sticks out towards the tailstock, the carriage hits the backsplash so there's about 2" of travel towards the headstock you can't use with the backsplash installed. In the event I one day fashion a different stand and backsplash I'm good to go here with the full travel allocated for e.g. carriage bumping right up against the headstock housing.

Here's a shot of the cross slide, as I mentioned in part 1 I flipped the mounting block back around to locate the two tapped T bracket holes towards the left, this gave me more (.625 inches) travel left on the scale at the headstock end.

I'd rather be lucky than good the chip guard fit perfectly!

Here's a wide angle shot, I drilled and tapped 3 holes in my 3 x .75 x 38 inch aluminum bar for the chip guard.

Here's a close up.

Back to the cross slide install I had about 3/4 inch of travel left with the cross slide fully retracted towards the operator.

Here it is fully extended, there's only about 3/16 inch of travel left on the scale.

Final shot with the brass chip guard I fashioned.

Here I'm finally routing the cables, I later cut the zip ties securing the light and let it float free as before.

I tested three different paths for the cables, under the motor, over the back and around the electrical box, ended up going with the third in front of the electrical box. The instructions say keep it away from high inductive loads plus I didn't like it near the motor for other reasons.

Here's a close up. Not I mounted it to the side of the electrical box, the video shows mounting it to the front but that is not possible there are electrical components there. Also the kit gives you the bolts for mounting this but not the nuts and washers. I used a couple 1/4-20 bolts I had on hand. There's about 2' of extra cable for the X axis and about 4' of extra cable for the Z axis so I had to wind it up and secure it with some zip ties.

Here's a couple shots of the front, I like it!

They give you a threaded rod for mounting the display, I chucked it and replaced it with a shorter bolt. The threaded rod was about 1" longer and the display was teetering up in the air too high on that thing. This also gave me more bottom clearance between the arm and the headstock housing, the kit has that thick locking nut on the bottom of the threaded rod which is also why the arm mounting block is positioned slightly higher than the top of the electrical box. ALSO you need a jam nut to secure the display to the threaded rod or in my case the bolt. Otherwise the display just unscrews itself instead of the whole thing pivoting on the nylon washers. I suppose I could have used some Locktight but a jam nut is better. I found once installed I probably won't be pivoting the display anyway. Installed the way I did it here the whole thing will swing completely out of my way should I need to remove the top of the headstock housing or anything else on the lathe. I completed the setup procedures and it seems to be working just fine!

Last but not least while I had the backsplash off I decided to fix a quality issue. See how nice and level the motor is now, it was seriously crooked from the factory plus the pulleys were out of alignment to boot. I leveled the motor and had to use my puller to move the pulley out about .150. By the way the pulley wobbles (face palm) really a precision gunsmith lathe how do you get the motor pulley wrong? Also note the new Napa Auto Parts belts, these have a variable sized cog wide, medium, narrow pattern not that I really cared I just thought I would slap a couple new belts on while I was aligning everything.

That's all folks, I'm off to play with a bunch of indexable tools that arrived while I was working on this DRO.


Last edited:


