POTD- PROJECT OF THE DAY: What Did You Make In Your Shop Today?

Today i did look thru the Scenic and by some chance it has 257000 km on the clock the same as the 607 when i bought it. Also it due for the a timing belt replacement, it has 3880km on this oil but it looks dark. One thing i could not check was to find the stamped Vin number and after 2 hours i finally found it under the LPG tank at the bottom of the spare tire wheel well. On the inspection pit i was suprase the floor is in excellent shape no rust, some one did cut the catalytic converter and front muffler. It need CV boots on both sides, but it's a solid car with no rust i'll take it to the big garage to start changing the engine, i wanted to take the oil pan down but there is too many thing in the way. But i'm sure from the sound it has a crank or con rod broken. Let's hope it makes it to the other garage.
IMG_20220119_211533.jpgIMG_20220119_211631.jpgIMG_20220119_211821.jpgIMG_20220119_212948.jpgIMG_20220119_212957.jpgIMG_20220120_180445.jpgIMG_20220120_180431.jpgIMG_20220120_181127.jpgIMG_20220120_181131.jpgIMG_20220120_181145.jpg
 
I don’t want a 45 sq ft lake in my shop evaporating and rusting machines, tooling, etc. I will drain the table at the end of every day I use it. And, there are times it’s nice to lower or raise the water level while using the machine. This makes the water level adjustable as well. I am using a plasma additive in the water.
I'm setting mine up to drain into a plastic drum after going through a coarse and fine filter, and then pumping it back into the table for the next use. My main reason for going this route is the dry climate, and resultant evaporation. I treat my water also. Mike
 
A while back I milled, drilled and tapped a fixture plate, but then just set it aside and hadn't done anything with it. My intention was to make some mini clamps to complement it, but you know... 'Oh look, there's a squirrel!'.

Recently however I saw a video by MrPragmaticLee, who thought he got the idea from Oxtools, but he wasn't sure. Anyway, I got inspired and jumped back on the project. Added 3/4 of a 1.5" round stock, cut some slots for a back stop, and drilled and countersunk holes to mount it to my rotary table.

This means it can be used in a traditional way to mount to the table, or on the rotary table, or in the vise as a "poor man's sine plate". I picked up some steel bar and whipped up the clamps, using my newly fabbed fixture plate to mill the angles on the toe of the clamps (is that incestuous?)

This is where I kinda went off the rails. I've never done any bluing and was thinking about that for the toe clamps, (Florida is not kind to untreated steel), when I struck on the idea of powder coating them. Not sure how the powder coat will hold up over time, but otherwise, I think they came out pretty good. Hopefully the color is bright enough that I won't accidentally mill into them.

PXL_20220122_164222721.jpg

PXL_20220122_163905470.jpgPXL_20220122_163905470.jpg

PXL_20220122_163525625.jpg
 
I'm setting mine up to drain into a plastic drum after going through a coarse and fine filter, and then pumping it back into the table for the next use. My main reason for going this route is the dry climate, and resultant evaporation. I treat my water also. Mike
Thats what I did. Have a submersible pond pump in the tank to pump the water back to the table. Didn't bother with any filtering, thinking the tank will act as a setting pond. Haven't bothered to clean it out yet, have only been using it 7 or 8 years.

Greg
 
Parting off small parts and having them disappear forever in the chip tray is always embarrassing. Today I had a scrap sheet of aluminum and made a simple tray to fit between the lathe ways below the chuck and along under where the carriage would normally be for a smaller piece. It just slips in. I have a DiAcro corner notcher that makes simple sheet metal work very easy.

Lathe tray 1 (1).jpgLathe tray 2 (2).jpgLathe tray 2 (2).jpg
 
BBQ pipe base...

So we picked up a BBQ at the scrap yard that looked like it was in acamp ground but rust got part of it, there were a few and we got the best one that just had rusted out bottom.

Cut out the rust, replaced and good, no photos of that.

Normally these are mounted to a tube that is planted in concrete, this one had the tube so good to go but do not want to concrete in the yard.

We have collected a few fire engine brake drums and a couple hubs so on a recent trip to scrap yard we scored a 1.25 inch thick torch or laser cut disk 9 inch diameter, perfect.

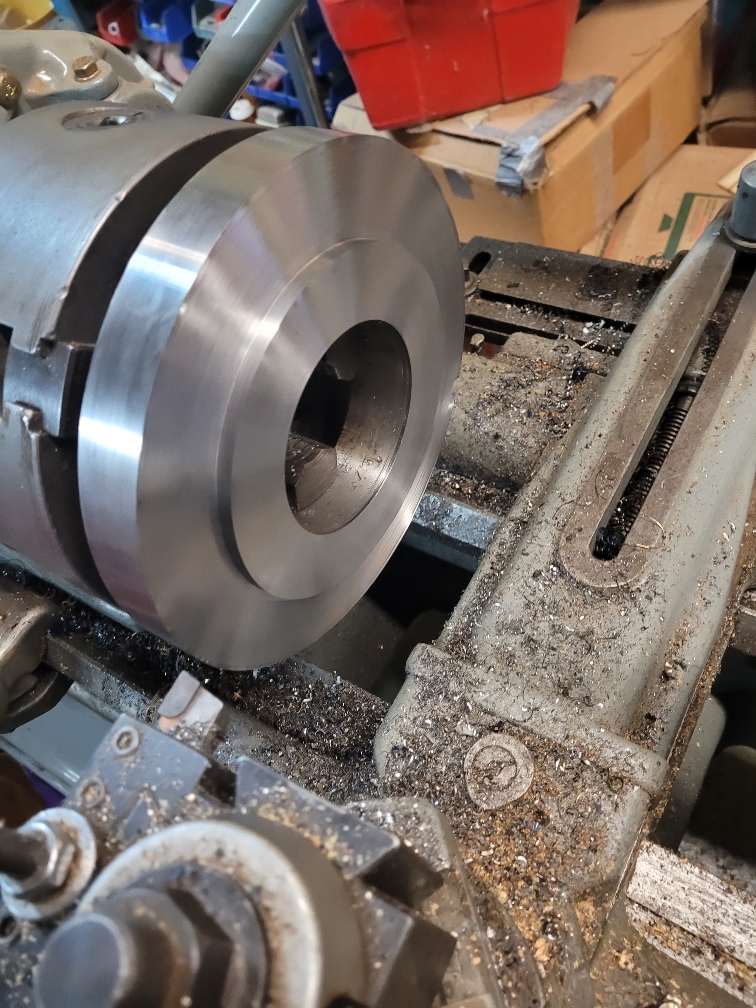
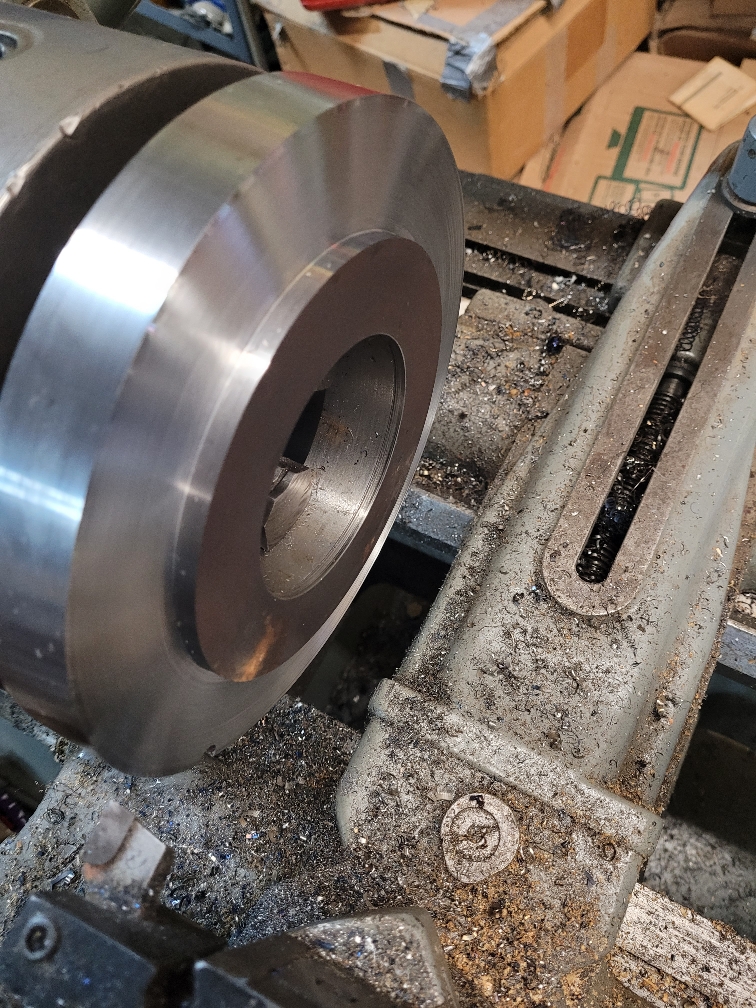
We chucked it lathe and with 3.5 inch hole Sal in tailstock with chuck pinned with key we cut out a slug.

Then bored out to fit tube leaving the last 1/8 inch at bottom for a bottom stop.

Gripped from inside and cut outside to round, still had the spot where the laser started but bondo will fill that.

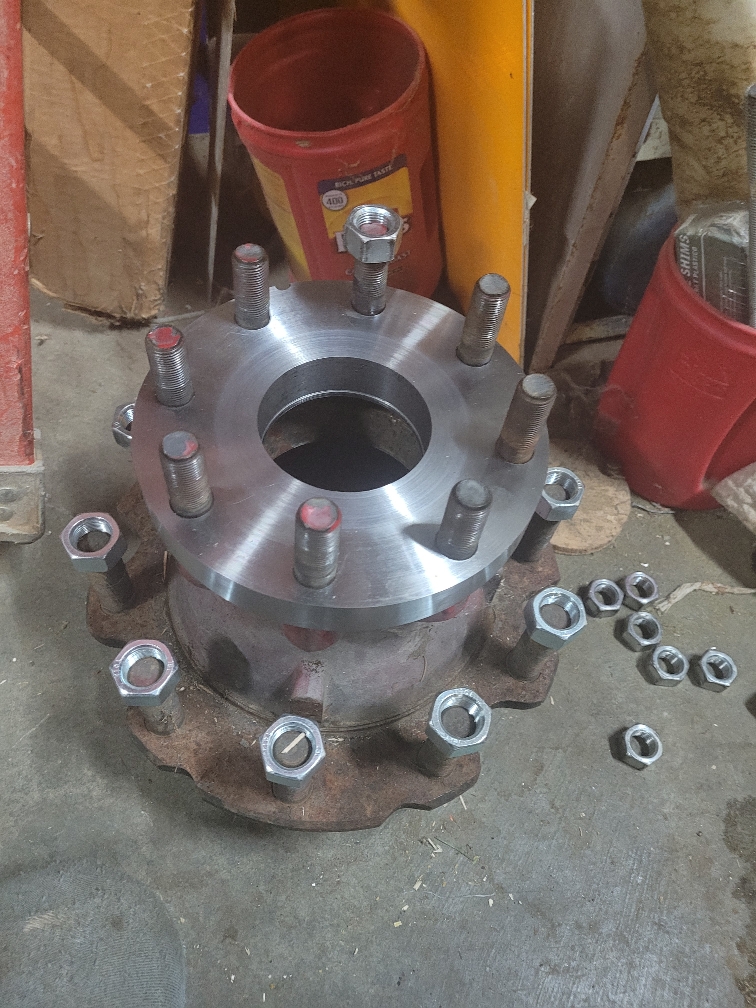
The disk is too thick for the bolts so removed 1/4 inch, leaving a center hub that just fits inside the hub.

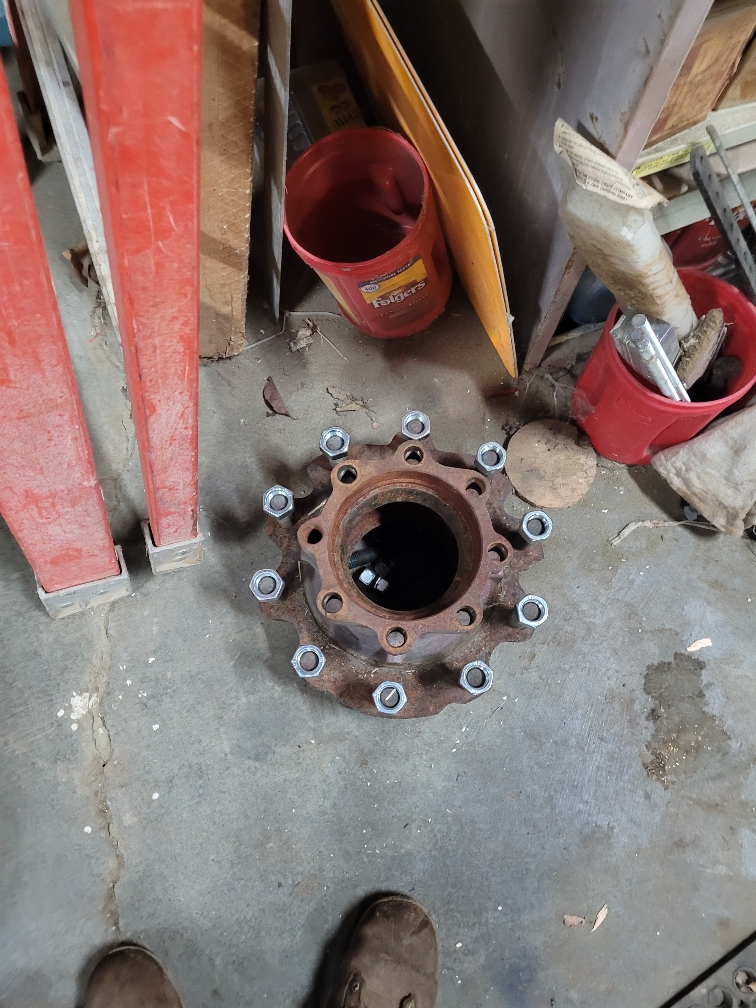
Could not find the data sheet for the hub, measured as 7 inch diameter bolt circle.

Had ordered a rotary table for this and other projects. Wonderfull tool.

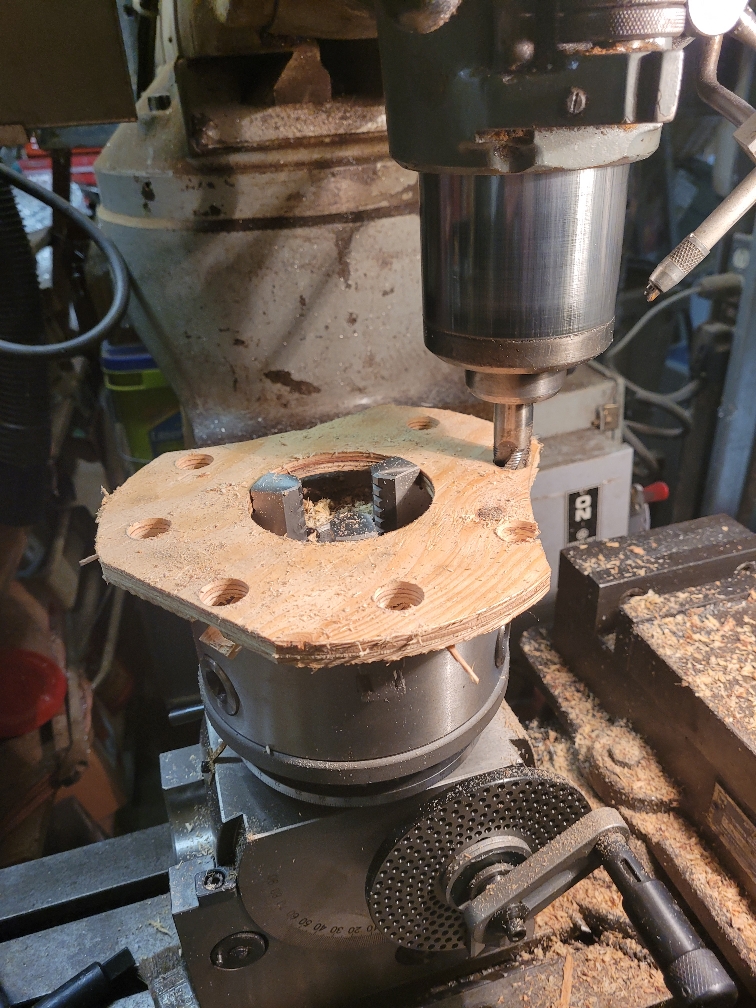
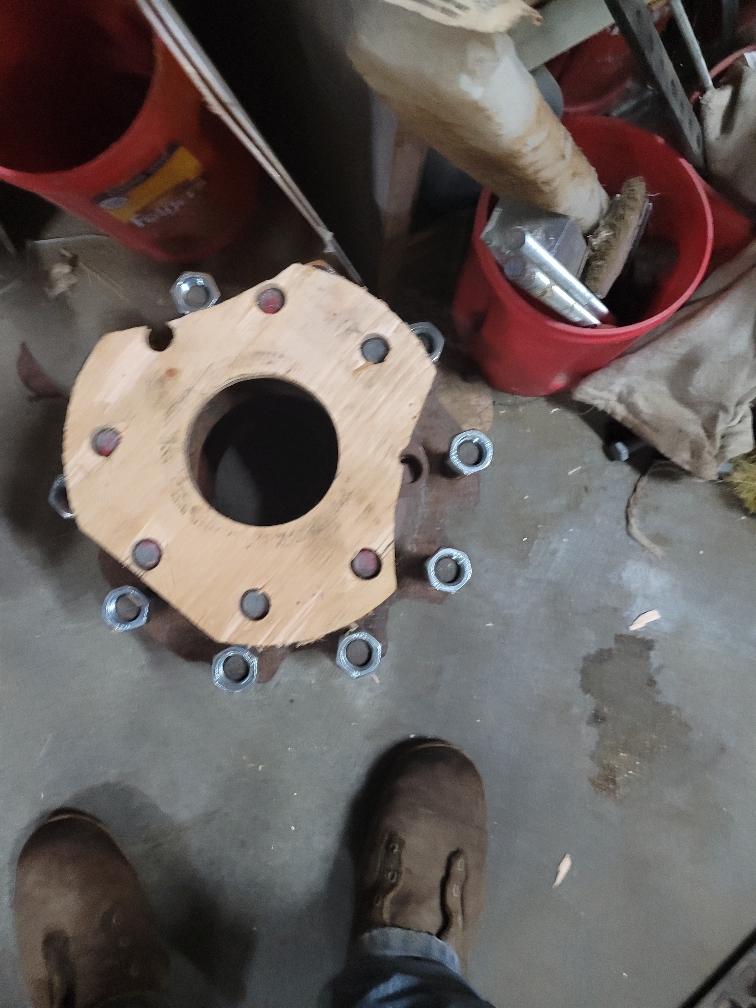
Cut out a chunk of plywood and repeated same center hole and place in lathe.

Used pencil to mark to get a 7 inch circle.

Transfered to mill in rotary table, drilled 1/16 holes allow for matching the circle.

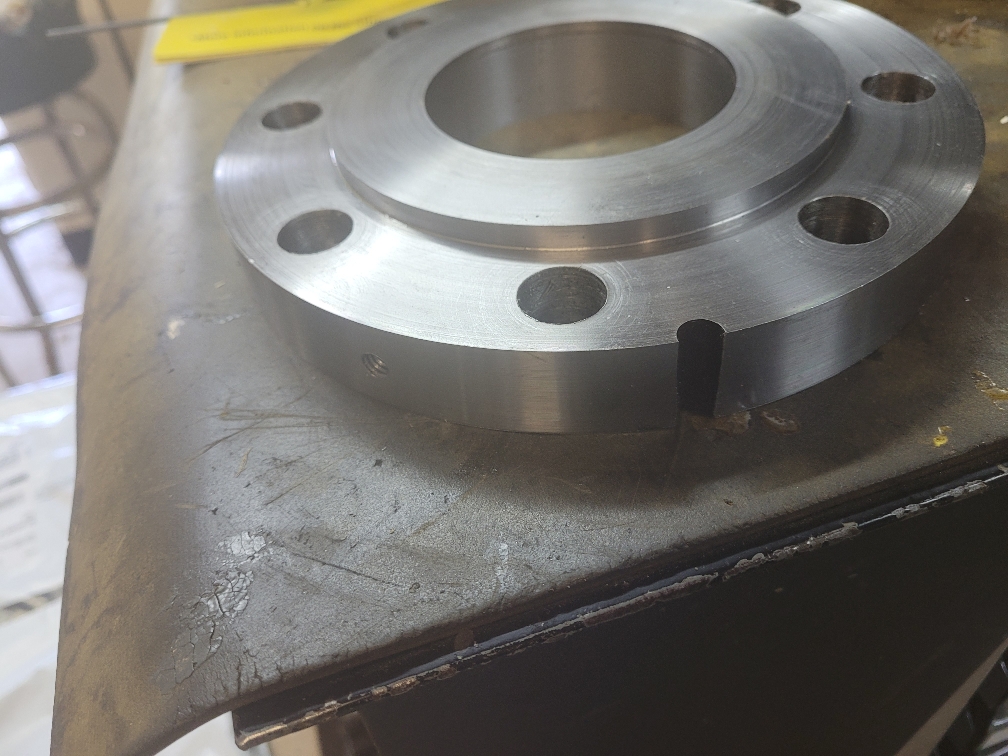
Used a 3/4 end mill to make the holes and test fit perfect.

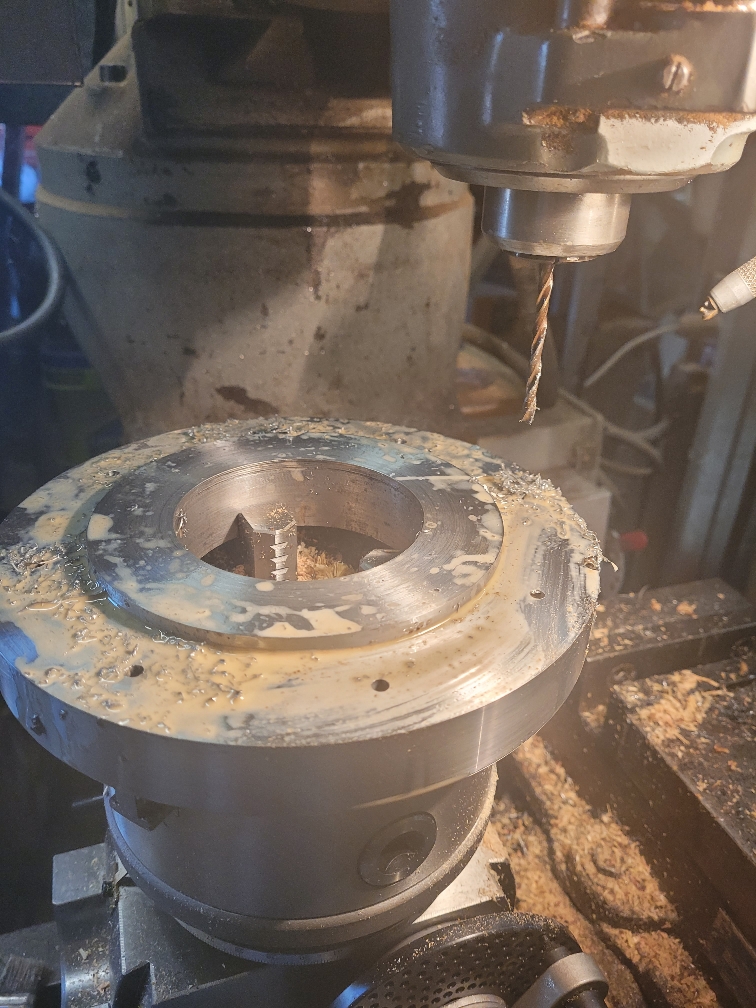
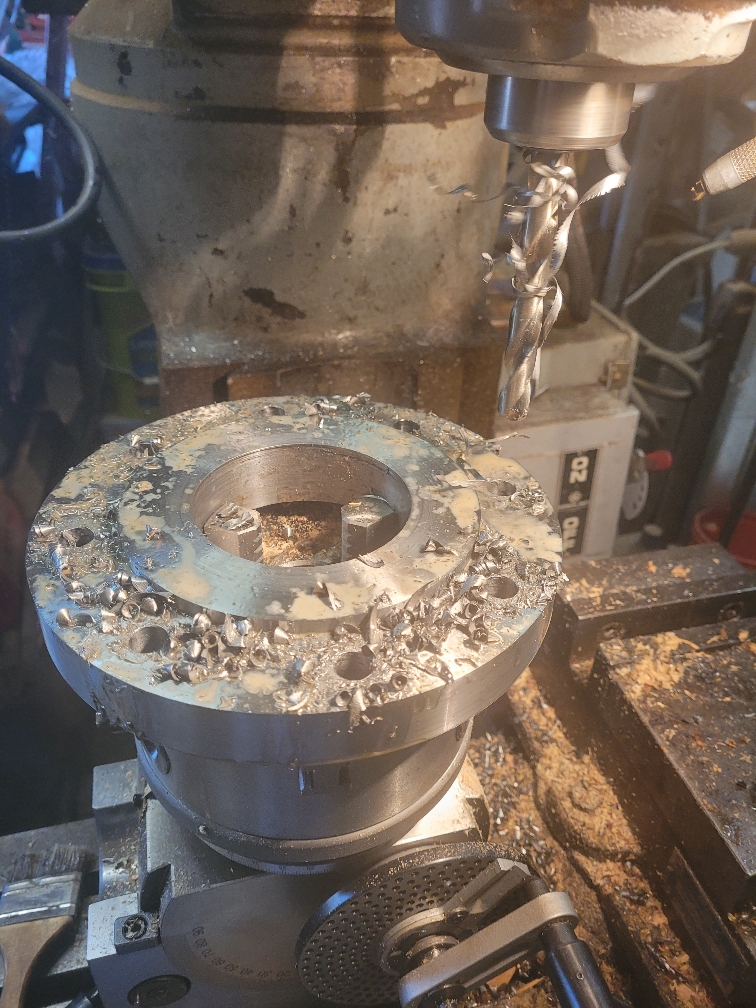
Placed steel disc on table and used a 1/8 bit in collet only 3/8 long as spotter then worked up to 3/4 inch for the bolts, used a 3/4 end mill as final cleanup as the drill vs the rotary table with chuck on top was moving a bit.

The end mill insured holes were straight and on correct spot as it cuts on end so corrects and drill bit errors, did not cut much but it cut some.

Test fit is interesting, it will not go on the hub with the bolts in place but the bolts will go in if it is on the hub. Alignment is critical, bolts fit with little excess in the holes to unless perfectly level it does not align.

The last step was to drill a 1/4 inch hole from edge into center then drill about 3/4 of that to tap 5/16.

This will allow a 1/4 inch rod to be used to secure the tube with a 5/16 setscrew applying pressure.

The tube will be inserted in the disk 1.125 deep with a minimum clearance so no wobble there.

Will use some screw clamps with wax paper to create a mold for the hole along the edge.

Will fill with bondo then paint.
45bde1de344dcba6b24ebbe0ba3981dd.jpg
68d85a4c90fbf41031c469a45d47048e.jpg
e878105b1f152fbe0b8476f34c4a3e4a.jpg
8e3c842e1aa0ef5ec2da32b6889dea0c.jpg
3ffc073b5e963e2bace4b04d031582ce.jpg
e9c393d516bdb49fe427c6d02635158d.jpg
61b35716caabe1eab63252864b3aa099.jpg
1f2bd73015718ea5f136695f5be3256c.jpg
4a6f1de181770496a72bcc6dcd1071bb.jpg


Sent from my SM-G781V using Tapatalk
 
I shoveled the new fallen snow today. There was only an inch so I didn't want to bother with the tractor. Our driveway is more than 5400 sq. ft so I figure that I moved 450 cu. ft. of snow. That's almost 17 yards of snow. A solid dump truck's worth.
 
You be the "Snowinator" my friend. I should be back home in snow country in ten days time. I'm guessing I'll have 2'or so on the ground. Think I will call my young friend down the road, and have him plow me out down to the bridge where the gate is locked, and go up to the shop and plug in the block heater on the backhoe for me a day or two before I get back. Gonna go for my beach walk now. Not too many warm days left, but I'll be back in the shop, which I'm really looking forward to, and spring will be here before we know it. Cheers, Mike
 
Back
Top