POTD- PROJECT OF THE DAY: What Did You Make In Your Shop Today?

While messing aroung getting the Jet VBS-900 bandsaw operational, I’ve been trying to figure out the rat’s nest of wiring to the welder/grinder. Today I gave up. It’s just too simple a system to have that mess, even if it did work.

So I pulled the guts out, here’s what it looks like. I will test and clean up the welder, likely need to replace the grinder.
But this now lower priority that sawing stuff up.

Somebody said “it’s a good thing the wiring is color coded. :)

View attachment 399183
That’s a mess. I’m sure one of our electrical guys could explain what and why but to me, that’s just a rat’s nest.
 
There have been a couple of threads here recently about fly cutters, and as one has been on my todo list for a while, I thought it was time. Quin at Blondihacks made a video where she attempted to make a "balanced" version, and that seemed like it wouldn't hurt. I realize it's probably unnecessary, as unbalanced fly cutters have been in use for ages, but it was a fun project. I made a model in FreeCAD, and used the FCinfo macro to help find the center of mass, and just made tweaks to get it near (within 0.1mm) the XY origin when the toolbit is centered in the flycutter. The body is a simple cylinder, only the slot for the bit is angled. The top is bored and threaded 1_1/2-18 to match the R8 arbor that came with the boring head I got with the mill.

I made a second flycutter to hold a CC*T tool that uses the obtuse angle on the insert. While the Tormach SuprFly I've seen mentioned here is tempting, I'm trying to avoid spending loads of money on different inserts, so getting more use out of the obtuse angle on these inserts seemed worth trying.

They both work great and produce the great surface finish flycutters are known for.

-Pete
View attachment 399221View attachment 399222
What flavor of metal did you use on this?
 
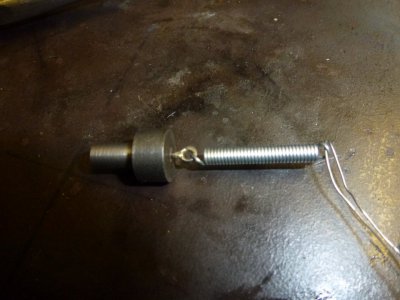
My POTD for the day was to make an edge finder. I had a little piece of half inch cold roll material so started with that and machining the end of it down to 0.250 inch. Then I cut off the end piece that will serve as the part that wiggles. After a little drilling and machining on the body part, it was ready for assembly. P1030502.JPG
The cutoff tool was set a little low so there would be a nub remaining so I could silver solder on a tiny ring to hold the spring.

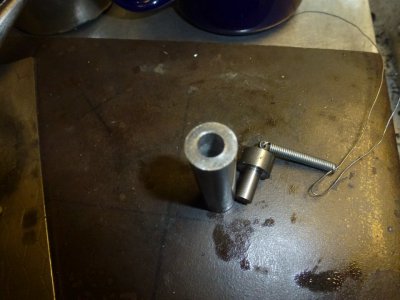
P1030503.JPG
The spring was about .15 inch diameter so drilled a .25 inch hole most of the way up the tube. That way the tool had some room
to oscillate some.

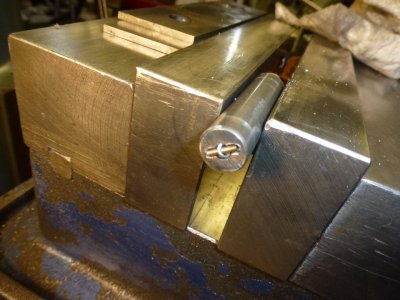
P1030504.JPG
A tiny end mill was used to mill out a pocket for the pin that holds the spring.

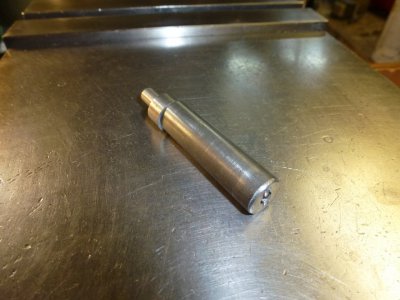
P1030505.JPG
Here it is completed and ready for a project. It took about an hour and well worth my time.
 
Last edited:
Is that all there is to those, just a spring inside like that? I obviously don’t use or own one let alone have never seen the guts before, but always find it intriguing that they can kick off to side like they do with just a slight touch to the surface. Sensitivity, I assume, is dictated by how smooth of an interface between the two sliding surfaces?
 
You call this a wiggler, but it looks exactly like my edge finder.
 
Is that all there is to those, just a spring inside like that? I obviously don’t use or own one let alone have never seen the guts before, but always find it intriguing that they can kick off to side like they do with just a slight touch to the surface. Sensitivity, I assume, is dictated by how smooth of an interface between the two sliding surfaces?

Yes, I did polish the surfaces with a diamond hone.
 
What flavor of metal did you use on this?
Good question...the short answer is I don't know. 2.5" CR steel of some sort. It machined pretty nicely, so maybe 12L14? I did use the CCGT inserts meant for aluminum for the turning operations, which seems to help produce a nice finish.

-Pete
 
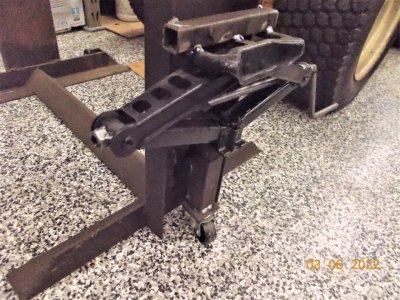
Brainstormed in the shop yesterday with my son and came up with an idea to make my homemade press more portable, as in easily moved.
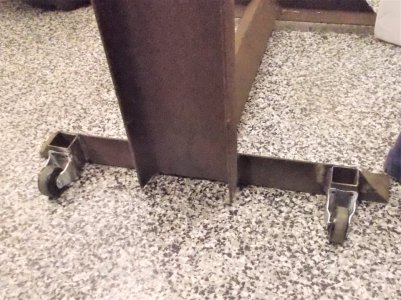
Using a modified auto scissors jack and a couple hardware store wheels.
two affixed to one end and a swivel wheel on the other.

I've wanted to be able to easily be able to roll it into the shop part of my building w/o messing up my floor. It had been sitting out there the 3 years since we did the floor and was a PITA to use in that cold and poorly lit area.
Seems to do the trick.

The acme thread nut was broken on the jack so we threaded a piece of .050 to13 TPI for a shot distance and used a regular nut instead.
 

Attachments

  • DSCN9172 (2).JPG
    DSCN9172 (2).JPG
    203.9 KB · Views: 60
  • DSCN9173 (2).JPG
    DSCN9173 (2).JPG
    183.9 KB · Views: 48
Back
Top