2020 POTD Thread Archive

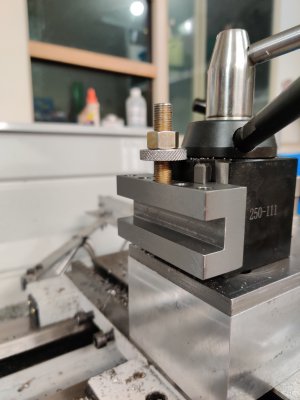
Nice idea to have the thrust bearing on the QCTP

EDIT: Noticed it about $7 on eBay for a needle thrust bearing like that with 2 washers!

yeah, they’re not expensive, and it makes tightening the post & getting more clamping pressure easier.

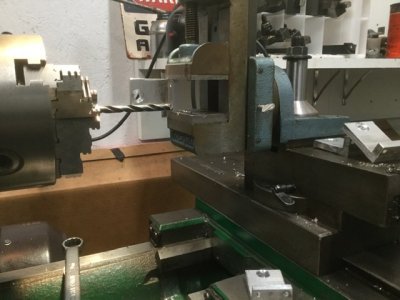
That's a fantastic looking restoration! I've never seen that nice a vise on a swivel (power) arm before. Panavise is nowhere near as good.

Thanks! Its only been sat on my workbench waiting to be mounted for 2 YEARS! :oops::D
 
Last edited:
Finished this project late last night, after building my boring head shank. It was a busy but satisfying day in the shop.
It's a tailstock die holder. Been meaning to build one for awhile but kept putting it off.
It's made from 6061 aluminum and had 1" and 5/8" cut off sockets pressed in to fit my hex dies. Both sockets where a 0.0025" - 0.003" press fit and it took nearly everything I had to get them seated with my 3 ton arbor press so I don't think they are going to slip.
The knurls are approx. 1.8" in diameter. I find it's comfortable to hold and I can get a very tight grip on it with my hand. If it turns out that I cannot hold it very well while threading, I will drill and tap a handle for it.
I will also add some thumb screws to hold the die in place if it turns out to be an issue but I don't think it will be a problem.
Pictures are pretty self explanatory as to how it works. The die holder is a tight fit on the chucked rod but spins very freely on it.
BLFVL9b.jpg

1uYM9E2.jpg

Ly6X1DI.jpg

hK7LLEg.jpg
 
Last edited:
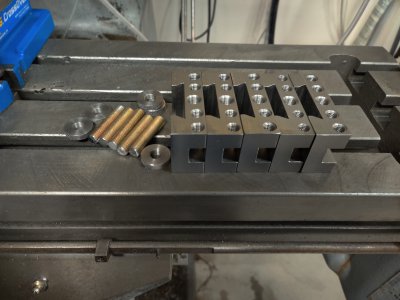
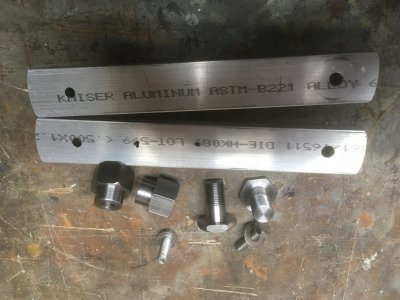
Continuing with my AXA tool holders... All the holes drilled and tapped. Deburred.. Studs cut from all thread, adjuster nuts made from SS303 on the lathe. Knurling that was tougher than the 12L14, but it went well overall.

I got the M8 tap to match the set screws on the existing holders, but decided to use 3/8-24 for the adjusters as I had everything on hand.

IMG_20200406_235739.jpg

Action shot on the lathe. Now I need to wait for the bluing stuff. Amazon sent it from KY to CA. I'm in UT. Not sure what they are drinking over there, but I might want some!

IMG_20200406_235823.jpg
 
Cabin Fever continues with more parts being made for that telescope I have been modifying over the winter.
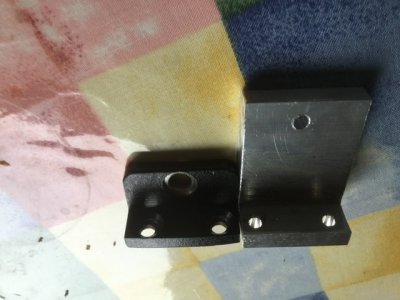
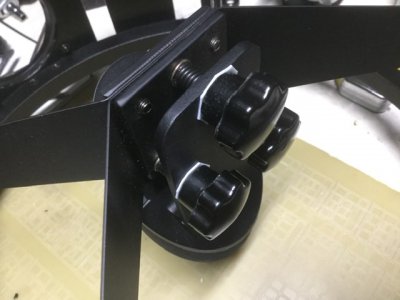
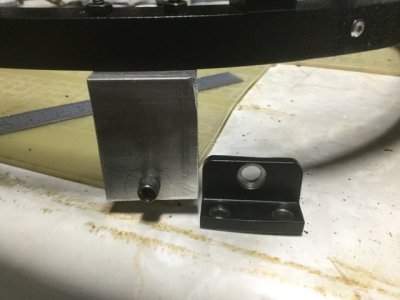
Today has been making new upper assembly tube mounts. The new mirror cell is taller, also better!, so made 4 new brackets.
Again using my milling attachment to locate the brackets and drilled all the same holes in the correct spots etc. Pressed out the barrel nuts from the old brackets and pressed into the new ones. Everything went well. Just need to paint the raw aluminum.
Also added Teflon washers to the secondary mirror bolts as the friction was horrible!
Pierre

C9CA5415-C5DB-47AA-93FD-DAE1A0A8B2A2.jpeg7462F76B-DA90-46FF-9BA5-4D199C8AB0B5.jpeg65C5BAFC-F57D-48FD-8EDA-A4BA326B73EB.jpeg56302A86-0A60-4E37-A32C-1160327C32BF.jpeg
 
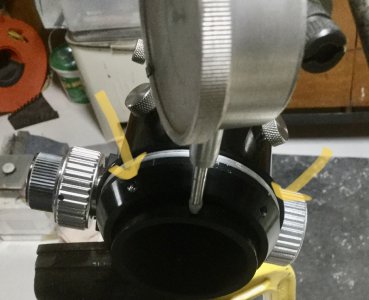
Had a lots of play in the focuser of the ES 12” so took it out to investigate.

I found there are 2 set screws that push against the tube glides. See arrows in photo. I got out my indicator and had over 0.010” movement. By tightening those two screws, I reduced the play to near zero. Earlier I had added some collimation screws to the focuser base as well.
Pierre
5DF9F353-F271-4A22-8EAB-83B4A4EEE6F6.jpeg
 
Finished A Project For My Wife

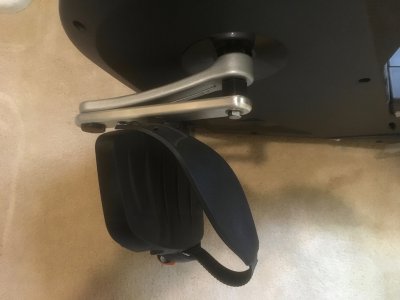
My wife had knee replacement surgery and needs to use a stationary bike as part of her rehab. We have one, but the length
of the arms on the crank were too long for her to do a full revolution with the pedals. (The PT place had adjustable pedals on
their bikes.) So, I worked up a bolt on arrangement that gives her a couple of shorter pedal lengths to work with.

IMG_0985.jpg

IMG_0994.jpeg

The first thing I learned is that bike pedals use a thread ( 9/16-20 ) in both left and right hand threads, so I had to order two taps and
two dies for those, as well as some drills I didn't have and a metric tap. I replaced the nuts that held the cranks on the axle with a
larger nut/spacer and made up some bolts for the holes where the pedals went originally. It all looks like a bit of a lash up, which I
guess it is but it's solid and my wife is happy. Steel parts are 12L14 which I blued and oil finished; "arms" are 6061-T6.
 
Just finished getting the rear bearing replaced on the countershaft/ clutch-brake assembly. I noticed a metallic jingling noise when using the lathe. It’s a Clausing 5903 with the Vari-Drive. Anyway, it turns out that one of the 2 snap rings which ikeep the rear bearing in place had popped out. Spent about an hour trying to put it back in....but just gave up and decided to change the bearing and then reinstall the clips.
So....tapped out the old...tapped new in place. Couldn’t get it that last 1/4”.... but was able to remove the grease fitting which was a 3/8”-24 thread fitting and screw a stud in there. Only got a few turns....but it was enough to push the bearing in place.
Had to make a little aluminum spacer to evenly push the bearing...but was a hell of a lot easier than removing that countershaft assembly.

3D626409-8EEB-4D86-B703-DD8F25304551.jpeg
 
Last edited:
@Nogoingback,
Your pedal fix looks great.
You might consider counterboring the arms to sink the hex head cap screws on the main shaft.
Alternatively, countersink and use flat head screws.
Protruding, as they are, there's a chance of snagging an ankle or a shoe. :bang head:
The factory arms are bowed out to provide such clearance.
 
Thanks for the suggestion about countersinking. When my wife first used it I watched with the possibility
of interference in mind. It looks as though the clearance is sufficent though I'll look in my spares and see what other fasteners I have. With the Virus, I'm not just popping into the hardware store like I normally would.
 
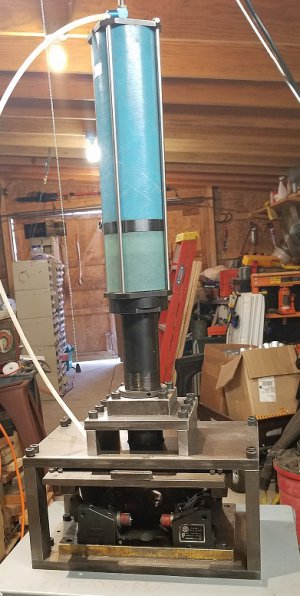
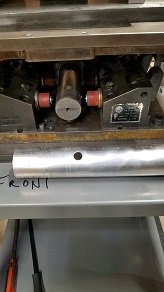
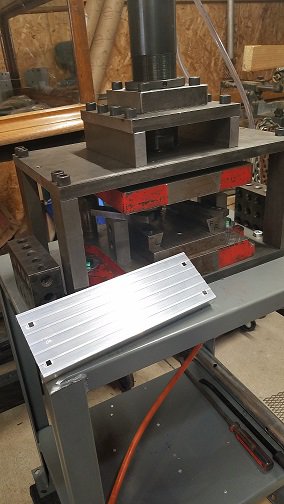
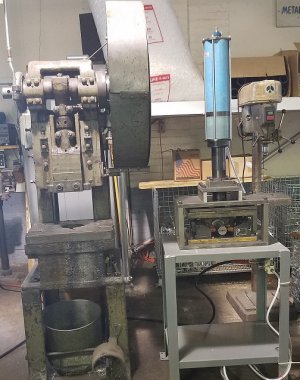
This has not been a Project of he Day but an ongoing project that keeps expanding.
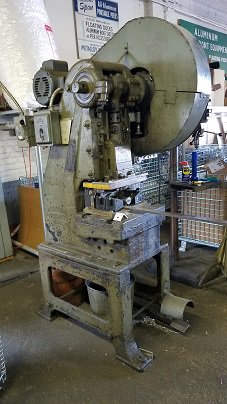
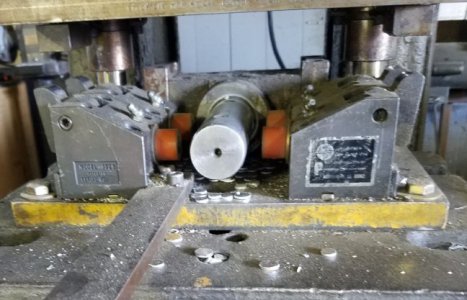
The job was to replace an old punch press with clutch problems with something more efficient.
I chose a Multicyl Co. air over hydraulic cylinder to do the job and we were successful.
Pict 7 is another die they added the day before the fixture was to be shipped!
 

Attachments

  • pict1.jpg
    pict1.jpg
    75.7 KB · Views: 35
  • pict2.jpg
    pict2.jpg
    102.4 KB · Views: 36
  • pict3.jpg
    pict3.jpg
    164.4 KB · Views: 35
  • pict4.jpg
    pict4.jpg
    275.5 KB · Views: 34
  • pict5.jpg
    pict5.jpg
    19.3 KB · Views: 34
  • pict7.jpg
    pict7.jpg
    87.6 KB · Views: 35
  • pict8.jpg
    pict8.jpg
    178.9 KB · Views: 36
Back
Top