Pretty sure I need a mill part III

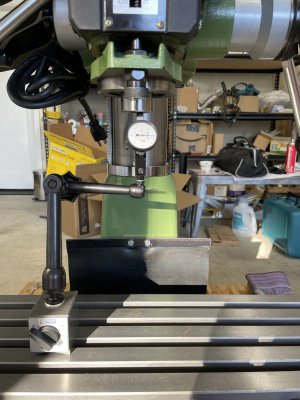
The table end to end was perplexing
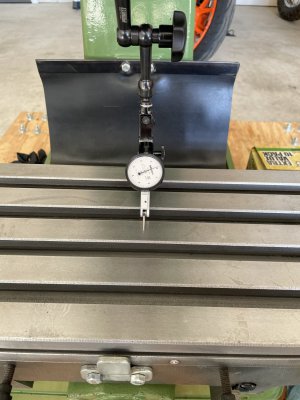
center of the table
405C64FB-3B7E-43C2-88FF-9AAFB92E2055.jpeg

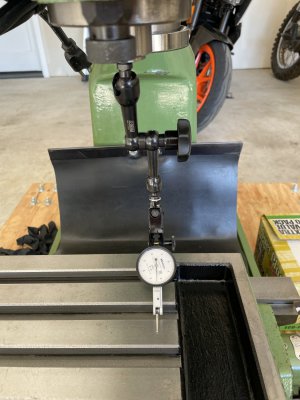
Right side
517535FF-E7F3-4FF3-8596-A8A15AFA6960.jpeg
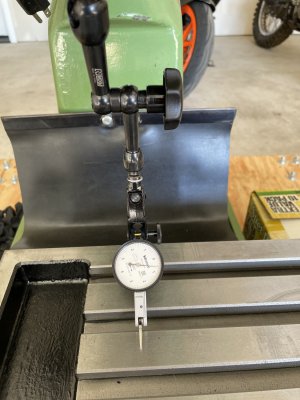
Left side
E8323D9F-EFF9-4A00-91B0-2E203A2E3A62.jpeg
Snugged down the gibbs and got the right side down to .0018 at the far end
Took measurements on the and back of the table with the same results
Did a saddle in the front and in the middle, no change
Thoughts?
Thanks Steve
 
Either the table wasn't ground perfectly flat or the factory didn't machine the dovetails with enough precision- not unusual for this class of machine
You could scrape it in closer but it takes some work
-M
The factory saves time and money by machining the raw castings without aging or aging for too short a time. Warpage can occur after machining.
 
Last edited:
You might get some advice on what to do. I don't know how to fix that. But before you take it to the scrapyard, will the parts you plan to make be affected by a draft of less than 1 thou per foot? Would being aware of the curve in the table help you to place parts and machine them in a way that you minimize functional impact to your creations? If you know the answers, then I think you'll be okay!
 
Thoughts?
Thanks Steve
Not bad for what it is. This is the sort of inspection from which no good can come. Practically speaking there's nothing to be done for it. It's not so bad that it warrants returning (assuming you bought it new) and the likelihood of a replacement being any better is nil. If you intend to do the kind of work where this is a problem you bought the wrong machine.
 
Either the table wasn't ground perfectly flat or the factory didn't machine the dovetails with enough precision- not unusual for this class of machine
You could scrape it in closer but it takes some work
-M
Was really hoping that the slope was due to my lack of knowledge and some type of setup error. Just fooling myself though as I did several variations on the measurements. On the good side the readings were consistent.
Trying to understand the dynamic behind the incline has my head hurting. Easy to grasp the table not being ground flat but more difficult to account for the ways.
Thanks for the input
 
You might get some advice on what to do. I don't know how to fix that. But before you take it to the scrapyard, will the parts you plan to make be affected by a draft of less than 1 thou per foot? Would being aware of the curve in the table help you to place parts and machine them in a way that you minimize functional impact to your creations? If you know the answers, then I think you'll be okay!
I honestly can't answer my accuracy requirements or know what I will be working on so right now have no issues with the outcome other than being a little disappointed with the results :) Whatever my first project is it will be simple. small and I'll be happy if I can get .001 accuracy
Could always limit my work to the left side of the table, the slope starts about 2" right of the centerline moving right. Left side is 2 tenths until the last inch of travel.
 
If you think your head hurts now, wait until you see what happen when tools and fixtures deflect ever so slightly.

If you examine anything under enough of a lens, flat surfaces appear like potato chips, and polished work looks like the cratered face of the dark side of the moon. Without oil, ground ways sliding past each other appear like the Alps being inverted and dragging back and forth over the Pyrenees. It's all relative, so don't trip up over a number until the decimal point creeps far enough to the right to fuss over. Of course, it's fun to measure and examine, it's part of learning. Perspective has to be learned individually, though. My perspective is that you'll forget all about the bow in the table once you start milling away metal.

Edit: .001 accuracy takes a great amount of work to attain in manual machining. Unless it has a fit requirement with another part, I'm content with .005 most of the time. Only critical fits require more, for the most part. Check out some manufacturing tolerances called out on blueprints and things around the web, most production work is held loose so the part is more feasible to produce.
 
Not bad for what it is. This is the sort of inspection from which no good can come. Practically speaking there's nothing to be done for it. It's not so bad that it warrants returning (assuming you bought it new) and the likelihood of a replacement being any better is nil. If you intend to do the kind of work where this is a problem you bought the wrong machine.
Almost spit my coffee up on this line "This is the sort of inspection from which no good can come." :)
Had the same thought as I was setting things up. The spindle runout came out so nice may as well check the table:eek:
No returning this one, it had been sitting unused for the last 24 years in a dusty shed until I came along.
Thinking I can work within the boundaries, as a learning tool it will be fine.
 
Back
Top