Quill indicator mount for Noga

petertha

H-M Supporter - Gold Member
H-M Supporter Gold Member
Joined
Jan 15, 2016
Messages
994
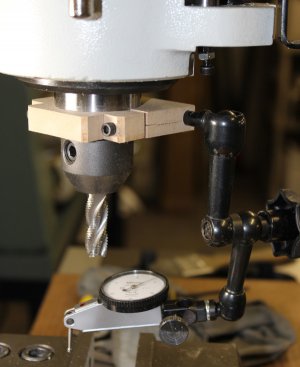
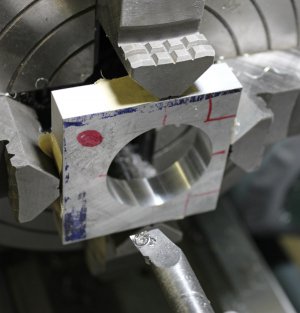
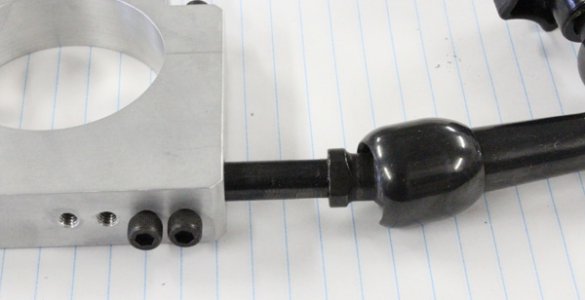
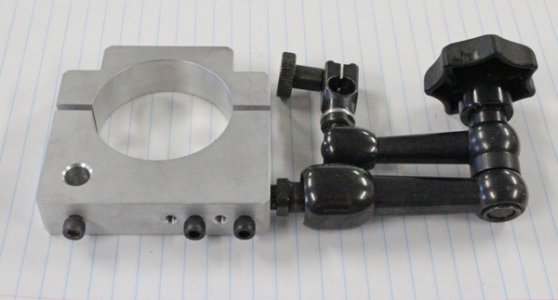
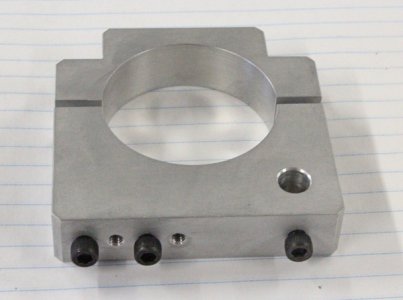
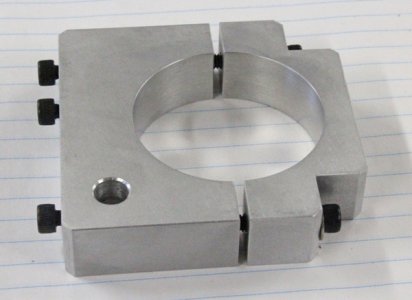
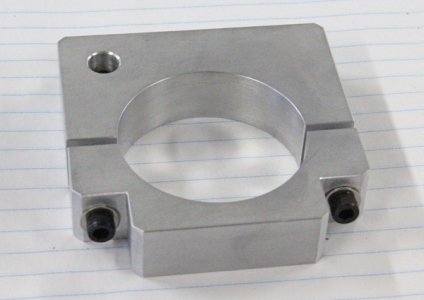
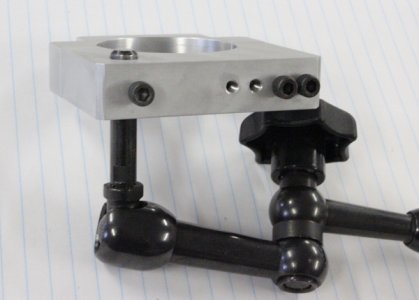
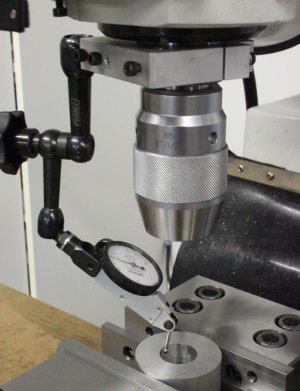
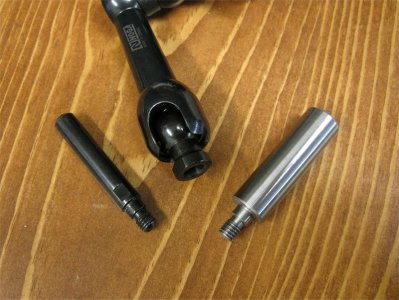
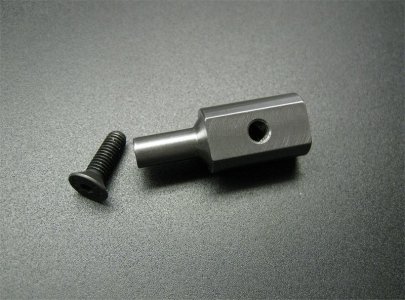
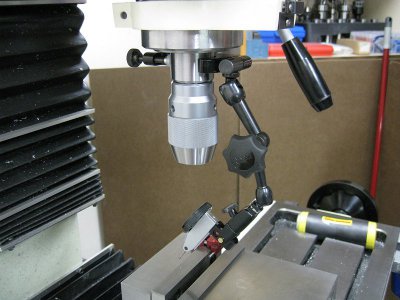
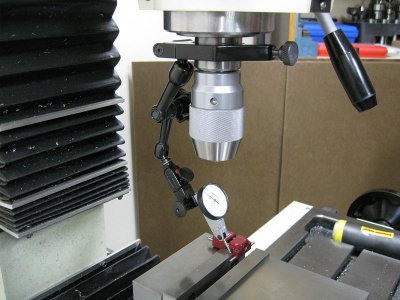
I've wanted a relatively compact & secure, on/off dial test indicator mount for my mill that utilizes my Noga mini arm. These systems are useful to attach to the quill whether there was a tool mounted or not. That means the mount either has to me a split design like what I did, or a single piece clamp on style. My preference was the clamp style but seems like the decent ones are spendy. Replicating the commercial style clamp is a bit of a cutout procedure to make the appropriate shape with contact bumps, recesses & clamp screw etc. Not insurmountable but I figured I'd start with my donut design. For one thing, it doesn't have to fit other quills, just mine. The ID has a lot of contact area so I figure it should clamp very securely.

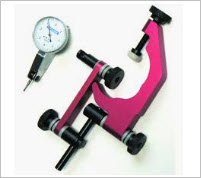
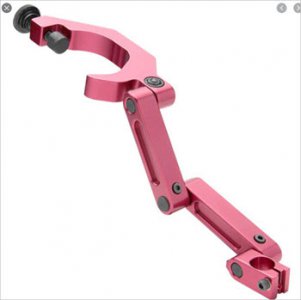
What I don't really care for on the commercial ones is the link arms are progressively locked knurled nuts or tightening individual cap screws with a hex wrench. Whereas the the Noga arm is very quick. Get the DTI into position & tighten just one knob. Here's what some commercial ones look like
 

Attachments

  • SNAG-5-8-2020 0000.jpg
    SNAG-5-8-2020 0000.jpg
    9.6 KB · Views: 31
  • 2020-05-08_9-06-41.jpg
    2020-05-08_9-06-41.jpg
    15.6 KB · Views: 44
Last edited:
The downside is the Noga stem end is 8mm so you normally either have to grip it in a R8 collet or drill chuck. My initial plan was to unscrew the shank from the ball & have the ball thread onto the plate. But they apparently used Kryponite Loctite, no getting that thing off. I also had a cheapo Chinese arm that I removed from its mag base. It did have a threaded ball end, it was a bit lighter & nicely anodized red. But it just didn't clamp very positive, the steel dovetail was kind of ratty to the point I was worried about buggering up the DTI dovevtail eventually. So Noga won out & I figured out a way. Here is the arm, woody prototype and only one machining pic taken.
 

Attachments

  • IMG_2834_edited-1.jpg
    IMG_2834_edited-1.jpg
    132.9 KB · Views: 38
  • IMG_2835_edited-1.jpg
    IMG_2835_edited-1.jpg
    119.9 KB · Views: 40
  • IMG_2848_edited-1.jpg
    IMG_2848_edited-1.jpg
    127.9 KB · Views: 34
  • IMG_2849_edited-1.jpg
    IMG_2849_edited-1.jpg
    60.4 KB · Views: 33
Hopefully pics make sense. I can mount it with stem horizontally short or extended a bit. I can mount it with stem vertical (kind of... before it hits the mill end cap). Fasteners are all 8-32 cap screws which is a bi Neanderthal but I'm a 1-hex key kinda guy.
 

Attachments

  • IMG_2851_edited-1.jpg
    IMG_2851_edited-1.jpg
    66.2 KB · Views: 27
  • IMG_2850_edited-1.jpg
    IMG_2850_edited-1.jpg
    78.4 KB · Views: 26
  • IMG_2847_edited-1.jpg
    IMG_2847_edited-1.jpg
    94 KB · Views: 26
  • IMG_2846_edited-1.jpg
    IMG_2846_edited-1.jpg
    97 KB · Views: 24
  • IMG_2845_edited-1.jpg
    IMG_2845_edited-1.jpg
    91.5 KB · Views: 24
  • IMG_2852_edited-1.jpg
    IMG_2852_edited-1.jpg
    85.4 KB · Views: 30
Mock up installation applications. Its compact enough I can do small centered holes or extended to somewhat larger diameters or maybe tramming for that matter.
 

Attachments

  • IMG_2859_edited-1.jpg
    IMG_2859_edited-1.jpg
    148.5 KB · Views: 32
  • IMG_2860_edited-1.jpg
    IMG_2860_edited-1.jpg
    153.7 KB · Views: 31
  • IMG_2861_edited-1.jpg
    IMG_2861_edited-1.jpg
    110.6 KB · Views: 33
  • IMG_2862_edited-1.jpg
    IMG_2862_edited-1.jpg
    174.6 KB · Views: 37
So far so good. Its very solid. Putting the split clamp on & off isn't too bad, takes me a about 10 seconds. I might still make a single piece mounting plate one day for the Noga that could be an improvement on the generics, but its on the rainy day to-do list.
 
My initial plan was to unscrew the shank from the ball & have the ball thread onto the plate. But they apparently used Kryponite Loctite, no getting that thing off.

Nice job. The shank does come off if you use heat, I used a small butane torch. I too got tired of using an 8mm collet so I made a 1/2" shank out of O1 since my edge finders are 1/2".
 

Attachments

  • Img_1266.jpg
    Img_1266.jpg
    110.8 KB · Views: 32
  • 20200513_161050.jpg
    20200513_161050.jpg
    4.5 MB · Views: 35
That's good to know about the heat. I figured that might be the case but I didn't want to cook the coating just in case. I guess I'll live with my gizmo now.

How do you find the weight of the Noga in conjunction with the C-clamp style? Does the clamp stay put nice & stable? I've heard some people say their clamp is a bit vague, but I wonder if its maybe a case of copy clone effect. Like maybe the 2 contact bumps have a tiny kerf angle when they were profile cut or the nylon button slips around a bit tightening. I'm pretty sure anything like this could easily be tuned up but I didn't feel like dropping the dough, throwing away the entire arm assembly away & then wondering if the clamp was salvageable if I couldn't feel it in my hands. Yours looks exactly like I was visualizing in my head.
 
Mine clamps on fine & tight. I don't use it much anymore cause I have a gear head mill, the spindle doesn't turn very freely like a BP, always connected to the gear train/motor. With that said it still stays put very well even with this additional force & I grab it by the locking knob to rotate. That & I just use a Blake co-ax now but it does still has it's advantages so I keep it around.

Mine is a $10 Indicol knock off. I had originally bought a real Indicol (new red & blue model) but returned it. I didn't like the way it performed, not the clamp, the arm. Although my clone is not as nicely made as the real Indicol clamp it clamps onto the spindle just as well.

IIRC I got the idea from Tom Lipton. I think he just tapped & hole on the Indicol clamp & screwed the Noga directly to it. I went through the trouble of making an adapter to mount my Noga. Figured it would've gave me more adjustability if needed although I've never needed to readjust the adapter yet. But at least it looks nicer. Here's a pic of my adapter to give you ideas in case you decide to try that route.
 

Attachments

  • Img_9069.jpg
    Img_9069.jpg
    136.5 KB · Views: 29
  • Img_9095.jpg
    Img_9095.jpg
    89.4 KB · Views: 29
  • Img_9089.jpg
    Img_9089.jpg
    92.9 KB · Views: 28
Back
Top