Restoring (hopefully) my new Smart and Brown SAB

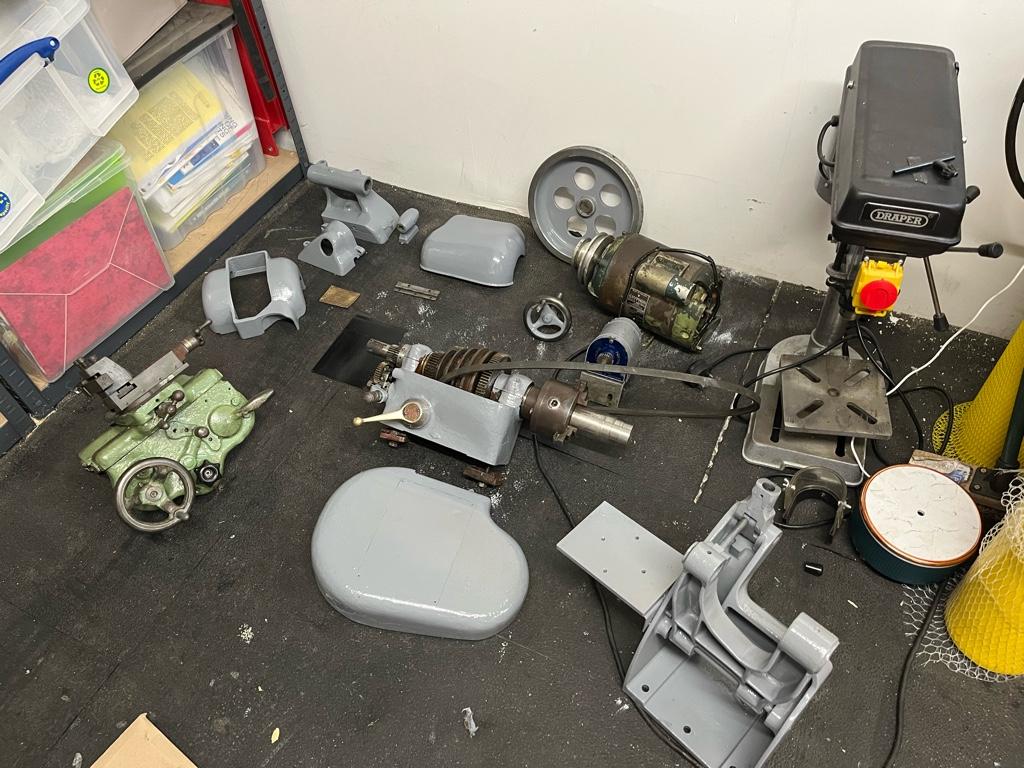
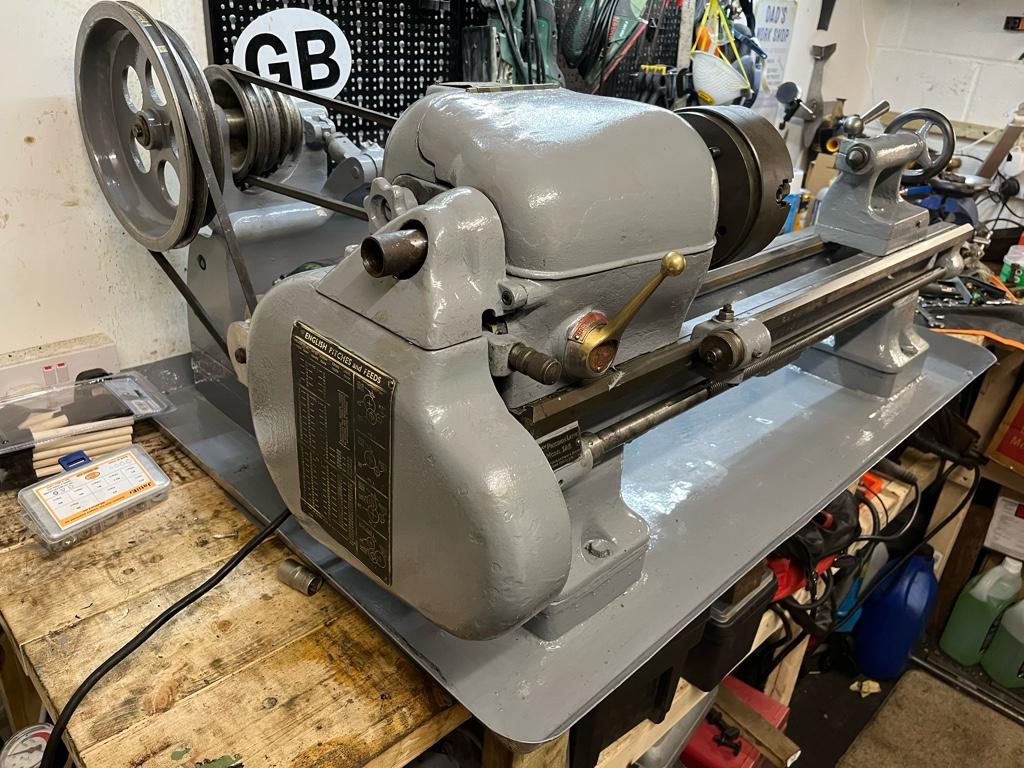
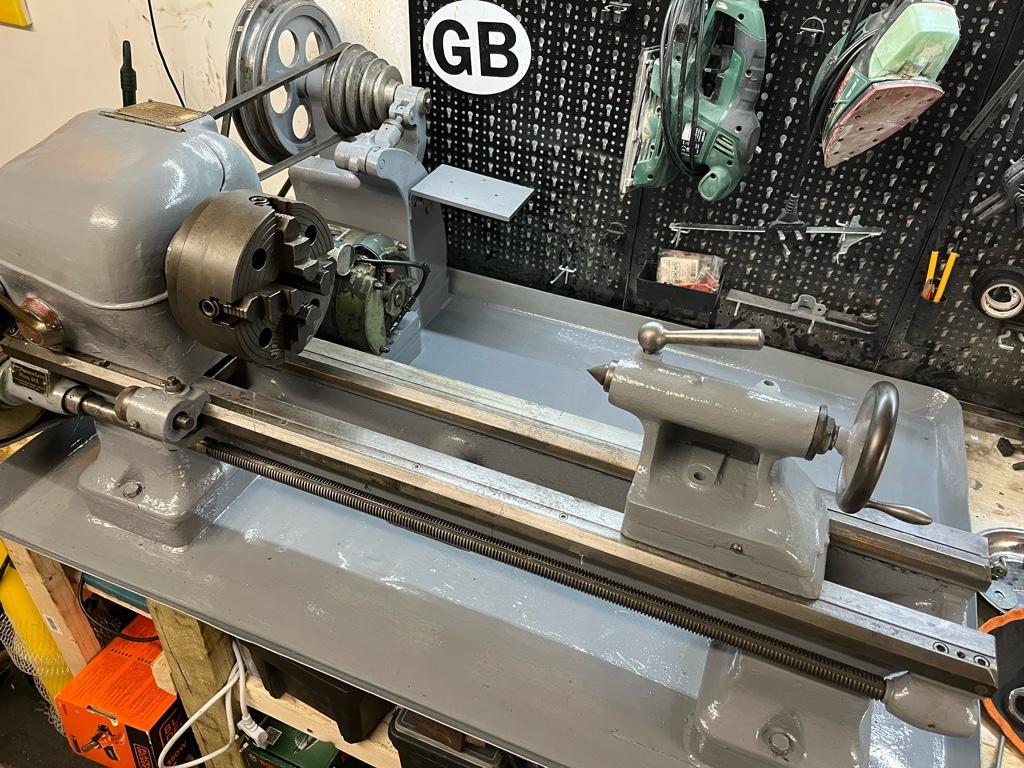
I decided to get the lathe back together albeit not completely painted. Getting it back together and up and running (with a quick bodge to get it kind of fixed to the bench so I could run it up) gave me a bit of a boost in motivation as I could see the end goal. I think when it was completely disassembled all over my workshop it felt too far away from being usable. I think getting it up and running and then taking pieces off one at a time to get painted and finished will be easier for me as I’ll always know that I’m only an hour or so away from being able to use it again.


75284d270136b6ef2ced808de8d2c5bc.jpg


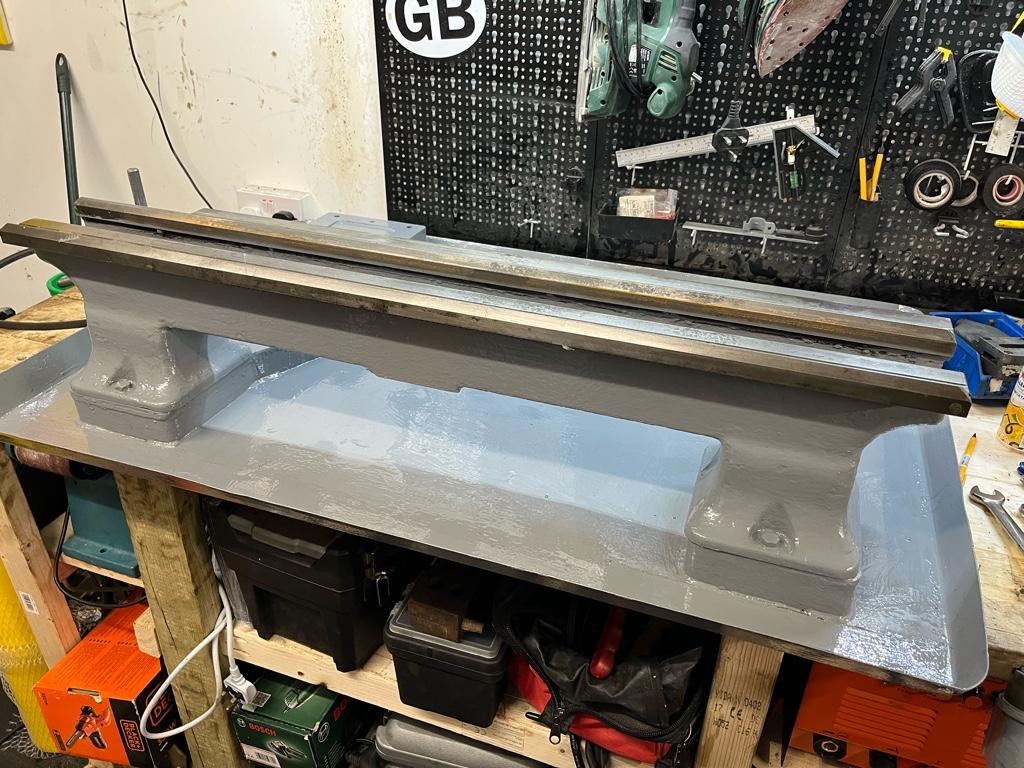
The next job is to get the tray/mount sorted. The lathe was on a cabinet when I bought it, but I didn’t have space for the cabinet and it was in such bad condition that it wouldn’t have been easy to get it back to usable condition. The seller plasma cut the top off and left the first 20cm or so of the base. I need to cut these off to get it flat so it can go on my bench

c3e9d7d7980a37d07c649524763b2bf8.jpg


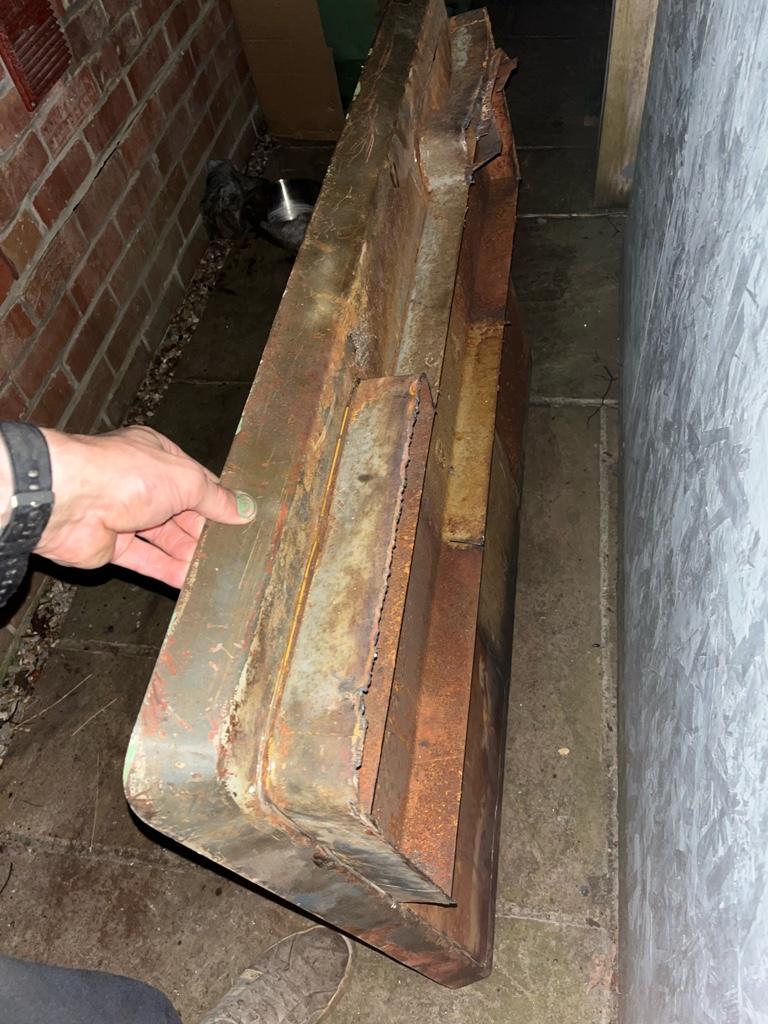
I’ve taken an angle drinker around it all and none of the edges are now attached. The issue seems to be that the base/legs are attached to a plate that runs flat against the tray (does that make sense?) and getting that off has stumped me

40f29bb10a328820808ecd306d560c66.jpg


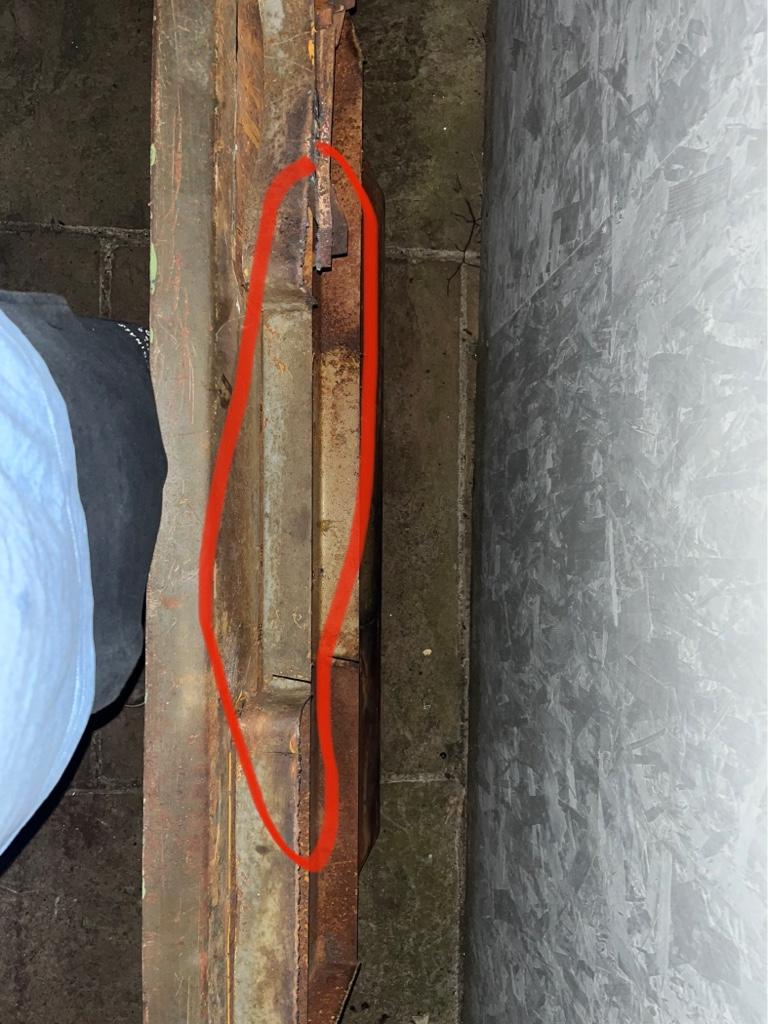
So I’ve got to get the two flat plates that seem to be welded together apart.

I don’t think I’ve explained that very well…. I’ll try again in the morning :)


Sent from my iPhone using Tapatalk
 
Very nice. My 1024 is a very heavy build except for the apron and tailstock which more delicate. While your lathe is smaller, the apron looks to be proportionately heavier in design. My experience ( not a scientific sample ) is that although S and B hardened their ways, they seem softer than some ( Monarch and Holbrook come to mind ). How do yours appear? Dave

Sorry, I missed this. How do I tell if the ways are hardened?


Sent from my iPhone using Tapatalk
 
If you can feel any ridge or hollow with your finger or fingernail, you have some wear. There may be some that you can't feel. You can put a dial on the way or flat and set the stand on the carriage and see how much the dial moves as you traverse the length of the bed. The last 6" of a bed will read fairly close to the first inch or two with a hollow in between. Dave
 
There’s been a colour change! I wasn’t really liking the green on this lathe. I think this green is used on quite a few lathes and I think it looks good on them (my Warco was this colour), I just didn’t like it on this lathe. I’ve seen a bunch of lathe restorations on machines of this age that go grey, and look great. So I made the change. I also wasn’t happy with the quality of job I did when painting the green, so I took more time to sand and prep before doing the grey. I wasn’t brave enough to take the headstock fully apart, so I’m not too happy with the paint on there, but I’ll see how it turns out when dry. I didn’t paint the motor as I think I’ll change that soon to 3 phase and VFD. Last piece I need to do is the apron/saddle. I also took the data plates off this time rather than mask them up, and the job is much better. I also spray painted black the data plate for feeds/speeds and then sand off the raised numbers when dry.

It took me a while to decide to essentially start again as it felt like the first paint job would have been a waste of time, but I’m really glad I did as I much prefer this colour and the quality vs the green. I just need to try and be patient enough to let this dry properly and not rush in to trying to get it back together wet. It’s in a heated workshop and I’ve turned the temp up a bit, so hopefully 24 hours will be enough (rust oleum website says this is the time takes for 100% dry, but I’ve read people saying it takes longer)

61accef82b0fa6ea7b660e48f8983bd2.jpg

18e860127e1c2a159be1f613bb4b3df6.jpg


Sent from my iPhone using Tapatalk
 
Most parts are still drying, but I managed to get the tail stock back together (with the freshly polished wheel and knob(?)) I’m definitely liking this colour much more than the green :)

6601cd09250233550045a015d9286d51.jpg

544cdb33004e1120de3f0726d5d8ad18.jpg


Sent from my iPhone using Tapatalk
 
That was an excellent decision on the color, though function is my only concern, not appearance. There’s not enough time left in my life to spend it repainting equipment. There never was. :)
 
That was an excellent decision on the color, though function is my only concern, not appearance. There’s not enough time left in my life to spend it repainting equipment. There never was. :)

Thanks Winegrower, I really like it. I stood staring at the parts in their green paint and just knew that if I left them like that I’d be disappointed every time I saw it. I figured while I’m in the swing of tearing the lathe completely down and my workshop is already covered in paint, sand paper and grease from the tear down, I may as well redo the paint and do it properly.


Sent from my iPhone using Tapatalk
 
The colour change is nearly done. Just the apron and saddle left. I’m much much happier with both the colour and quality of the job with this grey paint. It’s still very far from perfect but it’s good enough for me for now

7dbbb72c67e05afec29dda1e7b12ed2a.jpg


ddfe165519400a54290208e75384f7b6.jpg

de880636c805819d02b0a74a7f20d9ed.jpg


Sent from my iPhone using Tapatalk
 
Looks great! :encourage:

I also liked the green color, but it was just that the lathe needed a complete paint job to look uniform.
 
I think the color is great. I'd take off the base bolts one by one and wire wheel them though. Dave
 
Back
Top