-
Welcome back Guest! Did you know you can mentor other members here at H-M? If not, please check out our Relaunch of Hobby Machinist Mentoring Program!
You are using an out of date browser. It may not display this or other websites correctly.
You should upgrade or use an alternative browser.
You should upgrade or use an alternative browser.
setting up a LMS 3990
- Thread starter tghsmith
- Start date
- Joined
- Dec 26, 2016
- Messages
- 2,015
What's next on the upgrades list? a reverse switch could come in handy.
How about a mister?
How about a mister?
- Joined
- Jul 28, 2017
- Messages
- 2,366
The dinky Z axis fine-feed knob on my X2 made hole-boring jobs a real chore so I added a quick-and-dirty handle to mine:

It works well enough that I just left it attached. The crank arm is just a piece of hardware-store aluminum I had lying around. I used a shoulder bolt so the handle is free to turn when I use the crank. In the background you can see the mini lathe I used to turn the handle. I drilled and tapped two holes in the original knob to install the crank. When not in use it hangs down, but I haven't had any issues with it getting in the way.
It works well enough that I just left it attached. The crank arm is just a piece of hardware-store aluminum I had lying around. I used a shoulder bolt so the handle is free to turn when I use the crank. In the background you can see the mini lathe I used to turn the handle. I drilled and tapped two holes in the original knob to install the crank. When not in use it hangs down, but I haven't had any issues with it getting in the way.
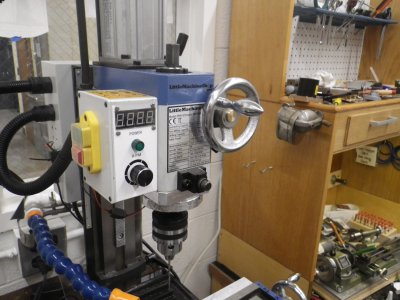
I've been thinking about the Z knob and changing it to a handle like the upgraded X,Y handles,, the only thing that was holding me back was the fit for the dial scale,, but with the DRO I never even look at it ,, may just get a 3" to 4" hand wheel and mount it without the dial....
- Joined
- Feb 17, 2013
- Messages
- 4,406
Homebrewed - I really like your handle idea, and will add something like that to my own HF 44991. I, too, have a DRO, so I very seldom use the dial markings. One thing I've done instead is to put 4 marks on the outside of the knob. Because one turn advances Z by ~.062", moving from one mark to the next lets me do a quick-and-dirty Z advance of about .015" (or multiple thereof) for repeated depth cuts.The dinky Z axis fine-feed knob on my X2 made hole-boring jobs a real chore so I added a quick-and-dirty handle to mine
<snip>
- Joined
- Jul 28, 2017
- Messages
- 2,366
Good idea on the .015" indexing.
While DROs are nice, I've found myself dialing in exact depths while doing rough cuts just because I can. Well, these days my time is "free" anyway
While DROs are nice, I've found myself dialing in exact depths while doing rough cuts just because I can. Well, these days my time is "free" anyway
- Joined
- Feb 17, 2013
- Messages
- 4,406
OOPS! Just noticed that I'd previously posted my "4 lines" idea on this very forum ... post #7, above. Ah, well

I have misters on my bigger (RF-30 clone) mill and on my lathe. The mini is not yet equipped with one ... but I guess I can move one of the others over. I do have a compressed air drop nearby
OK, howzabout this? Reversing switch is under a safety cover. When the cover is snapped down, the switch is "guaranteed" to be in Foreward. Also note the small red "Reset" pushbutton on the front. It's a normally closed momentary button that briefly interrupts the wire going from the switch on the back of the speed pot to the circuit box on the back of the mill. Pushing this button fools the controller into thinking I turned the speed pot all the way down, then back again. This saves a bit of time restarting whenever I've stopped the motor. Also lets me resume the previous speed without hunting.What's next on the upgrades list? a reverse switch could come in handy.
How about a mister?
I have misters on my bigger (RF-30 clone) mill and on my lathe. The mini is not yet equipped with one ... but I guess I can move one of the others over. I do have a compressed air drop nearby
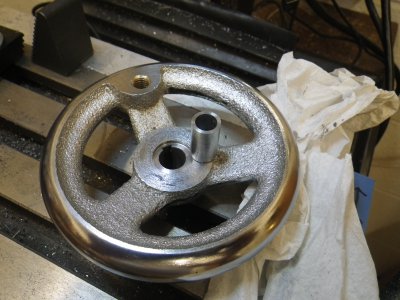
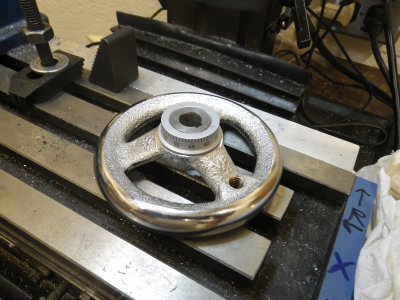
I took a look at the Z knob and found that the dial would fit a X,Y handle,, the boss on the handle is just a little long,, ordered up another handle (still on sale) took it over to a friends big lathe,, turned the boss down to length,, bored the shaft hole to 7/16ths,, and added a recess to the front,, turned out a steel spacer/bushing to match the handle bore and the Z shaft,, pressed in place with a little loctite.. drilled and tapped the set screw,, turned a brass cap to for a final clean look.. feels very nice...