Sherline Tailstock Misaligment

Very good, Karl. If you can cut all the way down a 4" rod and have zero difference in the diameters at any point on that rod then the headstock has to be aligned with the ways. Get used to this procedure because if you ever have to cut a Morse taper, or any taper, then the way you do it is to offset the headstock. Then you have to put it back. Now you know exactly how to do it!
If I buy and use Sherline's compound slide, does that eliminate the need to offset the headstock?

Sherline in its Miniature Lathe and Milling Machine: Assembly and Instruction Guide, eighth edition, states, "... Then stand the lathe on end with the alignment key pointing upward and put a few drops of LocTite(R) on the joint between key and headstock. Capillary action with draw the sealant in, and when it hardens, the key will be locked in place. We prefer this method to 'pinning' the head with 1/8" dowel pins, because it offers you the option to change your mind. The headstock can be removed by prying with a screwdriver blade in the slot between the bottom of the headstock and the lathe bed to break the LocTite(R) loose should you wish to be able to rotate the headstock again." p. 13.
 
If I buy and use Sherline's compound slide, does that eliminate the need to offset the headstock?

The compound works for short tapers but not so well for longer ones. You will also find that it is more accurate to mount a sample taper in an accurate chuck and turn the headstock to the angle of the taper, then remove the sample and insert your work piece. Doing it this way allows you to indicate the sample taper in very accurately and where Morse tapers are concerned, this matters. In addition, turning the headstock is vastly more rigid than using the compound.

I've been turning that headstock for decades now and actually find Sherline's system to be an advantage because you can accurately dial in a taper and then re-align the headstock to dead zero quickly. No other lathe I know of allows such precise headstock alignment with so little fuss.
 
To confirm the horizontal misalignment that I measured using a test bar, I used the method described in Sherline's article "Lathe Alignment and Micro-Drilling". It involves mounting a dial test indicator [DTI] in the headstock (I used a collet), placing the tip inside the Morse #0 taper inside the tailstock spindle, and turning the headstock spindle while reading the total indicated runout [TIR]. I was unable to turn the headstock spindle through 360° because there was insufficient space above the table for the dial to pass. I was, though, able to measure the horizontal TIR by turning through 180° from rear to front.
DSCF5728 tailstock alignment with DTI.jpg
Starting with the dial facing the rear and the needle set a zero, the needle turned one full revolution + 1.1, or 9.1 whole units. The angle of the lever on the DTI was 15°. Adjusting for cosine error, the TIR from back to front was 9.1 x Cosine 15° x 0.001"/1 = 0.0088". Dividing the TIR by two yields the horizontal misalignment: 0.0044".

I measured 0.0032" misalignment using the test bar, but that was across 4.4" of the 6" length. Extrapolating for the 6" length, 0.0032 x 6"/4.2", yields 0.0044".

Thus, the test bar method and the dial test indicator method both gave 0.0044" horizontal misalignment. Both showed that the tailstock is misaligned toward the rear.
 
Last edited:
Karl,
I have had very similar results as you when assessing the tailstock alignment on my Sherline lathe. I found that mine was also misaligned to the rear, like yours. I have modified my tailstock with the addition of a brass locking screw on the backside of the tailstock. It somewhat compensates for the misalignment by forcing the slack of the tailstock towards the front, instead of the back as the OEM locking screw does. I've posted a picture of it in another thread I think.
 
Forty Niner,

I saw your post. It's in the thread "Offset key for Sherline Lathe Headstock - need one made". It's a creative idea. You wrote, "I started the test before the modifications and had 0.0035" taper over 4.5" on a piece of 5/8" round. Using the two locking screws in concert I reduced the taper to 0.0002."

By "0.0035" taper", do you mean that the diameter of the rod was 0.0035" greater at the right end? If yes, then I think that would be within Sherline's tolerance, assuming you don't have much vertical misalignment. Sherline states, "If your headstock is aligned and the total indicator movement is less than 0.005", your tailstock is within tolerance."

I got 0.0088" total indicator movement, which is out of tolerance.

I sent my lathe back to Sherline in March (six months ago) for two issues: 0.0011" TIR at the headstock spindle, and the tailstock misaligned 0.007" to the rear. It came back with a new headstock and tailstock. Karl Rohlin wrote to me, describing what he did. In regard to tailstock alignment, he wrote that headstock alignment was close to perfect. He measured tailstock misalignment using a test bar between centers. In photos, he showed that the tailstock was misaligned only 0.002" to the rear.

I don't know why my measurement value and Sherline's measurement value are so different, but: On June 17, Mikey pointed out that Sherline "used an unturned rod, which is not nearly as accurate as making one as outlined above." On June 18, Mikey in his instructions for verifying headstock alignment wrote, " I meant to mention that Sherline probably did not bother to do this and if this is so then their measurement procedure is meaningless, as is their statement of accuracy. It is always best to test and verify yourself."

Karl
 
Last edited:
I thought I would describe my experience with tweaking the alignment of my Sherline lathe; maybe it will be helpful to someone.

Background: I am new to machining and this is my first and only lathe. Lots of things I am learning for the first time are common sense to most of you, I suspect. My main hobby is building bamboo fly rods. I got the Sherline this summer to try my hand at making my own metal ferrules. Typical metals are nickel silver, various bronzes and sometimes aluminum. The outside dimensions are not super critical; a thou plus or minus is not important. What is more critical is the inside. The female internal is from 0.125 to 0.300 diameter and 0.75 to 1.5 inches deep; it is drilled, reamed and then honed. This hole must be straight, round and uniform. The outside of the male slide is also finished by honing, but that doesn't concern us here.

Headstock: I started at the same point as the original poster. Dead centers in the head and tailstock did not quite meet, though my deviation looked a little less than his. I followed the procedure in the Sherline manual. I machined a few inches of 0.75 aluminum with tiny passes and checked the diameter along its length. Had a taper. The manual said to tap the front left of the headstock with a small hammer. Re-machined; no improvement. Hit it harder; managed to hit the pulley. No improvement. Put away the hammer. I set up a dial indicator on the end of the stock. loosened the headstock setscrew, and applied a clockwise torque to the headstock with my left hand while watching the indicator move; tightened the setscrew with my right. Improvement. After a little tweaking I got rid of the taper to 4 digits. I did a happy dance.

Tailstock/ram/jacobs chuck: My main concern is drilling & reaming straight round holes. Making a ferrule the first step is drilling. I start with a spotting drill, then a 0.125 drill, then larger by steps until the reamer comes out. The problem I have is that every drill seems to hit the previous hole not square, but to the front. You can see it move to the rear just a little bit each time it enters. As you peck the hole you can hear a different sound as the drill exits the hole. This happens with every drill size and the reamer too. I don't know if this problem originates in the tailstock, ram or chuck; and I don't know if its really affecting the final bore, but I don't like it and want to get rid of it.

I chucked up a piece of drill rod and measured the runout as I advanced the ram. Over its 1.5 inch length of travel the indicator showed 0.006 travel inward (toward me) as the ram moved. I tried rotating the drill rod in the chuck; same result. I tried removing and rotating the chuck in the ram; again same result.
runout.JPG

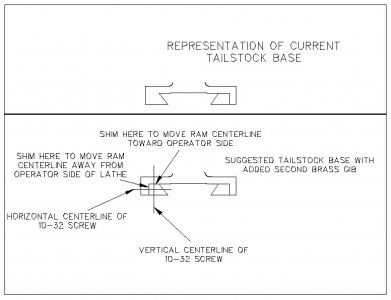
So where does the problem lie? I thought about this until my head hurt with no conclusions. (I was never much good at billiards either.) I looked for ways I could shim things to help me diagnose the problem. I tried the solution of adding a brass tipped setscrew to the backside of the tailstock; I let the ram locking screw drag along the ram. Not good approaches for all the drilling, and didn't make a difference. Finally I tried adding a shim between the chuck and the Morse taper adapter. It seems that a shim of 0.002 solves my problem:
chuck_shims.JPG

With this shim; the runout drops to 0.001 and drills now hit the center of the previous hole (at least to the naked eye.) I still don't know WHY the problem is there and WHY this shimming seems to solve it. And WHY the shim is on the backside of the chuck when it seems it should be on the front.

Thanks for your time in reading all this.

Frank

P.S. after reading all this, maybe the Morse taper in the ram is just a little off?
 
I have a few comments:
  • Headstock: you should always loosen the locking screw in front of the headstock before trying to align it. That set screw bears on a groove in the post that locates the headstock. If you fail to loosen it first and go banging away at the headstock with a hammer you will mar that post; this will make future alignment attempts very difficult because the screw will be trying to move around on upset metal. When aligning the headstock, you only need to loosen the screw so it is touching a tiny bit, then align the headstock, then snug the screw back down. You should be able to align the headstock to zero taper on a 3-4" long rod this way, thereby assuring the heastock is aligned with the ways.
  • Your tailstock is probably off. I say this because alignment relies on machining that is not all that precise. Sherline is pretty good and most tailstocks are off by a few thou but I haven't ever heard of one that is dead on accurate. For drilling and rough work, this is not that big a deal but for precise alignment with a live or dead center, it is a big deal. To see if yours is off and by how much, you need to make a test bar and use a dial indicator to see how off it is. Unfortunately, knowing this information is not useful because you cannot make any adjustments to it anyway - frustrating!
  • Reaming: Reamers, specifically chucking reamers, need to and will bend to follow the hole. This is true even if the hole is not accurately located, resulting in an accurate sized hole that is not concentric with the OD and that is the issue. When you need an accurately located hole that is truly concentric with the OD, bore the hole, then ream it if you must. OR learn to bore accurately and forget using reamers.
It is clear that the chuck is not mounting square on the arbor. The rear of the chuck is registering on the front of the arbor and the face on the arbor where the chuck is making contact is likely not square. If I were you, I would face that registration face on the arbor so it is square.

Once the drill chuck is threaded on the arbor it still may not sit dead on accurate in the tailstock taper. One way to assess this is to chuck up an accurate rod that you know is straight and round, then use a DI to find a position where the rod is held straight. You need to mount the DI to the cross slide so you can move the DI along the rod. It will likely show a taper on the first run or two. Remove the chuck from the tailstock and rotate it a few degrees, then reinstall it and check for taper with the DI. Keep doing this until you find a position that shows zero or at least minimal taper and make witness marks on the tailstock ram and chuck so you can install it in this position every time. If you mounted the drill chuck accurately on the arbor and you aligned that arbor as accurately as possible in the tailstock then that is the best you can hope for with that chuck. You might want to consider switching to a better chuck, like an Albrecht or Rohm keyless chuck.

If you must have accurately reamed holes, consider learning to bore accurately. A bored pre-reamer hole will, by definition, be concentric with the lathe spindle and the reamed hole will therefore also be concentric. Personally, I rarely ream holes. Instead, I taught myself to bore accurately and most of my expensive reamers sit in a box.
 
Last edited:
  • Your tailstock is probably off. I say this because alignment relies on machining that is not all that precise. Sherline is pretty good and most tailstocks are off by a few thou but I haven't ever heard of one that is dead on accurate. For drilling and rough work, this is not that big a deal but for precise alignment with a live or dead center, it is a big deal. To see if yours is off and by how much, you need to make a test bar and use a dial indicator to see how off it is. Unfortunately, knowing this information is not useful because you cannot make any adjustments to it anyway - frustrating!
This weekend, I turned a dead center for my Sherline adjustable tailstock custom tool holder (#1203).
DSCF6151 adjustable tool holder.jpg
This combination is a workaround for the tailstock on my lathe being off.
I have a Sherline adjustable live center, but it has significant runout.
I hope to eventually get my tailstock into better alignment; I have an idea to try.
I hope to eventually follow Mikey's article on making a high-quality live center.

Here is a positive design aspect of my adjustable tailstock custom tool holder: The ID is 0.6256 inch. I made the OD of the dead center 0.6250 inch ± 0.001 inch, and it fits nicely. Any tool or split bushing that I make in the future can simply be made to have a 0.6250 inch OD.
Karl
 
This weekend, I turned a dead center for my Sherline adjustable tailstock custom tool holder (#1203).
View attachment 374660
This combination is a workaround for the tailstock on my lathe being off.
I have a Sherline adjustable live center, but it has significant runout.
I hope to eventually get my tailstock into better alignment; I have an idea to try.
I hope to eventually follow Mikey's article on making a high-quality live center.

Here is a positive design aspect of my adjustable tailstock custom tool holder: The ID is 0.6256 inch. I made the OD of the dead center 0.6250 inch ± 0.001 inch, and it fits nicely. Any tool or split bushing that I make in the future can simply be made to have a 0.6250 inch OD.
Karl

I look forward to seeing how your idea to improve tailstock alignment pans out. Like other owners, I have developed workarounds to improve accuracy when using my tailstock.
 
I know I may be stepping into a really big pile of manure here, but I think I've figured out a way to enjoy an adjustable tailstock that could be the answer to all the problems and various attempts to resolve tailstock misalignment. I have committed a major alteration to my tailstock, and I've documented my efforts in posting #15.

After I got the lathe up and running again, I decided to look at the possibility of going about dealing with the issue in a more user friendly manner. The reality is that not everyone has access to wire EDM equipment. When I figured out a less involved solution, I sent my idea to Sherline to see if they would be willing to look into what I had come up with.

Okay, so the upside of the idea is that the tailstock could be adjusted in almost any direction needed for that final bit of fine tuning that a user may to fight for. Not only straight in and out in relation to the operator side of the machine, but also allow for the tailstock to be twisted to a limited degree.

The downside. It would cost Sherline whatever is needed to have new extrusion dies made that would allow my suggestion to be implemented.

Recently, I have been in contact with Karl Rohlin at Sherline. I believe he is in charge of the production area and seems to have the power to say yes or no to a proposal. Karl gave me some specs on how industry standards are applied to production equipment and he felt the Sherline products fell within those tolerance ranges. He ended his reply with what looks like a final decision, and it is that Sherline will not be getting involved in any changes to a component that already falls within accepted industry standards.

I feel it is not quite a fair comparison to use a machine weighing hundreds or thousands of pounds, where the size is measured in feet, and the cost ranges to nearly a million dollars against what we use at the hobby level. Our machines can be carried around the shop, are only inches in any dimension, and have prices starting below a thousand dollars. To me, it's all a matter of scale. If the accepted industry tolerances of two or three thousandths of an inch for production equipment is shrunk down to the size of a Sherline lathe, it would easily fall within one thousandth of an inch.

The somewhat crude image I've included here shows the change I've proposed to the base of the Sherline tailstock. As one can see, by adding shims to the top or side of the added gib, the base of the tailstock is allowed to move in relation to the bed of the lathe. The shims effectively change the distance between the operator side and the far side of the base. When properly shimmed and secured, the base of the tailstock is forced into alignment when the standard front gib is tightened.

I am biased, of course, but I feel I have solved a nagging problem with tailstock misalignment.

Please examine the image and pick it apart at will. Challenge me in what I have come up with. I think I can explain any questions one may have as to how it all works.
 

Attachments

  • Tailstock base.jpg
    Tailstock base.jpg
    165.6 KB · Views: 33
Back
Top