- Joined
- Feb 7, 2018
- Messages
- 160
A good friend of mine builds percussion drums/ drum sets for a living and has always wanted to make his own ply drum shells. These are typically made in-house by the larger companies, but the smaller guys are limited to a few suppliers. Basically a ply drum shell looks like Baltic birch plywood that has been formed in a cylinder. Using different woods and lamination techniques can make different sounding drums. Being able to make your own naturally opens up options that aren't available from the vendors. He has been using a less sophisticated mold now and had enough success with the practice shells he was able to make that he decided it's time to get something more precise for the job. We talked about this for over a year and I came up with a design I thought could be made given the tools at my disposal. From the beginning I knew I was going to need to do some of the job at my work, but wanted to do as much as I could in my own home shop. I'm a machinist and the company owners I work for allow me to come in on the weekends to work on projects when it doesn't get in the way of any work.
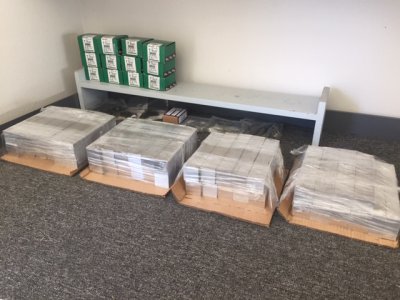
The materials arrive. I used Xometry for all the aluminum. No cut fees, free shipping, and cheaper than Online Metals. The hardware came from MC and there's some steel that I sourced from our local supplier.
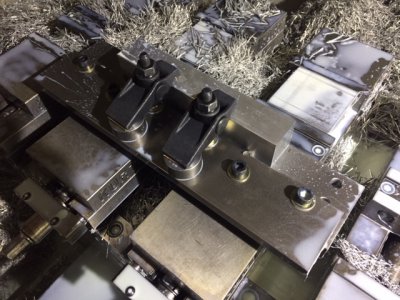
I designed this fixture to be able to do several different machining ops on the project. Seen here the parts (staves) are being blocked up and receiving a 5 degree taper along their length on both sides. I did this on one of my work cnc mills.
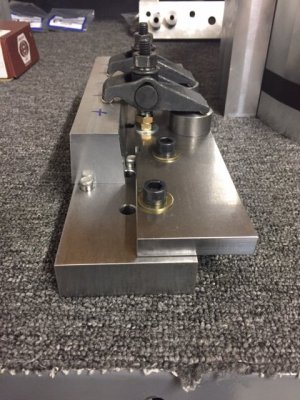
Another shot of the fixture showing the tapered side cuts and holding method. All said and done this fixture worked out great for all the jobs it did, and I was very pleased.
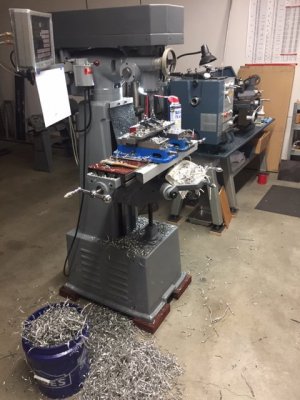
The drilling commences... The same fixture was used to drill all the holes, and ALL the holes were drilled on my manual mill at home. I don't recall the count now but I believe it was over 400 total with multiple steps per hole in many cases like drill/ream and drill/tap. This was the longest part of the job by far. While this would have been short work on a cnc I was saving that time for things I simply couldn't do at home.
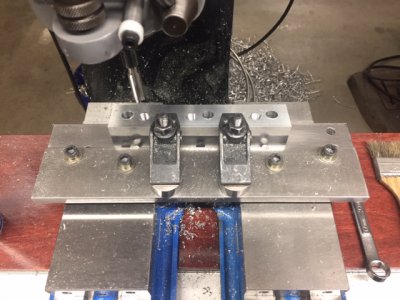
Three 1/2-13 holes per part and I upgraded my mill to have a reversing drum switch just so I could power tap these.
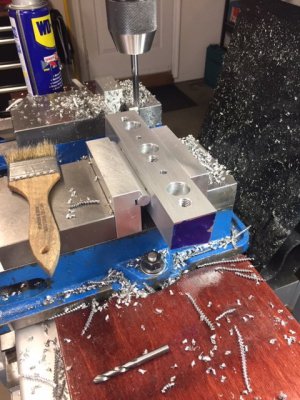
Drilling and reaming dowel pin alignment holes. A set of soft jaws made to now hold the 5 degree tapered faces parallel to the table surface.
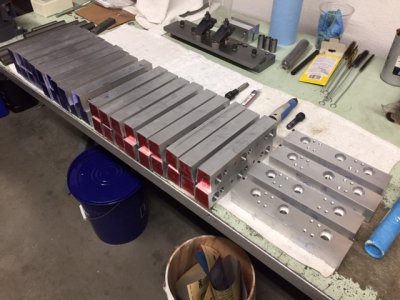
The parts were color coded to keep track of them all. 36 staves and 4 bolting flanges. The bolting hole patterns alternate from part to part.
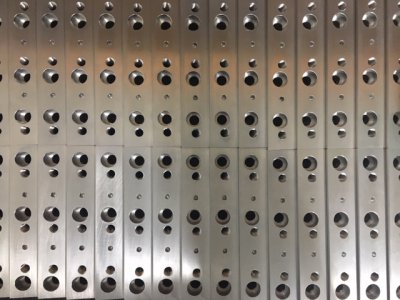
All the drilling done. Dancing in the streets!
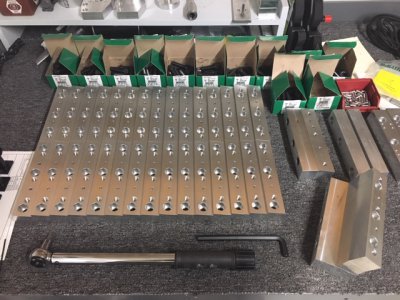
Favorite part of any project is always assembly. As mentioned the fasteners are 1/2-13. For reference each one of these staves is 8" long.
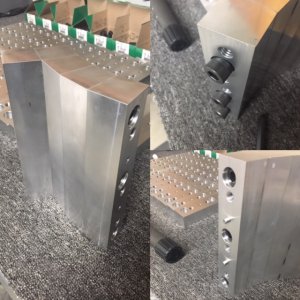
Assembly begins. Part of the job of the dowel pins was to keep the staves aligned while torquing the stave bolts.
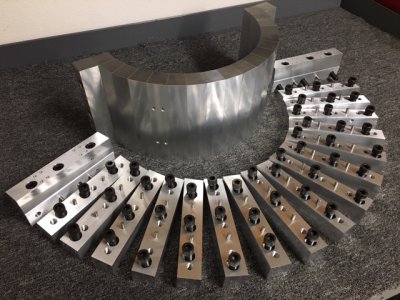
One half of the mold assembled and all the parts that goes into the other. The 4 threaded holes on the face of one of the staves is a handle mount location, 4 in total, and will be used as well later on to do further machining operations.
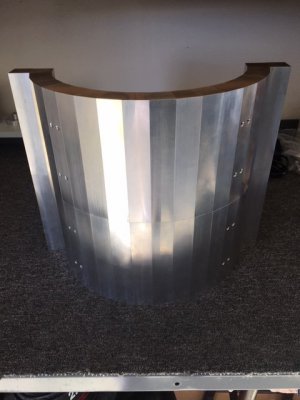
Two halves make a whole. It was really good to get to this stage. You can now see all 4 handle mounting locations.
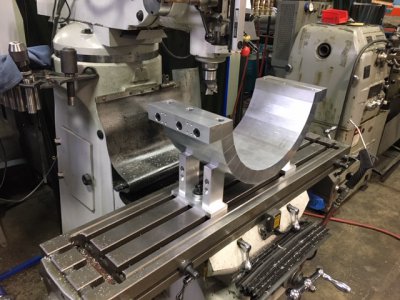
Extra material was allotted to face the flanges on each half of the mold parallel to each other. The handle mounting holes being utilized to hold the mold half with some fixture feet. I didn't have enough travel on my home mill to do this.
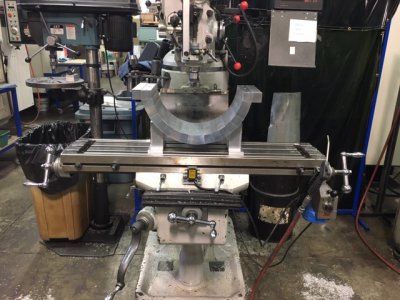
Another shot of the facing setup.
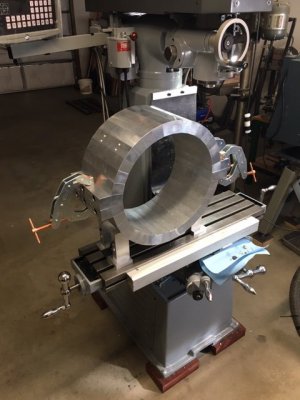
With the two halves of the mold faced they would now align up flush with each other. Surprisingly my home mill has more Z height than our clone at work. The next step is to put in the holes for the mold closing bolts.
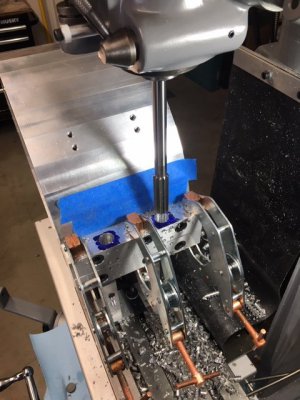
Holes for the closing bolts are drilled and reamed through. A bushing will be pressed into each location, 4 per side, and for some additional retention there are (4) 10-32 set screws on each bushing.
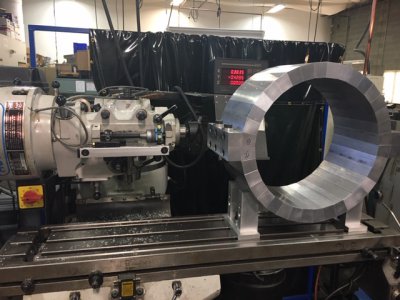
With the closing bolts now holding the mold together I fly cut the faces of the flanges to flush them up. There was a good deal of tolerance stack up as I expected so extra martial was allotted. The only critical surface on this mold will be the inside bore once its done.
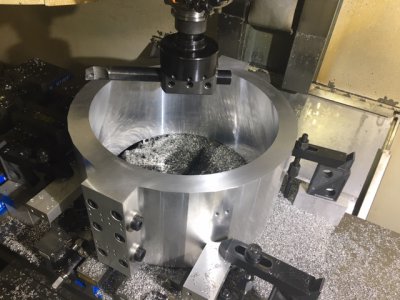
After dusting both the top and bottom surfaces to true them up it was time to bore it. This was the last and most important step in the whole job. Our big mill at work was the only real option I had to do this. This is a 4 inch boring head with a 1 inch bar. Finished bore diameter is 13-7/8" x 8" deep. The mold weighed ~73 pounds going in the machine and 69 pounds coming out.
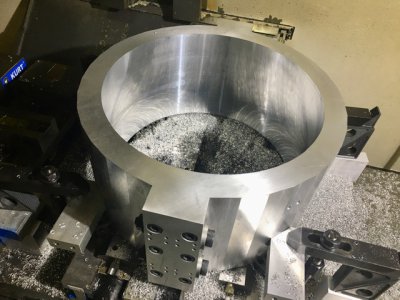
Inside turned out as good as I could have hoped for.
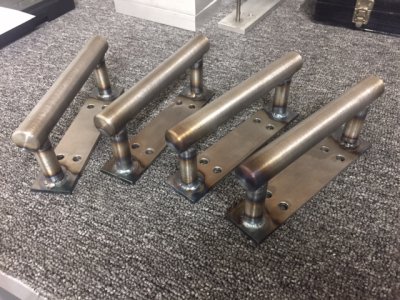
The steel handles. Credit to my neighbor for TIG welding them together for me.
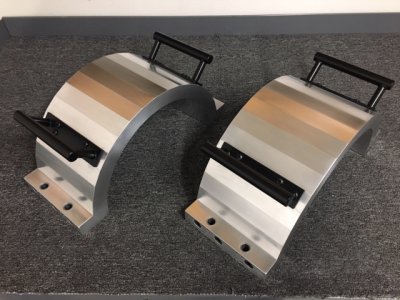
All the finish work done on the mold. Handles were powder coated.
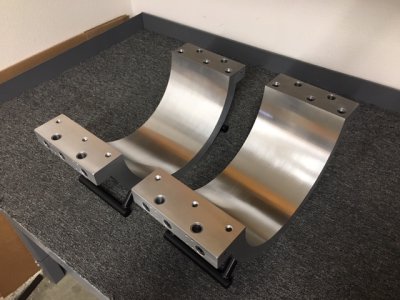
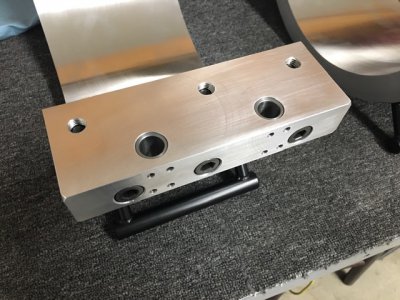
Flange faces
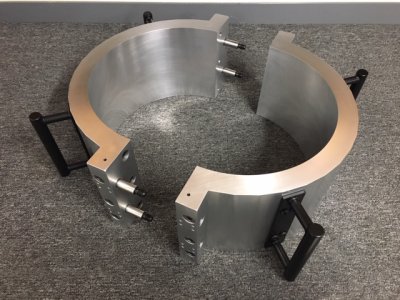
Shoulder bolts used to both close the mold and align the two halves.
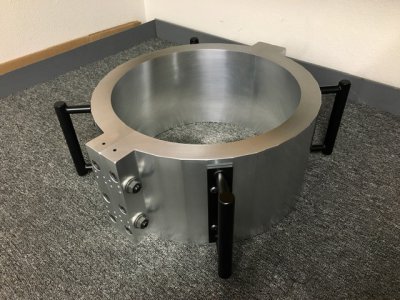
The finished mold assembly.
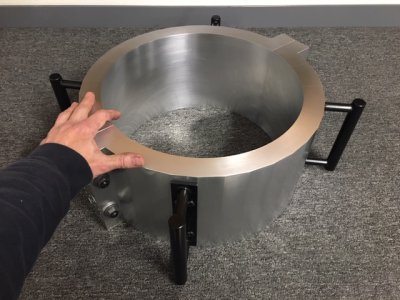
Boxed up and shipped off to Los Angeles.
-Nick

The materials arrive. I used Xometry for all the aluminum. No cut fees, free shipping, and cheaper than Online Metals. The hardware came from MC and there's some steel that I sourced from our local supplier.

I designed this fixture to be able to do several different machining ops on the project. Seen here the parts (staves) are being blocked up and receiving a 5 degree taper along their length on both sides. I did this on one of my work cnc mills.

Another shot of the fixture showing the tapered side cuts and holding method. All said and done this fixture worked out great for all the jobs it did, and I was very pleased.

The drilling commences... The same fixture was used to drill all the holes, and ALL the holes were drilled on my manual mill at home. I don't recall the count now but I believe it was over 400 total with multiple steps per hole in many cases like drill/ream and drill/tap. This was the longest part of the job by far. While this would have been short work on a cnc I was saving that time for things I simply couldn't do at home.

Three 1/2-13 holes per part and I upgraded my mill to have a reversing drum switch just so I could power tap these.

Drilling and reaming dowel pin alignment holes. A set of soft jaws made to now hold the 5 degree tapered faces parallel to the table surface.

The parts were color coded to keep track of them all. 36 staves and 4 bolting flanges. The bolting hole patterns alternate from part to part.

All the drilling done. Dancing in the streets!

Favorite part of any project is always assembly. As mentioned the fasteners are 1/2-13. For reference each one of these staves is 8" long.

Assembly begins. Part of the job of the dowel pins was to keep the staves aligned while torquing the stave bolts.

One half of the mold assembled and all the parts that goes into the other. The 4 threaded holes on the face of one of the staves is a handle mount location, 4 in total, and will be used as well later on to do further machining operations.

Two halves make a whole. It was really good to get to this stage. You can now see all 4 handle mounting locations.

Extra material was allotted to face the flanges on each half of the mold parallel to each other. The handle mounting holes being utilized to hold the mold half with some fixture feet. I didn't have enough travel on my home mill to do this.

Another shot of the facing setup.

With the two halves of the mold faced they would now align up flush with each other. Surprisingly my home mill has more Z height than our clone at work. The next step is to put in the holes for the mold closing bolts.

Holes for the closing bolts are drilled and reamed through. A bushing will be pressed into each location, 4 per side, and for some additional retention there are (4) 10-32 set screws on each bushing.

With the closing bolts now holding the mold together I fly cut the faces of the flanges to flush them up. There was a good deal of tolerance stack up as I expected so extra martial was allotted. The only critical surface on this mold will be the inside bore once its done.

After dusting both the top and bottom surfaces to true them up it was time to bore it. This was the last and most important step in the whole job. Our big mill at work was the only real option I had to do this. This is a 4 inch boring head with a 1 inch bar. Finished bore diameter is 13-7/8" x 8" deep. The mold weighed ~73 pounds going in the machine and 69 pounds coming out.

Inside turned out as good as I could have hoped for.

The steel handles. Credit to my neighbor for TIG welding them together for me.

All the finish work done on the mold. Handles were powder coated.


Flange faces

Shoulder bolts used to both close the mold and align the two halves.

The finished mold assembly.

Boxed up and shipped off to Los Angeles.
-Nick
Last edited:

